

[ad_1]
Methods to make the DIY inbuilt bookshelves that fully remodeled our area.

This room has been the slowest to come back collectively and consequently is now most likely my favourite area in our entire home. An enormous a part of why I adore it a lot although, has to the bookcase / built-in. The heat that has been added, between the hardwood flooring and the bookcase, is night time and day from the place it began.
Apart from trying cute although, there was numerous performance that was wanted for this piece too. For instance, we wanted loads of room for data, books, and small ornamental gadgets (baskets too for organizing). After which additionally, we wished some closed storage for the issues that we didn’t need on show.
Click on by way of for the complete price range breakdown of how a lot this undertaking actually value us, the way to make your personal, and a few errors we made alongside the way in which…

Methods to make a inbuilt bookshelf
First, I wished to say that this tutorial is a bit more imprecise than my typical DIYs and that’s as a result of there are numerous transferring elements to this undertaking. And so many various methods of working with wooden. This undertaking isn’t as minimize and dry, instructions clever. And in addition varies relying on how massive or small your bookcase / built-in is. So I’ll share as many particulars as I can consider right here and if I left something out or you will have any extra particular questions, depart a remark and I’ll make sure to reply. That mentioned, right here we go…
Jeff took the lead on this undertaking and I used to be an additional set of palms the place I may very well be with staining, meeting, and so forth. It’s made from white oak ply (sheets of plywood with a white oak veneer on high and backside). It was method less expensive to go this route than strong white oak. I’ve a price range breakdown on the finish of this publish if you happen to’re interested by value.
Taking measurements
Determine the fundamental measurements for the construct. Depth, size, and peak.
After which you possibly can draw out your design on paper OR use one thing like Shapr3D to mannequin it. Jeff used Shapr3D. I haven’t discovered the way to use it but, so I left that to him. He’s good at that stuff. After that, we used a web site known as Lower Listing optimizer to plan out the cuts we wanted. This helped lots to determine what number of sheets of plywood to order.
*One factor that we didn’t take into consideration, that it is best to whenever you’re on this part, is the grain course. If you’d like the grain going all the identical method, you’ll should be extra cautious with the way in which these cuts are laid out.
Making your cuts
Make your whole cuts with a round noticed and straight edge (or you should use a observe noticed or desk noticed). We truly used a mixture of all three of those for numerous causes. However if you happen to don’t have all of those instruments, only one can get the job carried out. Additionally, renting instruments is a superb possibility, if wanted. I’ll speak about that on the finish.
Edge Banding
Subsequent up is edge banding. We used an iron-on edge banding, which actually, I didn’t love.
BUT I feel a method we may have made it higher was to be strategic about the place we took the sting banding cuts from. There have been some areas that have been extra constant grain clever than others. And I didn’t understand it till we have been too far in to show again. SO! I’d advocate actually taking note of these particulars earlier than slicing the sting banding.
For iron on edge banding, you simply minimize the sting banding down, connect it with the hat of an iron, press it down with a tough flat floor, and trim off the surplus with a particular trimming device.
*It can save you a few of the edge banding for after the meeting stage if there are edges that some collectively to type a miter minimize on the corners.
Meeting
Now, it’s prepared to start out assembling. I’d advocate having a second individual round to assist with this, if you happen to’re constructing one thing on the bigger facet.
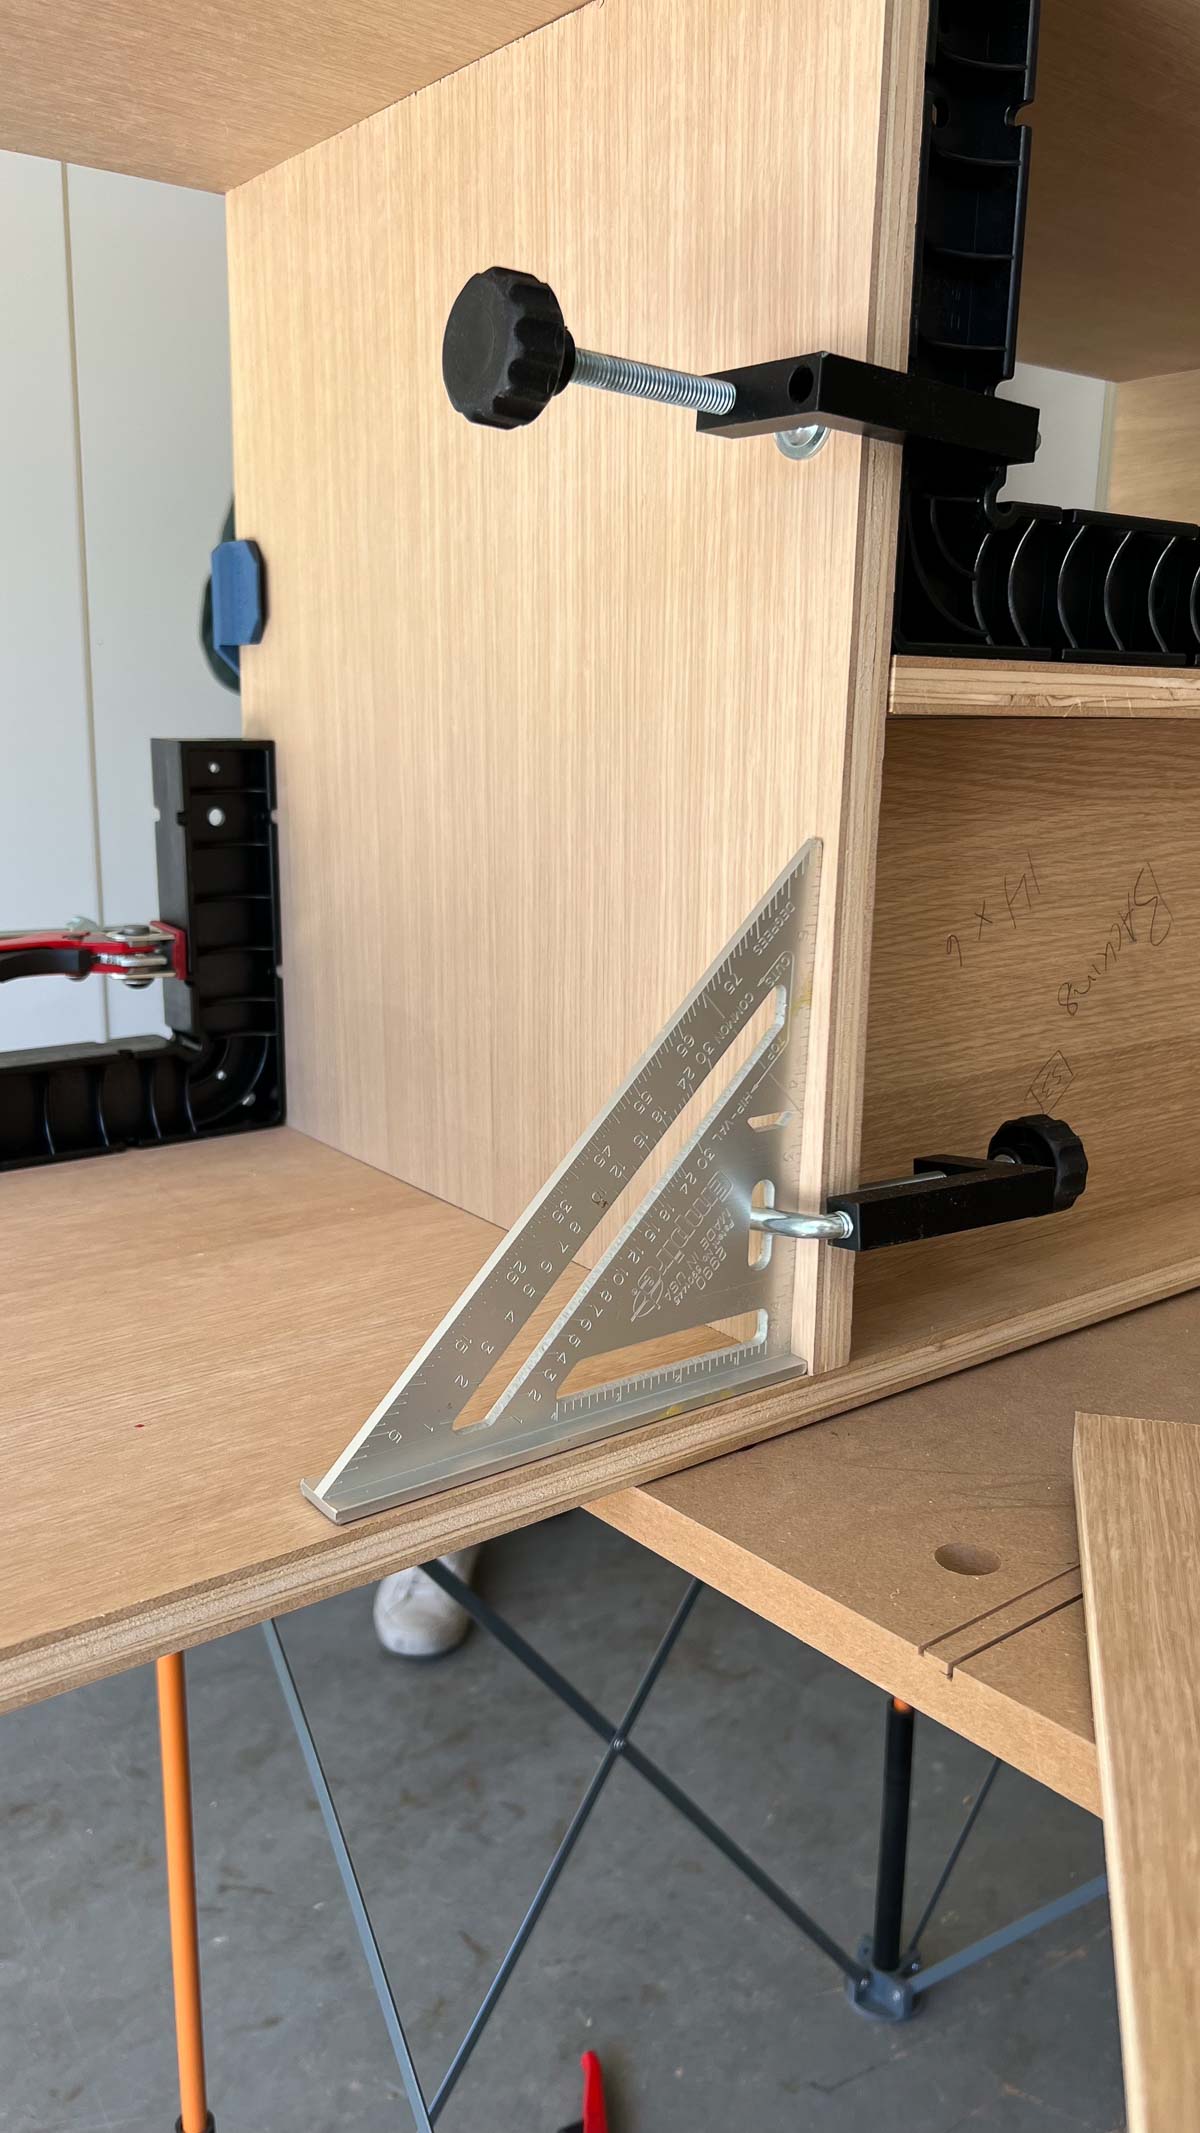
The fundamentals for meeting are as follows… We used pocket holes for any cabinets that had backs on them after which simply screwed up from the underside anyplace pocket holes wouldn’t work. Utilizing a Kreg jig for the pocket holes makes issues lots simpler.
There are numerous triangle / carpenter squares and ranges concerned on this course of. And loads of tweaking. Reference your drawing or Shapr3D mannequin typically by way of the meeting course of.

Including ft + toe kick
We added adjustable ft to the underside of the bookshelf and the cupboard space. After which when it was all put in, we simply coated it with an extended white oak toe kick, which made out of the scrap items of white oak ply.
*This was additionally the stage the place we introduced all the pieces into the room to ensure it could match correctly within the area. Then we took it again out to sand and stain…

Sanding + staining all the pieces
Last item to notice at first was put in within the room, we sanded all the pieces (120 grit) after which added a stain that made the white oak a lot hotter. *It’s possible you’ll need to stain your items earlier within the course of (earlier than closing meeting, if you are able to do a fast dry match first). I’ll clarify extra within the ‘errors we made part’.
- Rubio Monocoat is what we used (the colour we used is Pure) and in addition used the accelerator (they arrive collectively as a set and I’ve the one we used linked) to chop down on drying time.
Putting in the bookshelves
The open shelving was constructed on the similar time however individually (not related) from the cupboard with the doorways. Identical supplies, similar all the pieces, simply not related till they have been within the room. This made it simpler to put in, because it was so massive. After which the 2 items have been connected to one another at set up, within the room.
As soon as all the pieces ins within the room and in place (don’t neglect to make any changes to the adjustable ft earlier than including the wooden toe kick), connect the 2 items to one another. After which, if desired, additionally connect it to the wall, for further safety.
As a final completion, add the toe kick. And that’s just about it. Lmk when you have any questions.

What errors did you make alongside the way in which?
There have been a handful…or possibly greater than a handful. Lol.
- However one of many largest errors I made was not having the ability to visualize how the peak of the taller part would look together with the window. The unique design had a taller cupboard and Jeff made all of the cuts based mostly on that design. As soon as we acquired it in to the area and have been prepared to attach the 2 items although, I spotted my mistake. The cupboard appeared too excessive and was throwing all the pieces off imo. SO! We began over on the cupboard. And that value us. Value it in the long run although.
- Actually take note of the course of grain whenever you’re planning out your wooden cuts. This was one thing we missed in a number of situations and it’s not the top of the world, however it could have been even higher if the grain course matched on each single piece for the open bookshelf space.
- For this explicit undertaking, I’d advocate staining all of the wooden earlier than meeting, if you happen to can. We didn’t do that and sort of regretted it. It was NOT enjoyable to attempt to stain this piece as soon as it was all constructed. And even thought of taking it an element once more for staining as soon as we acquired began, however we simply went with it in the long run. It’s doable to stain when the piece is already constructed, however it’s much more annoying. I promise.
- If you happen to’re feeling not sure a couple of explicit wooden minimize, and you’ve got extra wooden, it’s finest to chop them a bit outsized. In an effort to nonetheless minimize them down if mandatory. In any other case, you’ll need to scrap the piece all collectively and that may get expensive. And that was a mistake we made, with some cuts needing to be recut bc they have been just a bit to small.

Finances Breakdown
The overall value of this built-in bookcase was $985. Right here’s the way it all breaks down…
- White oak veneer plywood sheets $200 every x 4 = $800
- white oak edge banding $70
- Stain and accelerator $60
- adjustable bookcase ft $30
- screws and misc $25
I didn’t embrace the price of instruments used bc these are instruments that we have already got and use on many tasks. Clearly, if you happen to wanted to additionally buy the instruments wanted for this undertaking, it could be considerably extra. BUT you can even lease instruments from Dwelling Depot and Lowes, which might be an enormous financial savings, if you happen to don’t have already got what you want. I linked to the the device rental pages of every retailer above to make it simpler to seek out what you want.
Can I recreate this undertaking for a fraction of the price?
Sure! To place it merely, simply use a special sort of wooden.
You could find plywood as little as $22 a sheet (for a 4×8), which might considerably decrease the price. For instance, if we’d have solely modified that one materials, the entire price range breakdown would have been lower than $300 complete. And we may make some extra tweaks to the opposite provides (edge banding and stain/ accelerator) that will carry the price down much more. So, it may be carried out!


[ad_2]