

[ad_1]
I’ve painted cupboards so many instances in my DIY life that I’ve misplaced rely, however once I determined to make use of IKEA Sektion cupboards in my studio, the considered portray them made me nervous. I had no concept how one can paint IKEA cupboard, or if it was even attainable. In any case, there are specific supplies that simply shouldn’t be painted as a result of in the event you do paint them, it most likely gained’t final lengthy.
I had by no means used IKEA cupboards earlier than, so I had no concept what the manufacturing facility end was like, or what they had been made from. However after studying on the product description for my Veddinge doorways and drawer fronts that they had been made from fiberboard, polyurethane paint, and acrylic paint, I felt assured that they might be painted with a sturdy end that may final.
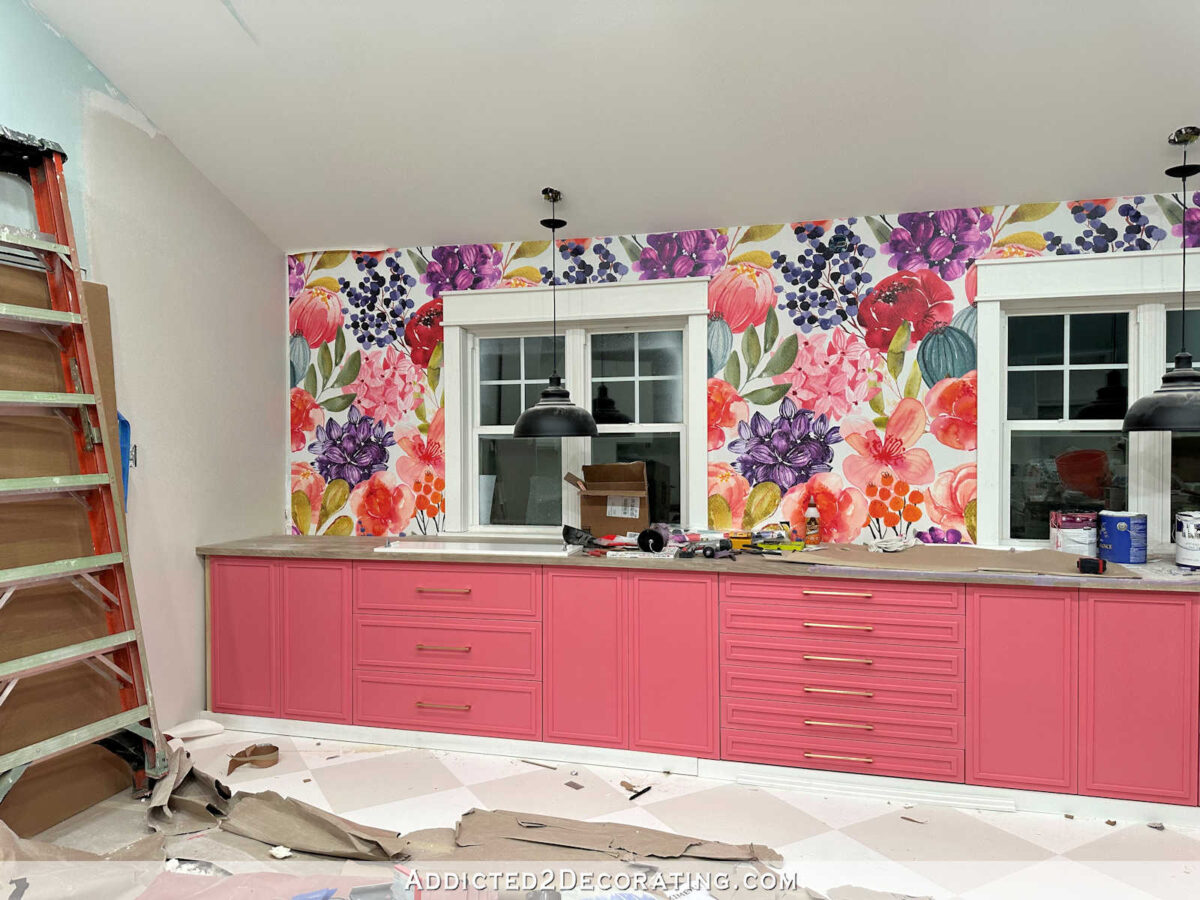
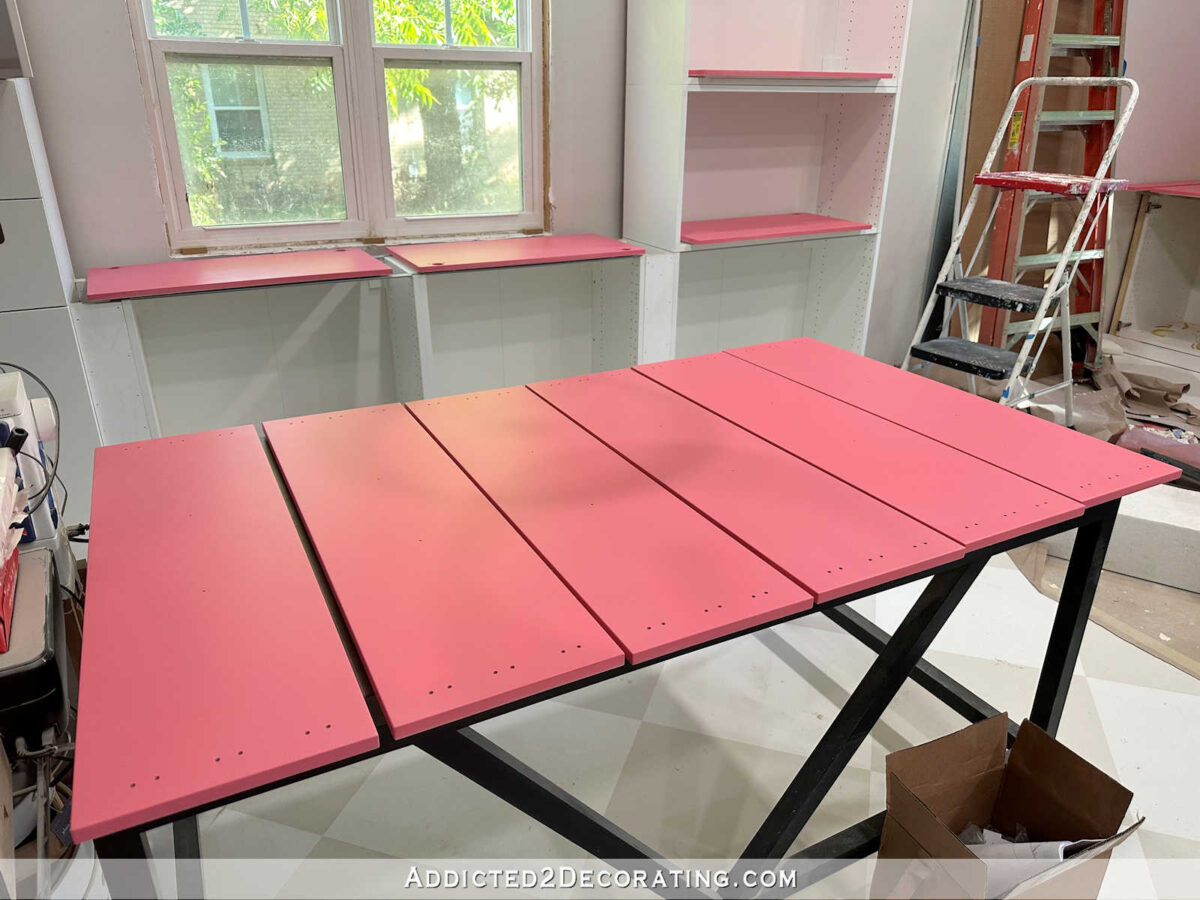
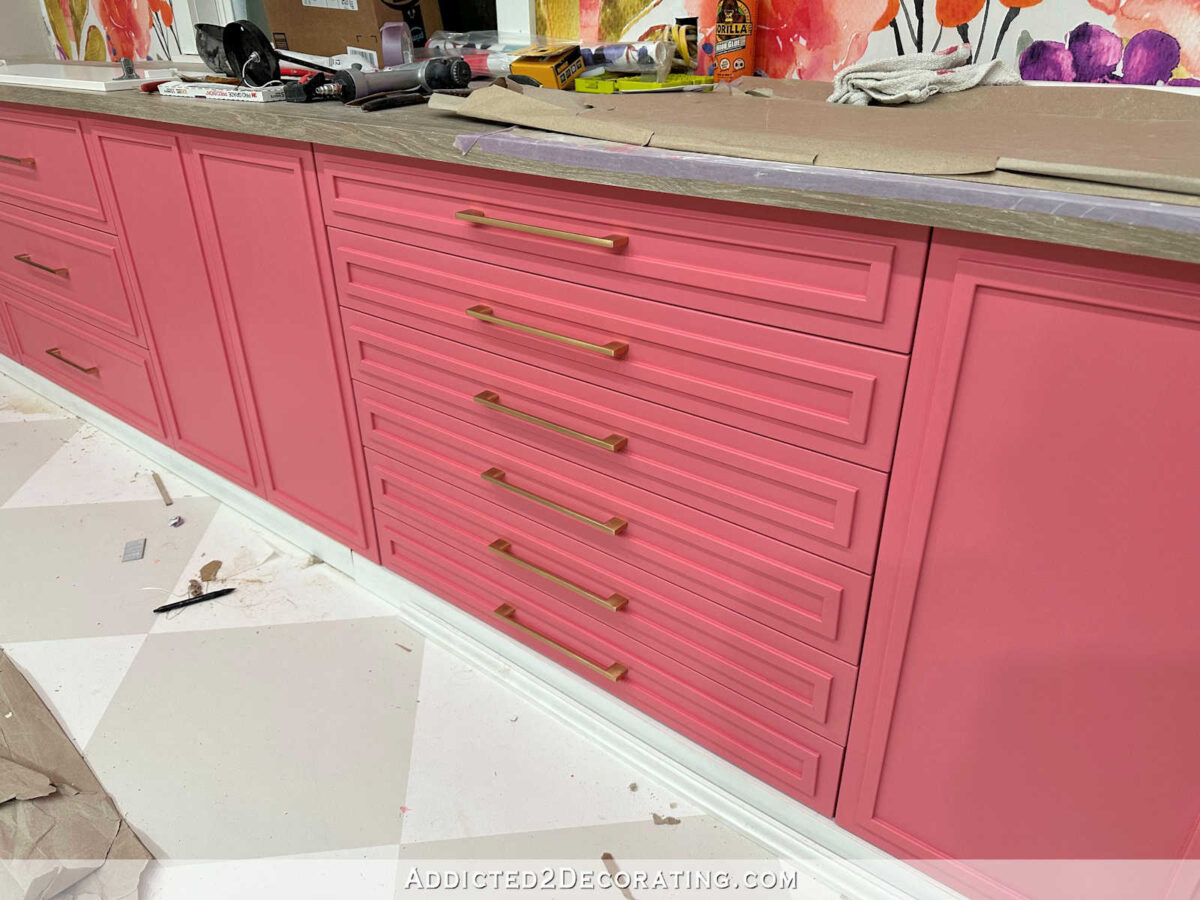
And I’m so glad I went for it! Whereas I don’t have any part of cupboards fully completed but (the one pictured under is the closest to being completed, however I nonetheless want to complete the toekick), these cupboards have far exceeded my expectations, not solely in how they operate (I’m now a large fan of IKEA Sektion cupboards!!), but in addition in how they appear. I completely love my pink studio cupboards.
Why Paint IKEA Cupboards?
I do know these of you who’re aware of IKEA cupboards and the wonderful manufacturing facility end that comes on these cupboards are most likely questioning, “Why on the earth would you paint these within the first place?” I get it. It’s a legitimate query. And the easy cause is as a result of I had my coronary heart set on pink cupboards for my studio. And naturally, nobody has ready-to-assemble pink cupboards. Pink cupboards are all the time going to be a customized end.
However let me let you know, I’ve by no means wished a lot that I used to be a white cupboard type of individual! Once I began opening up the IKEA containers and seeing the wonderful, sturdy manufacturing facility end on these doorways and drawer fronts, the thought that I used to be going to damage such an ideal end type of made me unhappy.
However…pink. The considered pink cupboards saved me transferring ahead. 😀
And because it seems, portray IKEA Sektion cupboards isn’t any completely different from portray some other cupboards. The method is all the identical, so as soon as I acquired previous my preliminary nervousness of ruining the manufacturing facility end, the remainder all felt very acquainted to me. So let me present you step-by-step how I did it.
How To Paint IKEA Kitchen Cupboards
The cupboard doorways and drawer fronts that I ordered are the Veddinge model, that are fully flat on the entrance and the again. In the event you maintain these as is, they’re absolutely the best to color, and all you want is a six-inch paint curler for clean surfaces.
However in fact, I can’t go away effectively sufficient alone, so I made a decision so as to add trim to the fronts of my doorways and drawer fronts. This made the method a bit more difficult and required a sprayer for the fronts. However I’ll get to all of that in a minute.
Right here is my primary course of for portray these IKEA Sektion Veddinge doorways and drawer fronts:
- Sand the fronts and backs to scuff up the manufacturing facility end, and take away the mud,
- Prime the back and front of every door and drawer entrance,
- Sand the primer on the backs of every door and drawer entrance to take away any imperfections, and take away the mud,
- Paint the backs of every door and drawer entrance with two coats of paint, sanding calmly between coats,
- Clear coat the backs of every door and drawer entrance with two coats of clear coat, sanding very calmly between coats,
- With the backs fully dry and completed, sand the primer on the fronts, and take away the mud,
- Paint the fronts with two coats of paint, sanding calmly between coats,
- Clear coat the fronts with two coats of clear coat, sanding very calmly between coats,
- Let the fronts dry totally (ideally a full day, at the very least) after which set up!
Once you see the steps listed like that, the method doesn’t appear very intimidating, proper? In actual fact, it appears fairly simple. However most individuals get slowed down within the particulars. Ought to I spray? What if I don’t have a spot to spray? Can I brush? And if I brush, how do I do away with brush stroke?
It may be quite a bit to suppose via, so let me present you precisely how I did it, what merchandise I used, and provide you with some ideas alongside the best way.
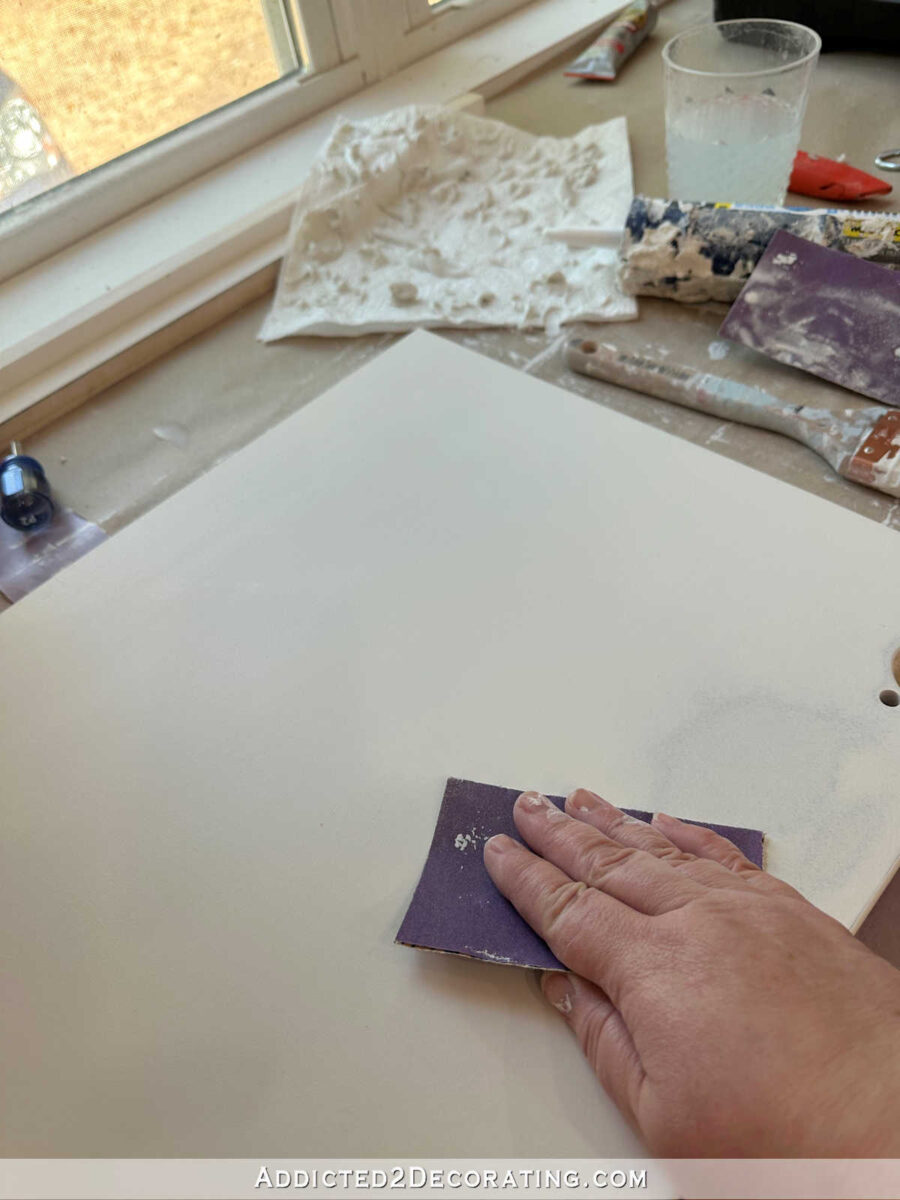
Step 1 – Sand the manufacturing facility end
Step one was to sand the manufacturing facility end to provide the floor some “tooth” for the primer and paint to stay to. I did this utilizing my electrical sander and 100-grit sanding discs. This IKEA manufacturing facility end is hard, and whereas I’d usually begin with 150-grit, I discovered that the powerful IKEA manufacturing facility end required one thing extra abrasive.

There’s no must sand the whole end off. In actual fact, what you see within the photograph above was my very first one to sand, and I sanded it far more than essential. The purpose is to take away the tremendous shiny manufacturing facility end, however there’s no must sand via the paint right down to the naked materials.
(Non-compulsory) Add trim
In the event you’re planning on including trim to your doorways and drawer fronts, now could be the time to do it. The entire cause I purchased the Veddinge door and drawers was in order that I may do my very own trim design and get monetary savings. However clearly, that is fully optionally available. I’d guess that most individuals purchase Veddinge fronts as a result of they need that flat, no frills look.
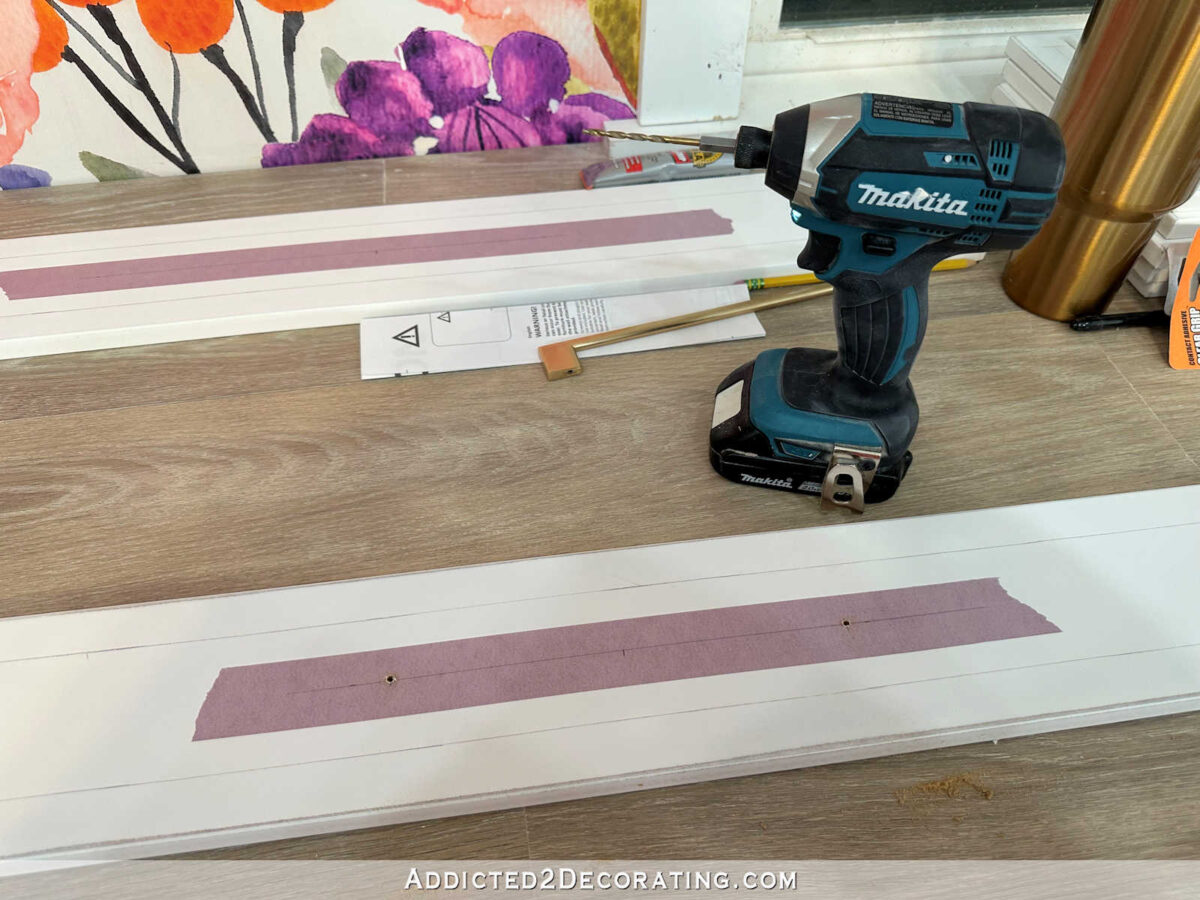
(Non-compulsory) Drill holes for cupboard {hardware}
I all the time suggest that in the event you’re going so as to add drawer pulls or knobs to the cupboards, drill these holes earlier than portray the cupboards. That method, if any errors are made, they are often fastened with some wooden filler and sanding earlier than you begin priming and portray. There’s nothing extra disheartening than drilling holes for {hardware} on freshly painted cupboard doorways and making a mistake.
Step 2 – Prime the back and front of every door and drawer entrance
In any case of that, I used to be lastly prepared to start out on the priming. I used Zinsser BIN Shellac-Primarily based Primer. That is nice stuff, and I used it as a result of it’s costly and I occurred to have it readily available from different initiatives I’ve accomplished lately.
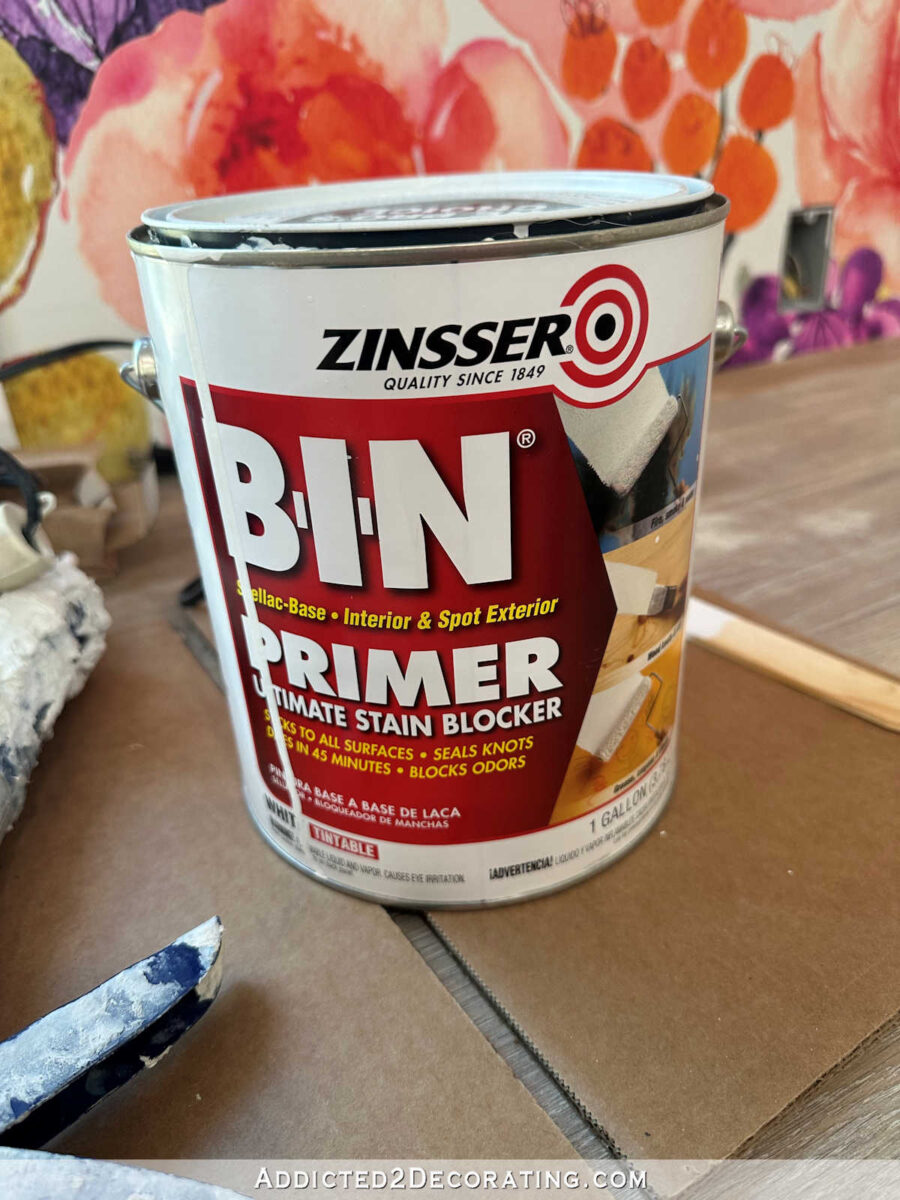
If I didn’t have this readily available, I’d have opted for my different favourite Zinsser Oil-Primarily based Cowl Stain primer.

Each are implausible merchandise, however the oil-based is about half the value.
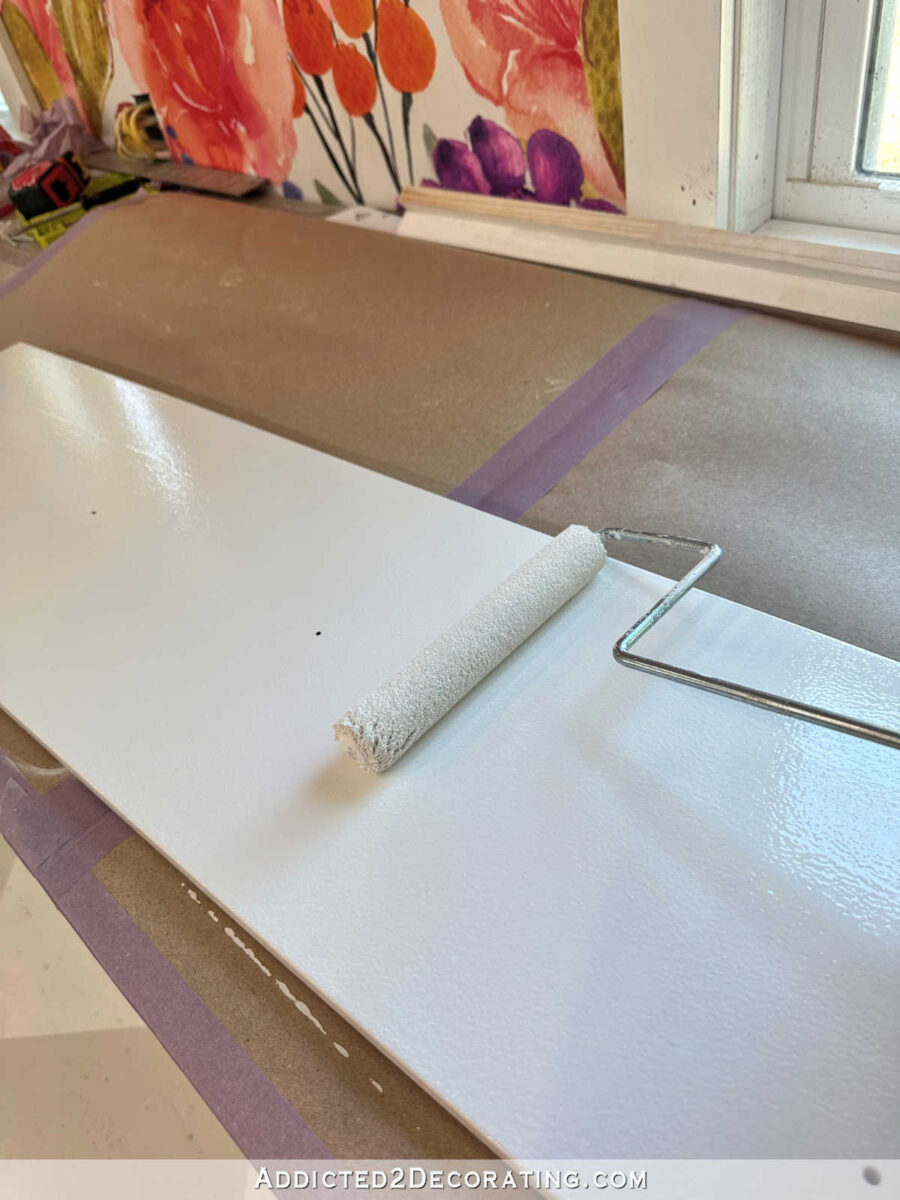
I utilized the primer to the backs of the doorways and drawer fronts utilizing a 6-inch curler for clean surfaces. Ensure that the label on the curler says “clean surfaces”! And my private desire is those that truly seem like miniature variations of rollers that you just’d use for partitions. I can’t stand these small foam rollers!
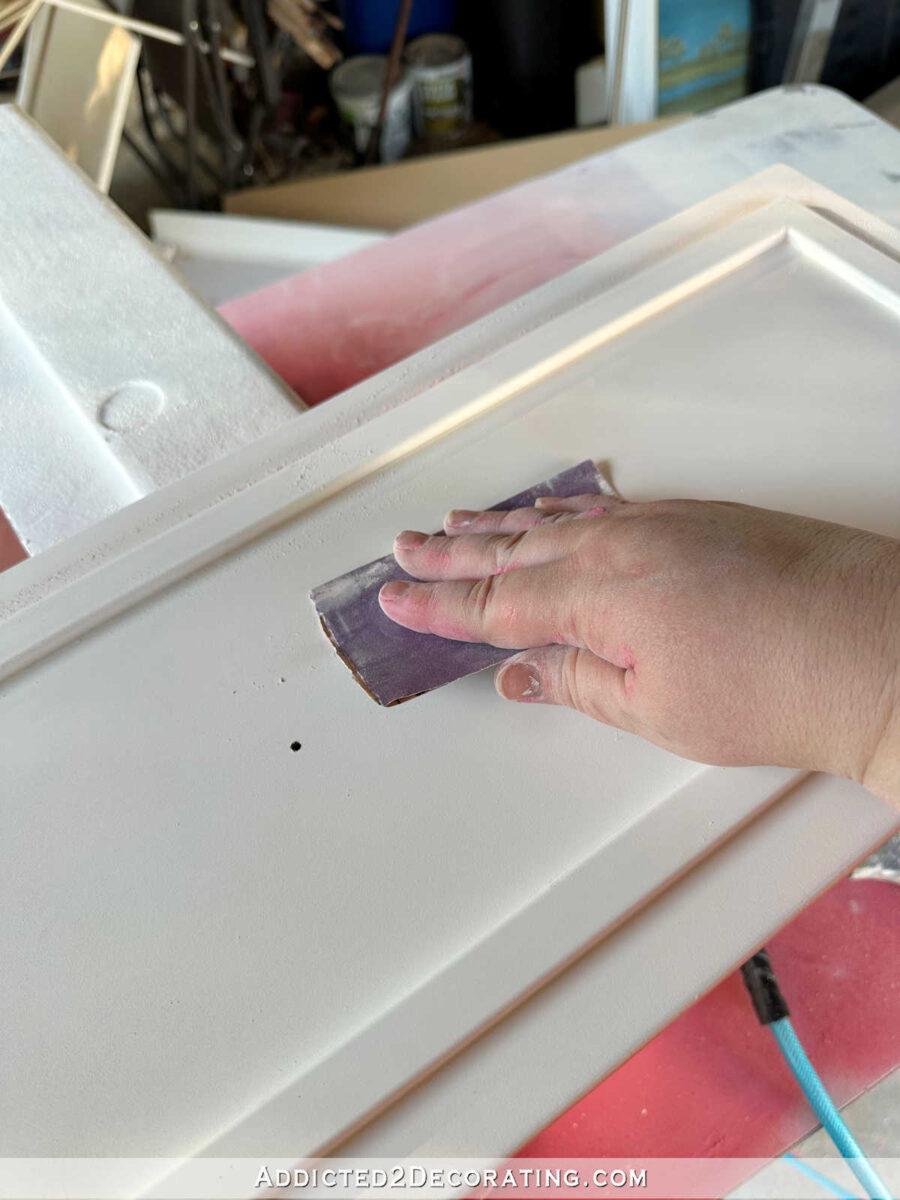
Step 3 – Sand the primer on the again of every door and drawer entrance
This primer dries fairly shortly to the contact, however I allowed it about two hours of dry time, after which I sanded it calmly with 220-grit sandpaper. This didn’t require a lot work in any respect. This was only a very fast sanding with a purpose to take away any bubbles or imperfections that will have escaped my discover.
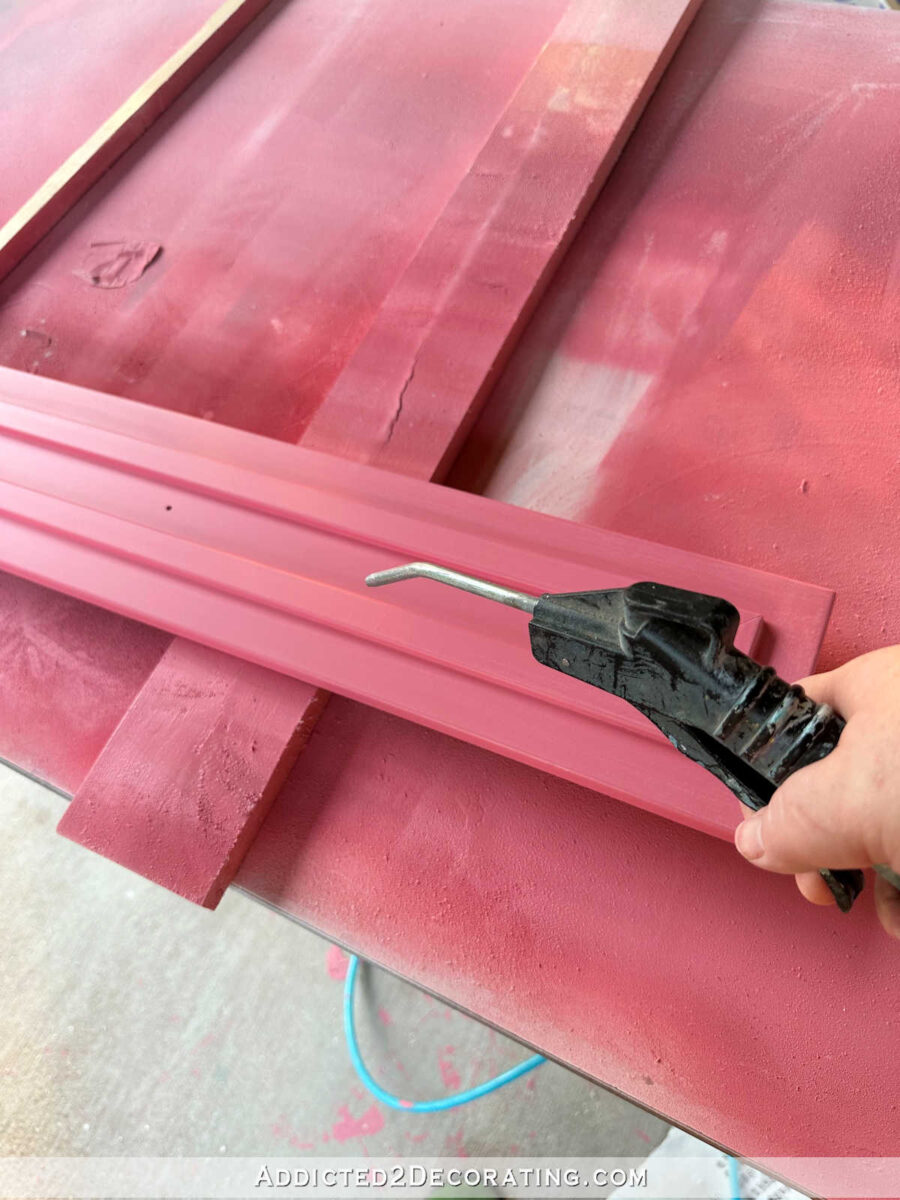
As a result of I made issues troublesome for myself by including the trim to the fronts, I couldn’t use the curler to prime the fronts. As an alternative, I had to make use of my little paint sprayer, which implies that the job needed to be accomplished outdoors. If I had left the fronts plain, I’d have used a curler to prime the fronts as effectively. After spraying the fronts with primer, I allow them to dry, after which calmly sanded them identical to I did the backs.
Step 4 – Paint the again of every door and drawer entrance
Subsequent, it was time for paint. I used Behr Premium Plus paint, which is my favourite common function paint. And so long as I’m planning on utilizing a transparent coat (which I used to be on these cupboards), I really feel snug utilizing this common function paint on cupboards. If I weren’t planning on clear coating, I’d have gone with the next high quality paint from both Benjamin Moore or Sherwin Williams made particularly for cupboards, like Benjamin Moore Advance.
However I like a transparent coat end for sturdiness, so I caught with Behr Premium Plus, and I added Floetrol within the quantity specified on the directions. Floetrol helps to remove brush strokes in the event you’re brushing a end, and helps to remove that orange peel impact in the event you’re spraying or rolling a end.
After the primary coat, I gave it a fast sanding with 220-grit sandpaper.

After which I sprayed a second coat of paint on the backs.
Step 5 – Clear coat the again of every door and drawer entrance
I adopted that with two coats of my absolute favourite clear coat — Normal Finishes Excessive Efficiency Topcoat in a flat end. I rolled on the primary coat with a six-inch curler for clean surfaces, and let it dry. Then I gave it a fast sanding with 400-grit sandpaper, and adopted up with the second and remaining coat.

I left these to take a seat in a single day to dry earlier than beginning on the fronts.
Step 6 – Sand the primed entrance of every door and drawer entrance
I did the fronts in the identical sequence, beginning with calmly sanding the primer with 220-grit sandpaper.
Step 7 – Paint the entrance of every door and drawer entrance
Subsequent, I used my sprayer crammed with my paint combined with Floetrol, and sprayed the primary coat, let it dry, after which gave it a lightweight sanding with 150-grit sandpaper earlier than spraying a second coat.
Sadly, I wasn’t in a position to spray the fronts of all the doorways and drawer fronts due to the climate. The climate regarded stunning, however on one of many days I used to be engaged on these, the temp was 109 levels, with the “really feel like” temp most likely hovering round 112 or perhaps even greater.
So once I tried to make use of my sprayer, which sprays a really tremendous mist of paint (which is what usually produces such a lovely end with that that orange peel look that heavier sprays usually produce), the tremendous mist of paint was midway dry by the point it left the sprayer and hit the door. That produced a powdery, tough end as a substitute of the attractive, clean end I’m used to.
In order that day, I needed to end up the portray course of indoors with a brush. Once more, had I not added trim to the fronts, the whole portray challenge may have been accomplished shortly and simply with a small 6-inch curler for clean surfaces. However due to the trim I added, I had to make use of a brush. It wasn’t a giant deal, although! It was slower, for positive, however as a result of I used to be utilizing a model new gallon of paint with Floetrol added, the end got here out superbly.
And even on those I brushed, I did one coat, let it dry totally, gave it a lightweight sanding with 220-grid sandpaper, after which brushed on a second coat.
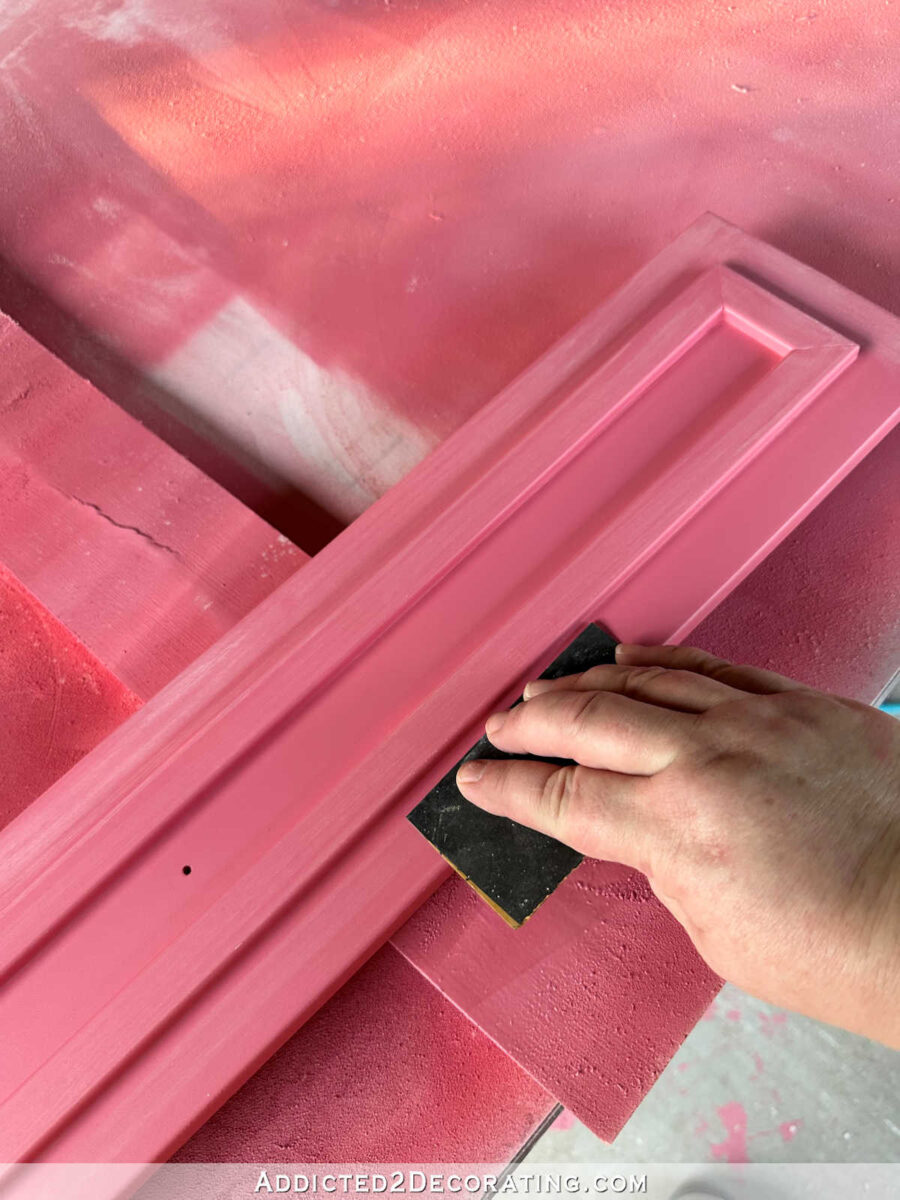
Step 8 – Clear coat the entrance of every door and drawer entrance
When the paint was absolutely dry (which doesn’t take lengthy in our present 100+ diploma climate), I sprayed the primary coat of clear coat, let it dry, after which very calmly sanded with 400-grit sandpaper earlier than spraying the second and remaining coat of clear end.
When sanding the primary coat of clear end, it’s crucial that you just use a really mild hand, and keep away from sanding on the corners/edges of the piece. The clear coat end is all the time the thinnest on the corners and edges, and in the event you do a lot sanding in any respect in these areas, it’s virtually assured that you just’ll sand via the paint end and need to do a number of touchups. I simply keep away from these altogether, and solely sand the flat surfaces.
After sanding the primary coat of clear coat, and earlier than spraying the ultimate clear coat (the coat that basically issues), I exploit my air gun attachment on my air compressor to ensure all the sanding particles has been eliminated totally.
I take further care with this step as a result of the second and remaining coat of clear coat on the fronts of the doorways and drawer fronts is the one which counts! That is the ultimate end that everybody will see, so I need it as excellent as attainable.
There could also be instances that sanding the primary coat of clear coat might reveal a spot of primer.

In that case, I simply dip my finger into the paint, and dab it onto the spot. It’s also possible to use a really small craft paint brush for this. Simply be sure that the touchup paint could be very clean, and let it dry totally earlier than spraying the ultimate clear coat.
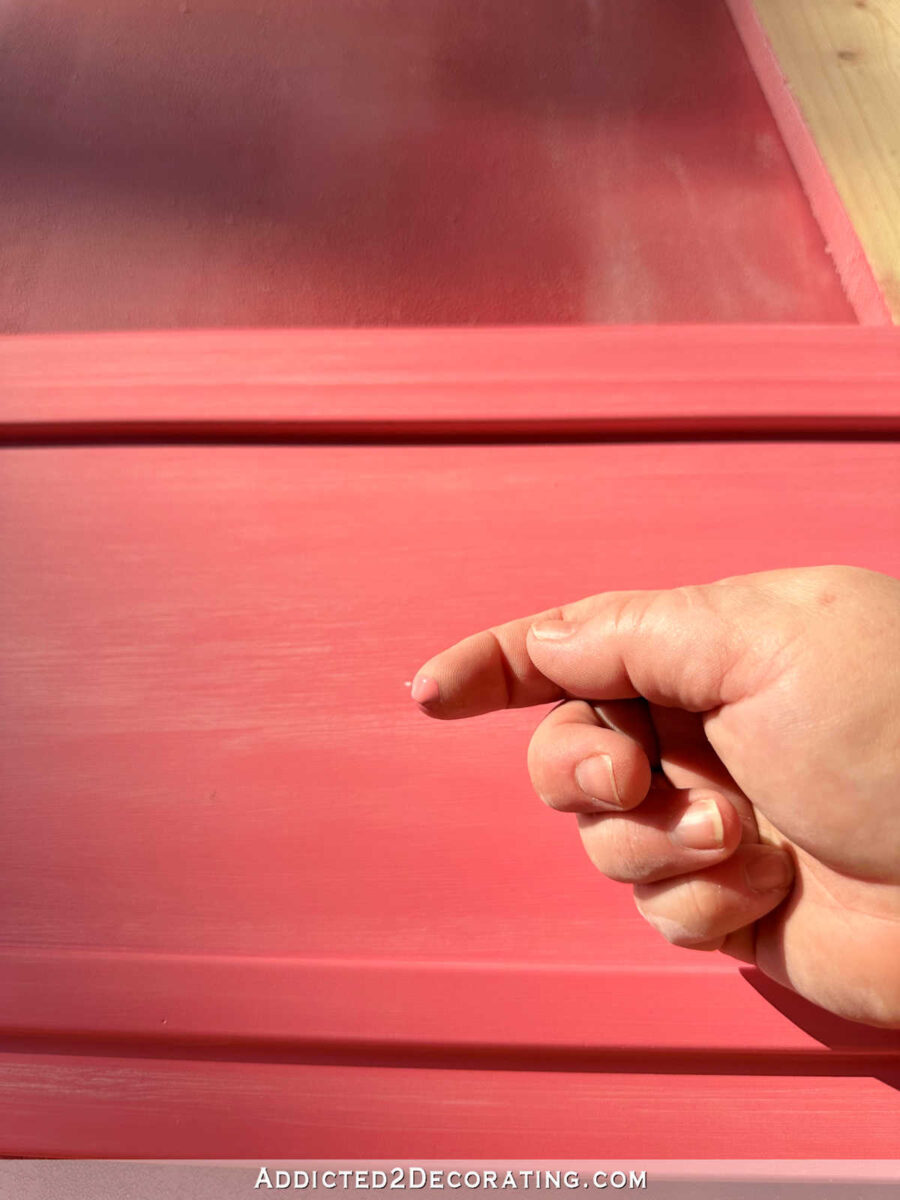
Right here’s what that spot regarded like when it was dry.

So after these tiny contact up areas are dry, you’re able to spray the second coat of clear coat, and that’s it!
Step 9 – Let the fronts dry totally and the set up
It’s essential to not rush this step. I do know the temptation is the set up the doorways and drawer fronts as quickly as they really feel dry to the contact, however remember the fact that most finishes take 30 days to completely treatment.

I’m not suggesting that you just wait 30 days to put in them. I’m method too impatient for that. But when I’ve used Normal Finishes (which dried tougher and quicker than only a painted end), I like to provide them at the very least 24 hours earlier than messing with them. I’m too impatient to attend longer than that, however I’ve discovered that giving it a full day is sufficient for them to be sturdy sufficient to resist the jostling and manhandling and even the occasional bump that occurs when putting in doorways and drawer fronts.
In order that’s it! It’s a protracted course of, but it surely’s a course of I’ve used for years now, and I’ve had a lot success with lasting, sturdy finishes. Whereas I don’t have IKEA cupboards in my kitchen, I did paint my my kitchen cupboards in 2017 utilizing this course of, and so they nonetheless look implausible immediately.
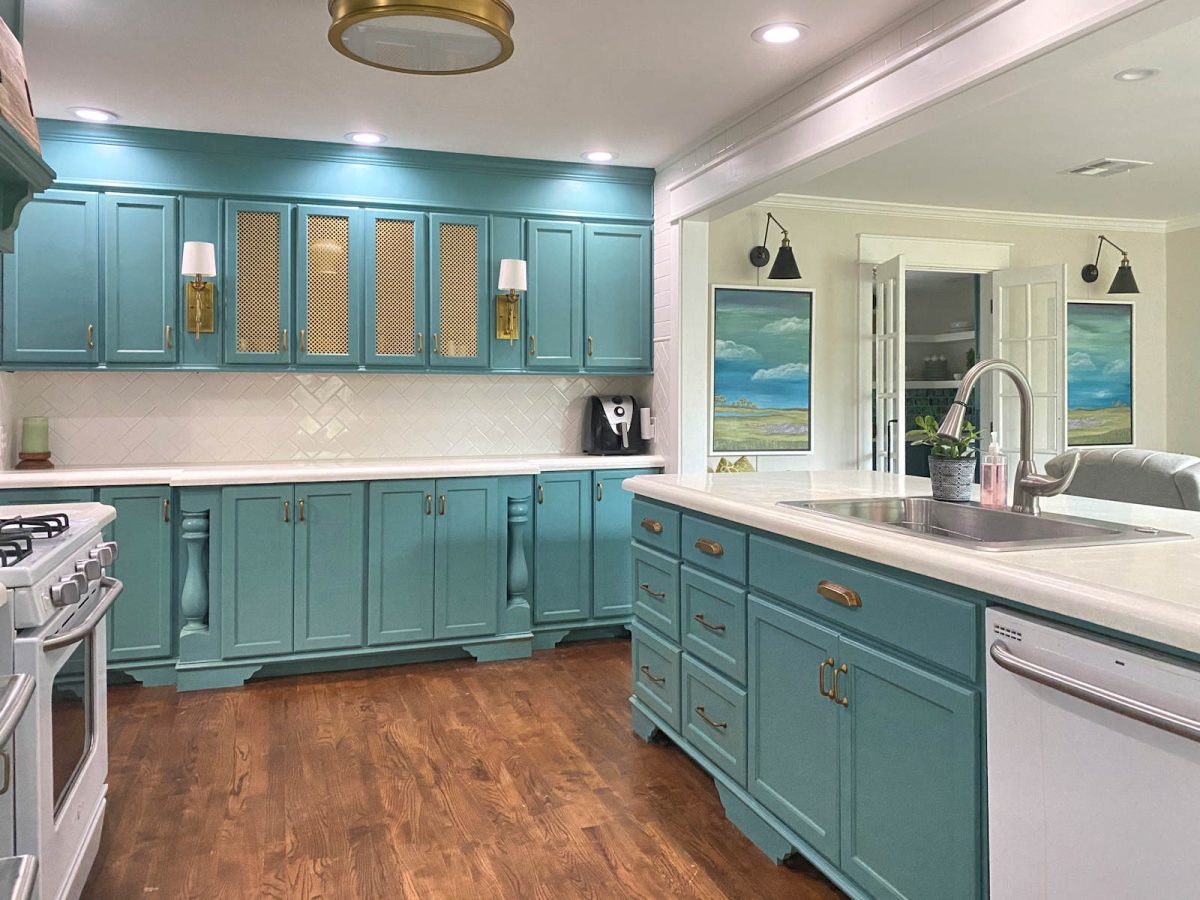
And I’m very exhausting on surfaces. In the event you learn my weblog repeatedly, and comply with alongside on my room remodels, you understand how exhausting I’m on my flooring. 😀 Properly, I’m not a lot better with cupboards or anything, and my painted kitchen cupboards have held up superbly to my abuse. After six years, I solely have three tiny imperfections within the paint, and people are three chips in regards to the measurement of half of a grain of cooked rice, and so they’re all in areas that you just’d anticipate (just like the door just under the sink). Aside from these three tiny chips, the paint is fairly excellent.
I do know that portray cupboards might be daunting in the event you’ve by no means accomplished it earlier than. However the benefit of paint is that it might all the time be sanded in the event you make a mistake. In the event you unintentionally stick your fingers into moist paint, simply let it dry, sand it, and check out once more. In case your end doesn’t prove as clean as you need it, be sure that it’s dry, sand it, and check out once more. It’s actually not something to be fearful of.
Just a few remaining ideas and ideas:
First, it actually doesn’t matter in the event you paint with a brush, a curler, or a sprayer. Don’t stress an excessive amount of about that call. You will get a lovely end with any of these instruments. If all you might have is a brush, I simply extremely suggest that you just use Floetrol in a model new quart or gallon of latex paint to get one of the best end.
Don’t pull out an previous gallon of paint that’s been sitting in your storage room for a yr and suppose that you just’re going to get an important end in your cupboards. Model new paint plus Floetrol has all the time been the successful combo for me, and it really works superbly even in the event you’re going to brush the paint on.
Additionally, the best way wherein I apply paint relies upon a couple of issues. For instance, if I had been portray doorways and drawer fronts which can be fully flat on front and back, I’d select to make use of a curler on all the pieces and on each step, from priming, portray, and clear coating.
If I’m portray doorways and drawer fronts with trim or element that makes a curler impractical, clearly my choices could be a brush or sprayer. Which one I select relies upon issues just like the climate (like our 109-degree climate thtn made spraying troublesome) or the time of day (like if I solely have time to color at night time when it’s darkish outdoors). In these conditions, I’ll choose to color issues with a brush so I can work.
So there’s actually no appropriate reply. It’s all about no matter is handy for the time of day, the climate on that individual day or season, and the model of cupboards. However all three strategies of portray cupboards work simply tremendous, with some being extra environment friendly than others (clearly, brushing goes to be the slowest methodology), however all three will get you to the end line. And so long as you’re taking time to do every step (DON’T SKIP SANDING!!!), you possibly can find yourself with a lovely consequence.
One remaining tip…
Now there’s one factor to remember, and this can be a massive one. All the time bear in mind than all three strategies of utility will end in barely completely different sheens on the completed product. I can’t clarify it, however I’ve skilled this sufficient to know that even in the event you’re getting your paint out of 1 can all through the whole challenge, in the event you brush one door and spray the subsequent, there will probably be a distinction in sheens.
This isn’t actually essential for each single step. As I discussed above, in the course of the portray step of the method, I sprayed a few of the doorways, after which needed to brush others. That wasn’t a giant deal since I used to be planning a transparent topcoat. However it’s essential to remember when doing the ultimate coat on every door and drawer entrance.
So I warn you about that simply to say that after you choose a technique for that remaining coat for the door fronts and drawer fronts, keep it up. Don’t spray half of your cupboard fronts on a day with good climate, after which brush or roll the remainder as a result of it’s raining the subsequent day however you wish to get the cupboards accomplished. In the event you begin off spraying the ultimate coat on the fronts, spray all of them. In the event you begin off rolling some, roll all of them. In the event you begin off brushing a few of them, brush all of them.
I used completely different portray strategies on mine resulting from climate, however I sprayed the clear coats on each single door entrance and drawer entrance in order that there could be no variations in sheen as soon as they had been all put in. And so they look implausible!
I feel I’ve lined all the steps that I used on this IKEA cupboard portray challenge. However in case you have questions, please be at liberty to ask!

Addicted 2 Adorning is the place I share my DIY and adorning journey as I transform and enhance the 1948 fixer higher that my husband, Matt, and I purchased in 2013. Matt has M.S. and is unable to do bodily work, so I do nearly all of the work on the home on my own. You’ll be able to be taught extra about me right here.
[ad_2]