
[ad_1]
This yr we lastly made my backyard goals come true and I’m right here to share all the small print of the gorgeous area we created. We’re complete newbies in the case of gardening and it’s all been a studying expertise, however hopefully what we’ve realized up to now might help you! The quantity of pleasure it has already introduced us is properly definitely worth the money and time it took to create our enclosed raised backyard mattress.
Earlier this yr I did some analysis on all the things it is advisable to know earlier than beginning a raised backyard mattress and it was actually useful to have some background information earlier than diving proper in. There are such a lot of completely different strategies to gardening and everybody’s yards are completely different which would require completely different layouts and fencing. And naturally all of us dwell in several areas of the world, so our climates are going to be an element as properly.
The one tip I bear in mind studying about so much and I’m glad we adopted was to plant what you prefer to eat. When you don’t, you’re simply going to waste time, vitality and freshly grown meals. Planting what you take pleasure in consuming saves plenty of wasted meals!
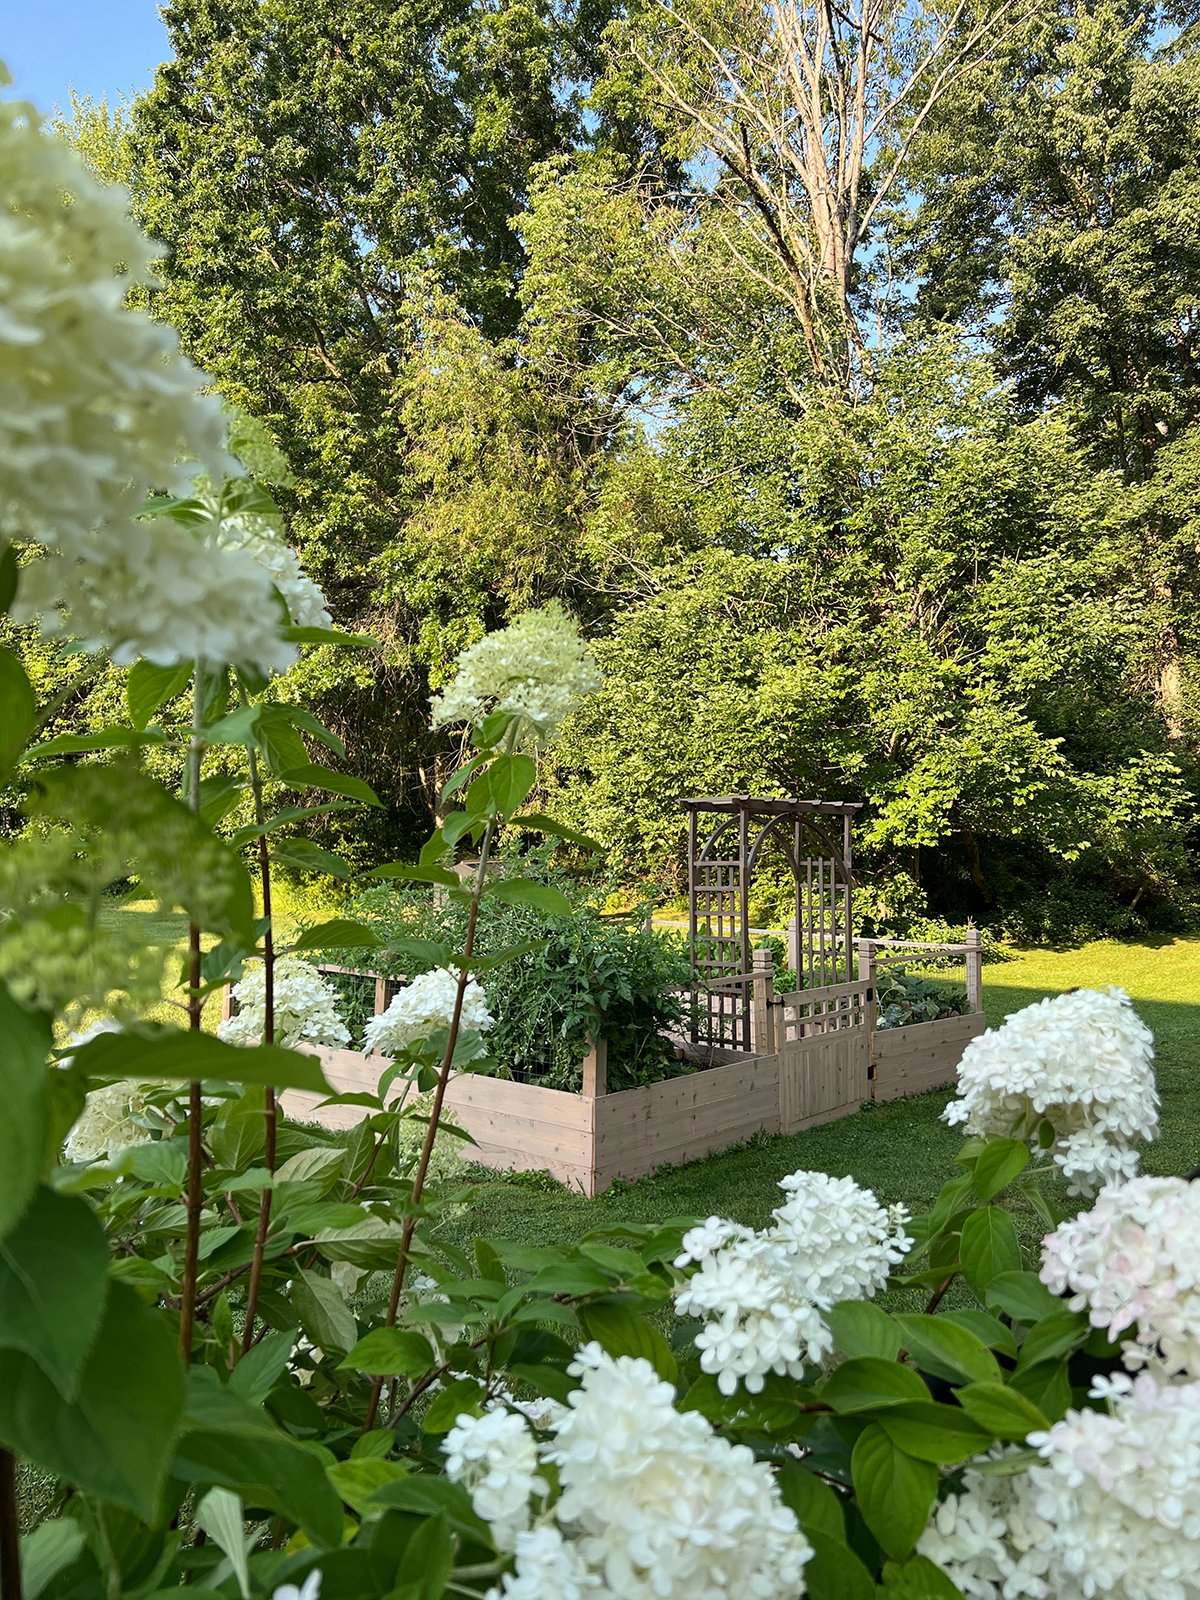
Why an Enclosed Raised Backyard?
Our yard is up towards woods so we want safety from all of the animals who like to return go to. We didn’t need to undergo all of the work of constructing and planting an attractive backyard simply to have it eaten by another person! Since we don’t have a fence round our yard, I used to be attempting to consider how I might enclose some raised beds. In the future I used to be over at a good friend’s and took a peek out their window and noticed their backyard – it was the proper resolution!
We used theirs as inspiration and tweaked it a bit to higher match our yard and our desires/wants.
Provides to Make an Enclosed Raised Backyard Mattress
FOR THE FRAME
FOR THE GATE
STEP 1: PLAN THE SIZE OF YOUR GARDEN
I extremely suggest mapping this out with some string or spray paint so you possibly can see precisely how large your backyard will likely be. We in a short time used a measuring tape to get a tough concept and as soon as we introduced the wooden again and laid it out, I spotted it wasn’t as large as I wished. It wasn’t an enormous deal, we simply wanted to go get extra wooden however be sure to finalize a dimension earlier than you begin!

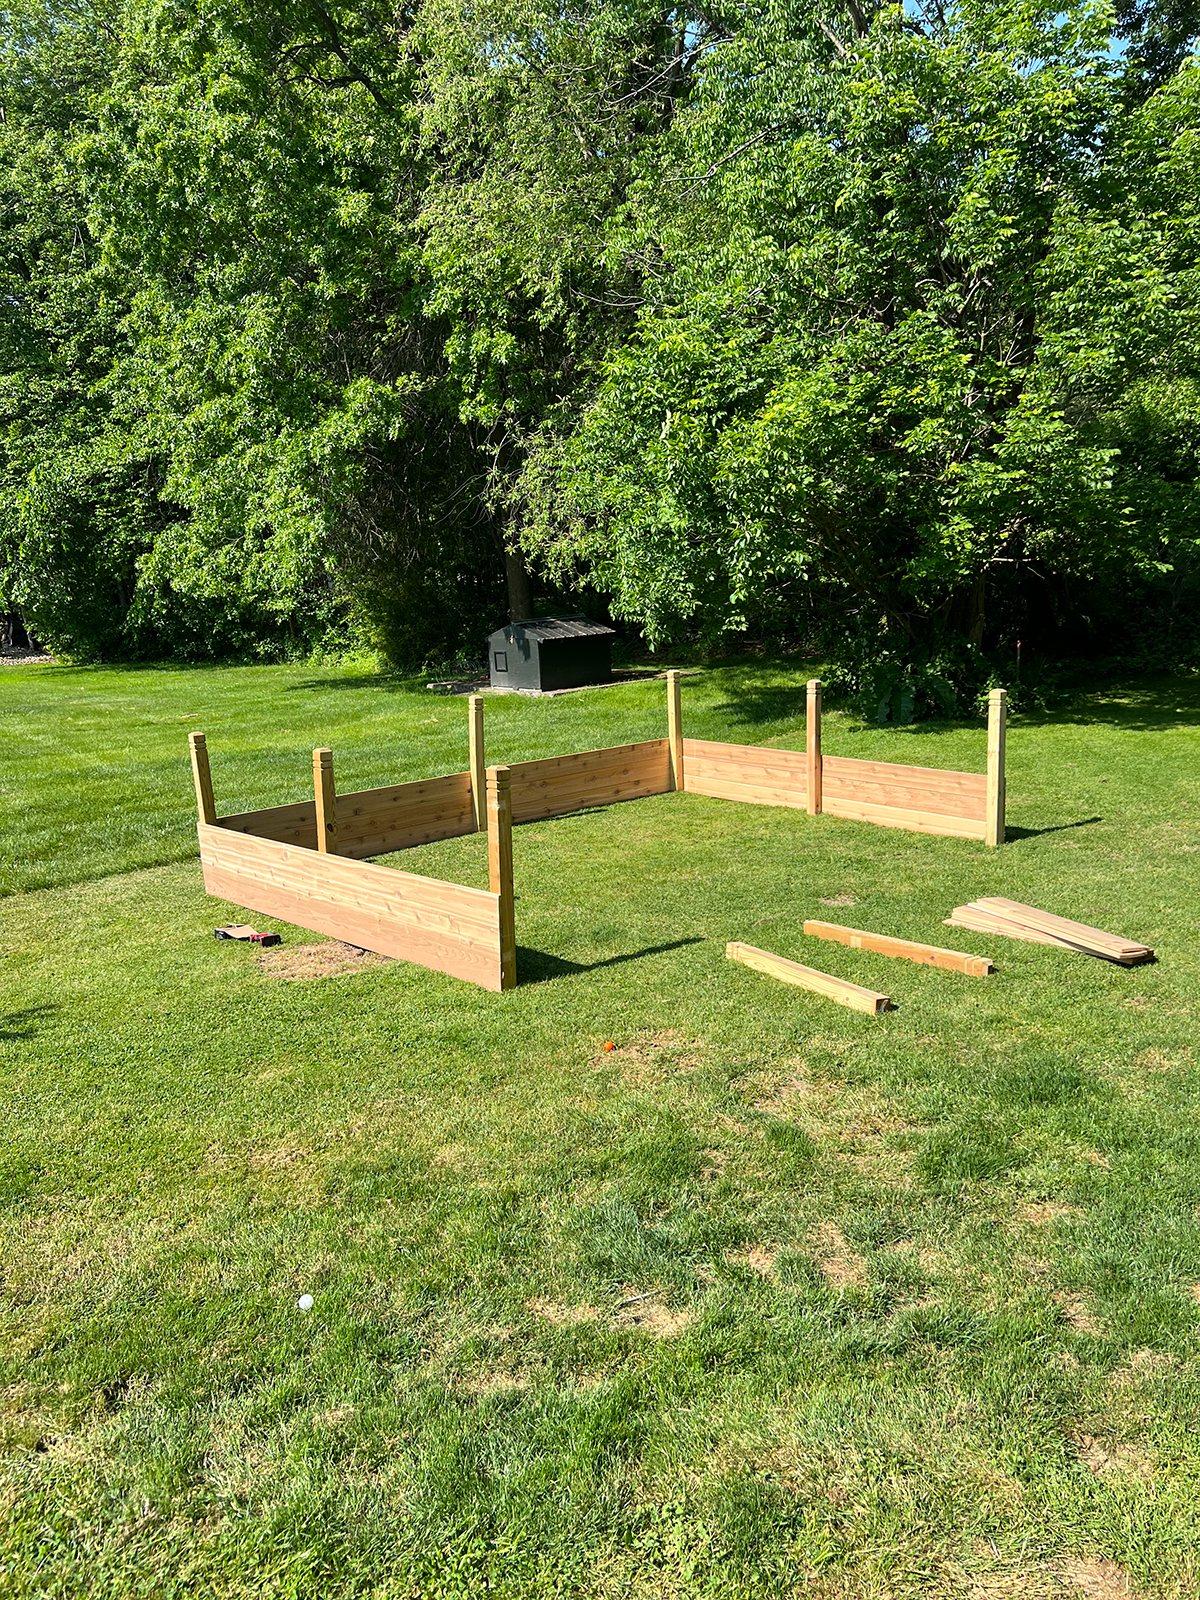
STEP 2: BUILD THE FRAME
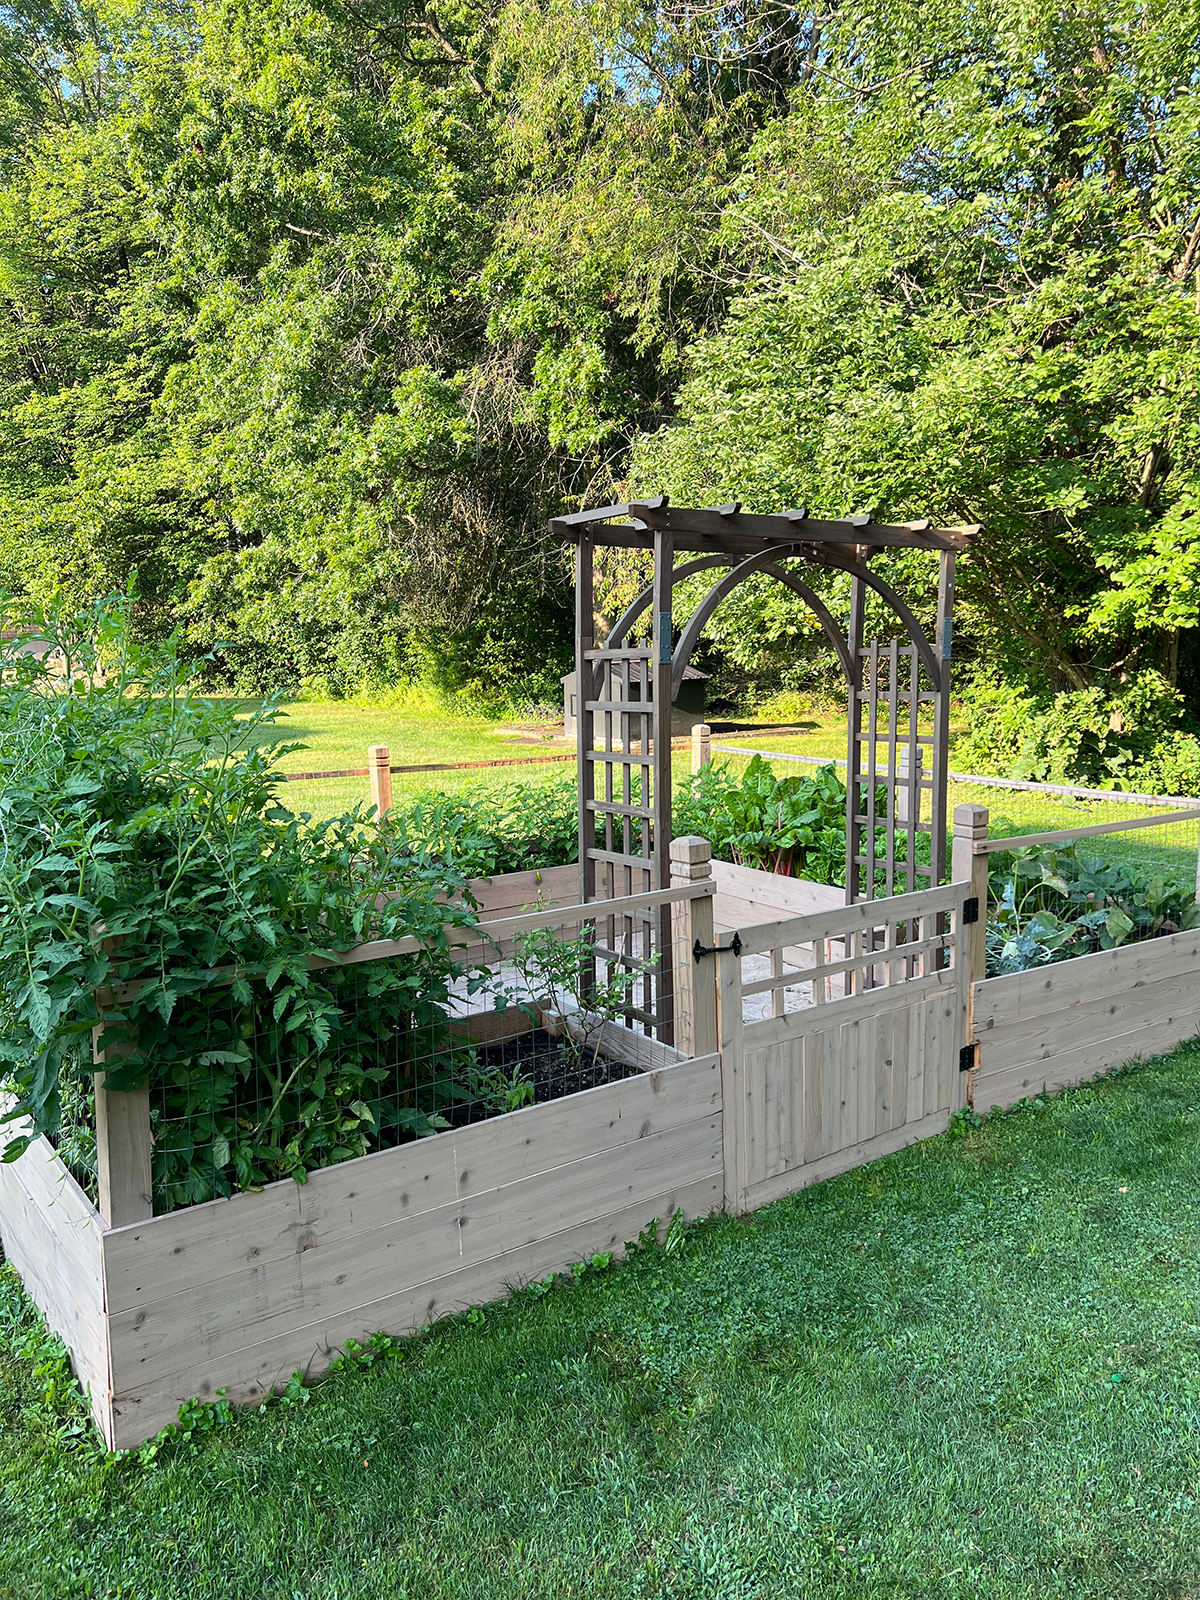
We tried to make use of 12′ and eight′ boards the place we might so there weren’t too many cuts. Beginning with the again row, we hooked up the underside board to a submit on each ends. Our posts don’t go into the bottom however that is positively one thing you possibly can do if you would like it to be a extra everlasting construction.
The 8″ boards are literally round 7″ vast and we stacked them 3 excessive, so our complete top was roughly 21″. You might completely go decrease or greater on this, however I can say now after utilizing the backyard that I feel it’s a fairly good top. I don’t must bend over an excessive amount of which is very nice.
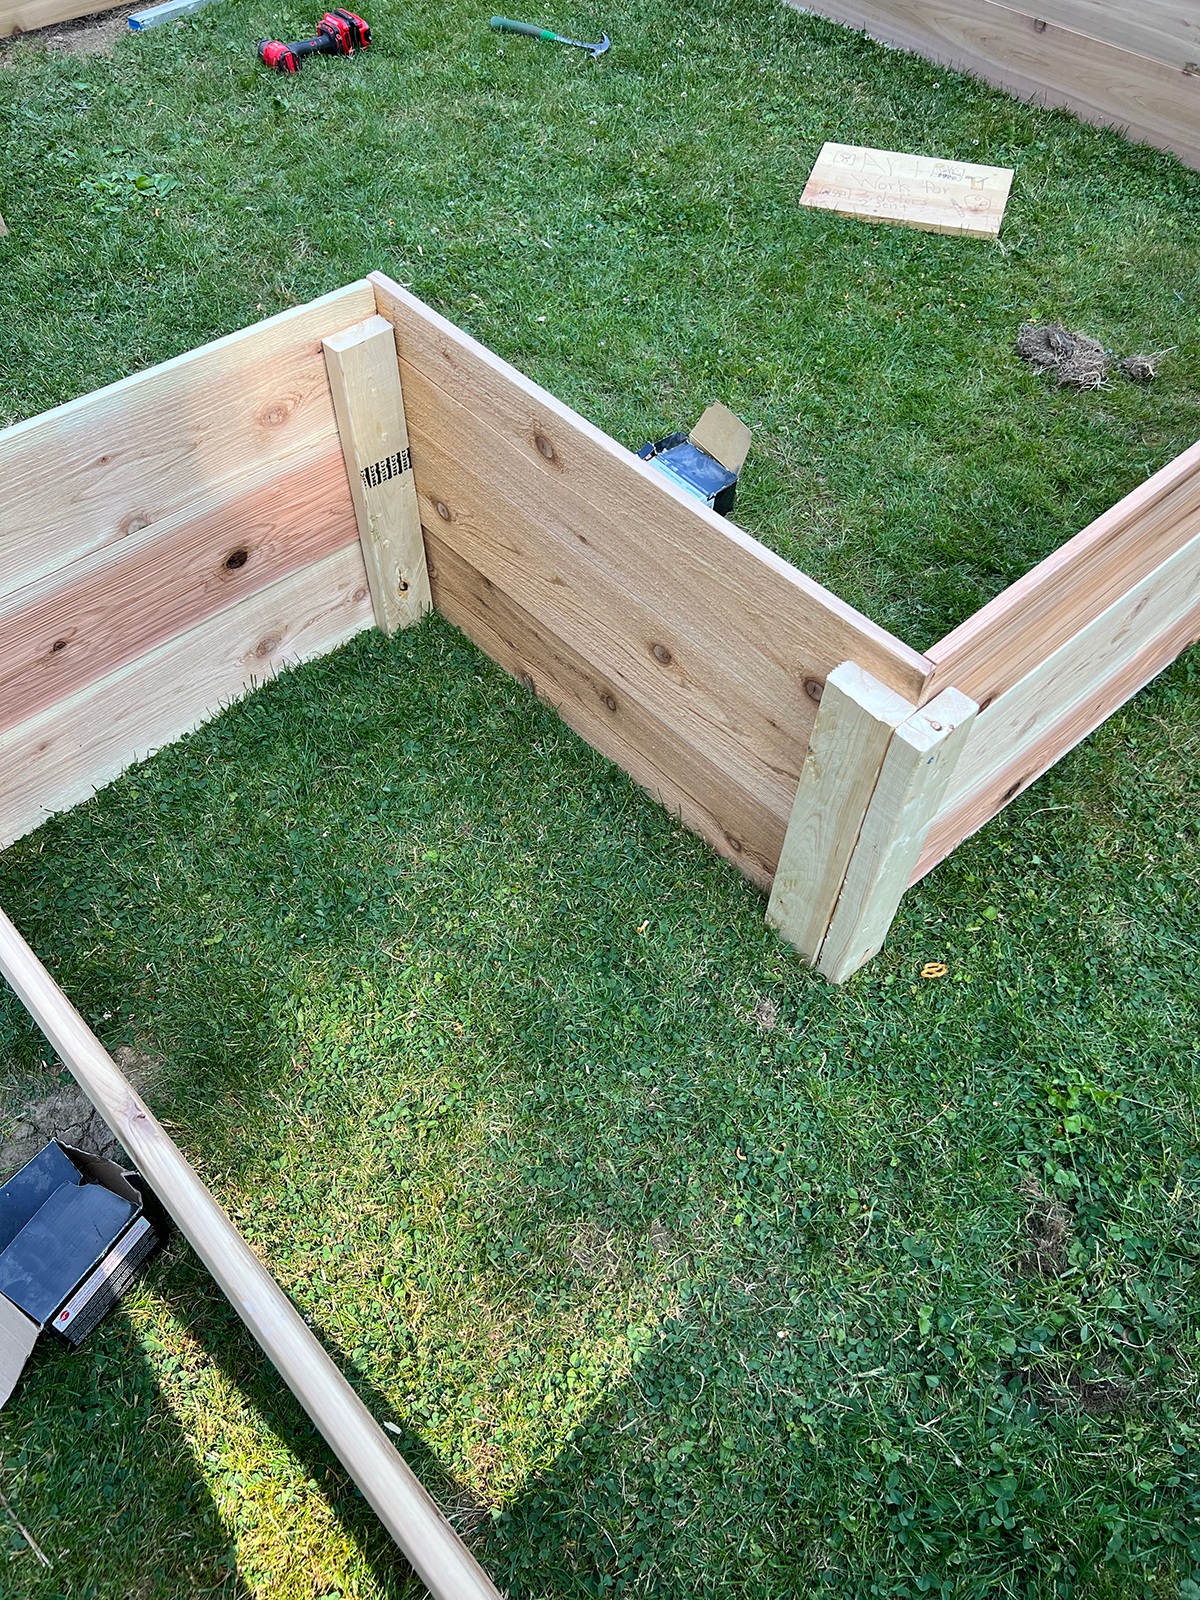
We used exterior screws to connect all of the boards and create our body. One factor to notice is that the cedar does have a tendency to separate simply, so I’d pre drill your holes to keep away from that!
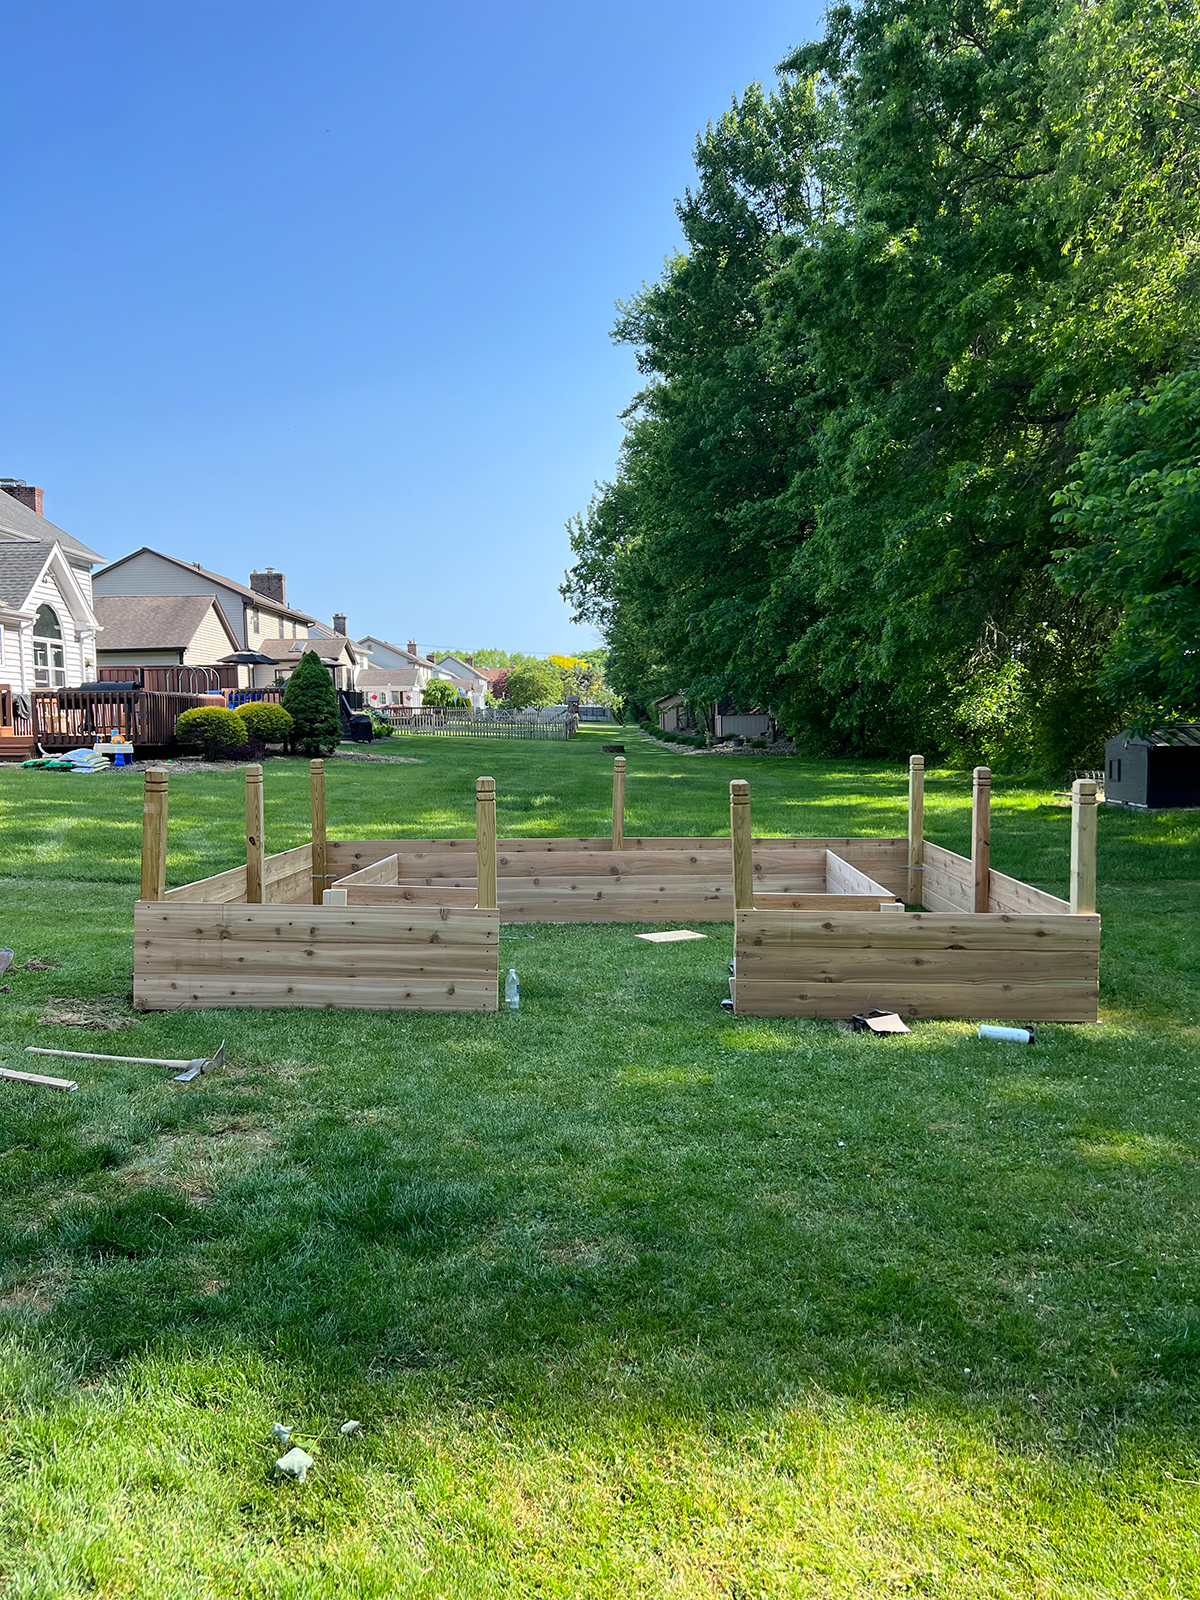
We additionally had been coping with some unlevel floor and needed to go in with some shims and scrap wooden to make changes. Wanting again, I’d positively counsel leveling out your floor first!
STEP 3: ADD SUPPORTS
As soon as your body is constructed, you’ll need to go round and add in some helps utilizing 2x4s. I like to recommend doing this vertically in between all of the posts in addition to including some in that lay flat on the bottom between the perimeters. We’ve seen some bowing taking place already as a result of we solely added the helps on the perimeters and never the underside/in between.
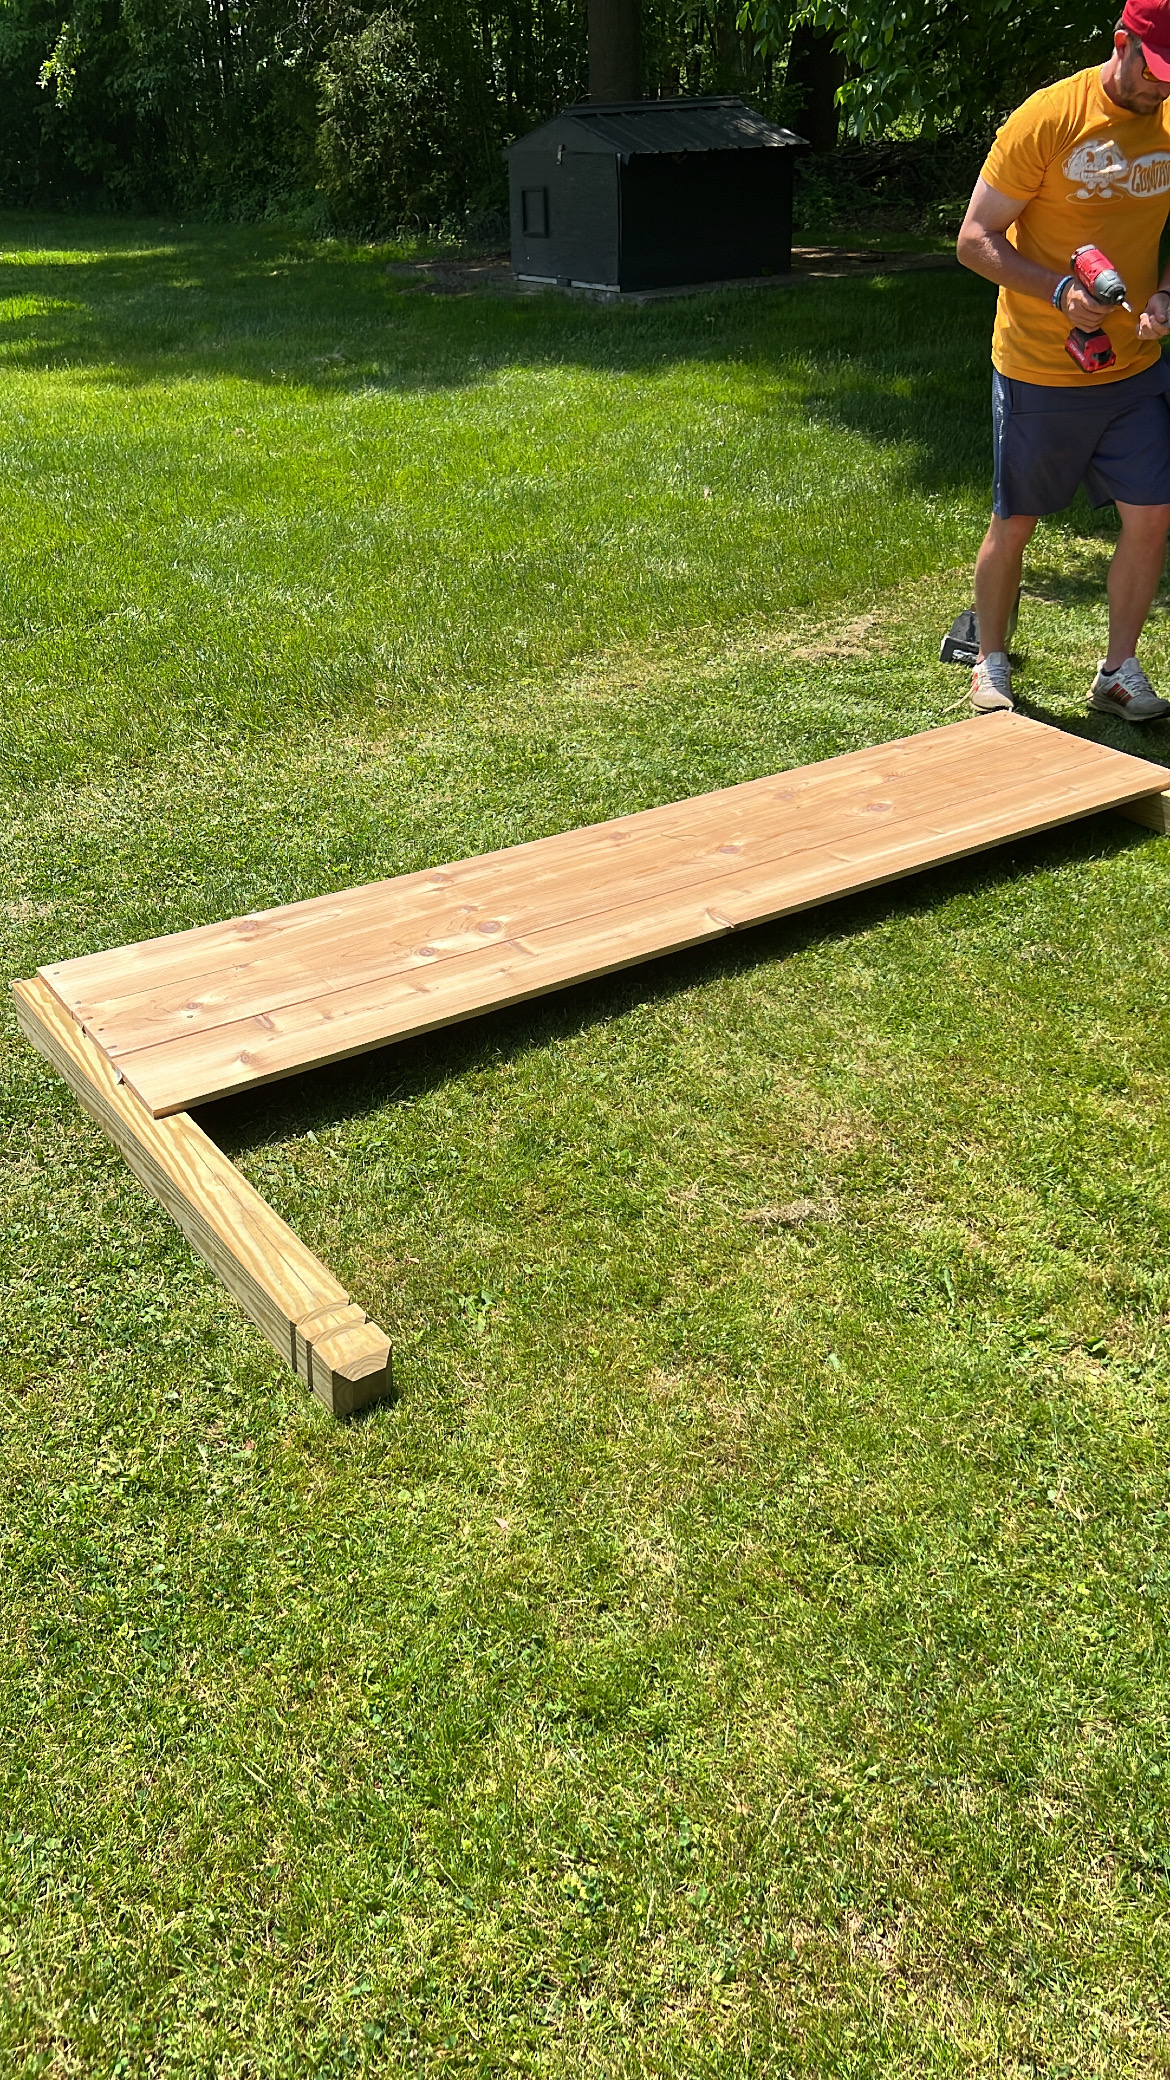
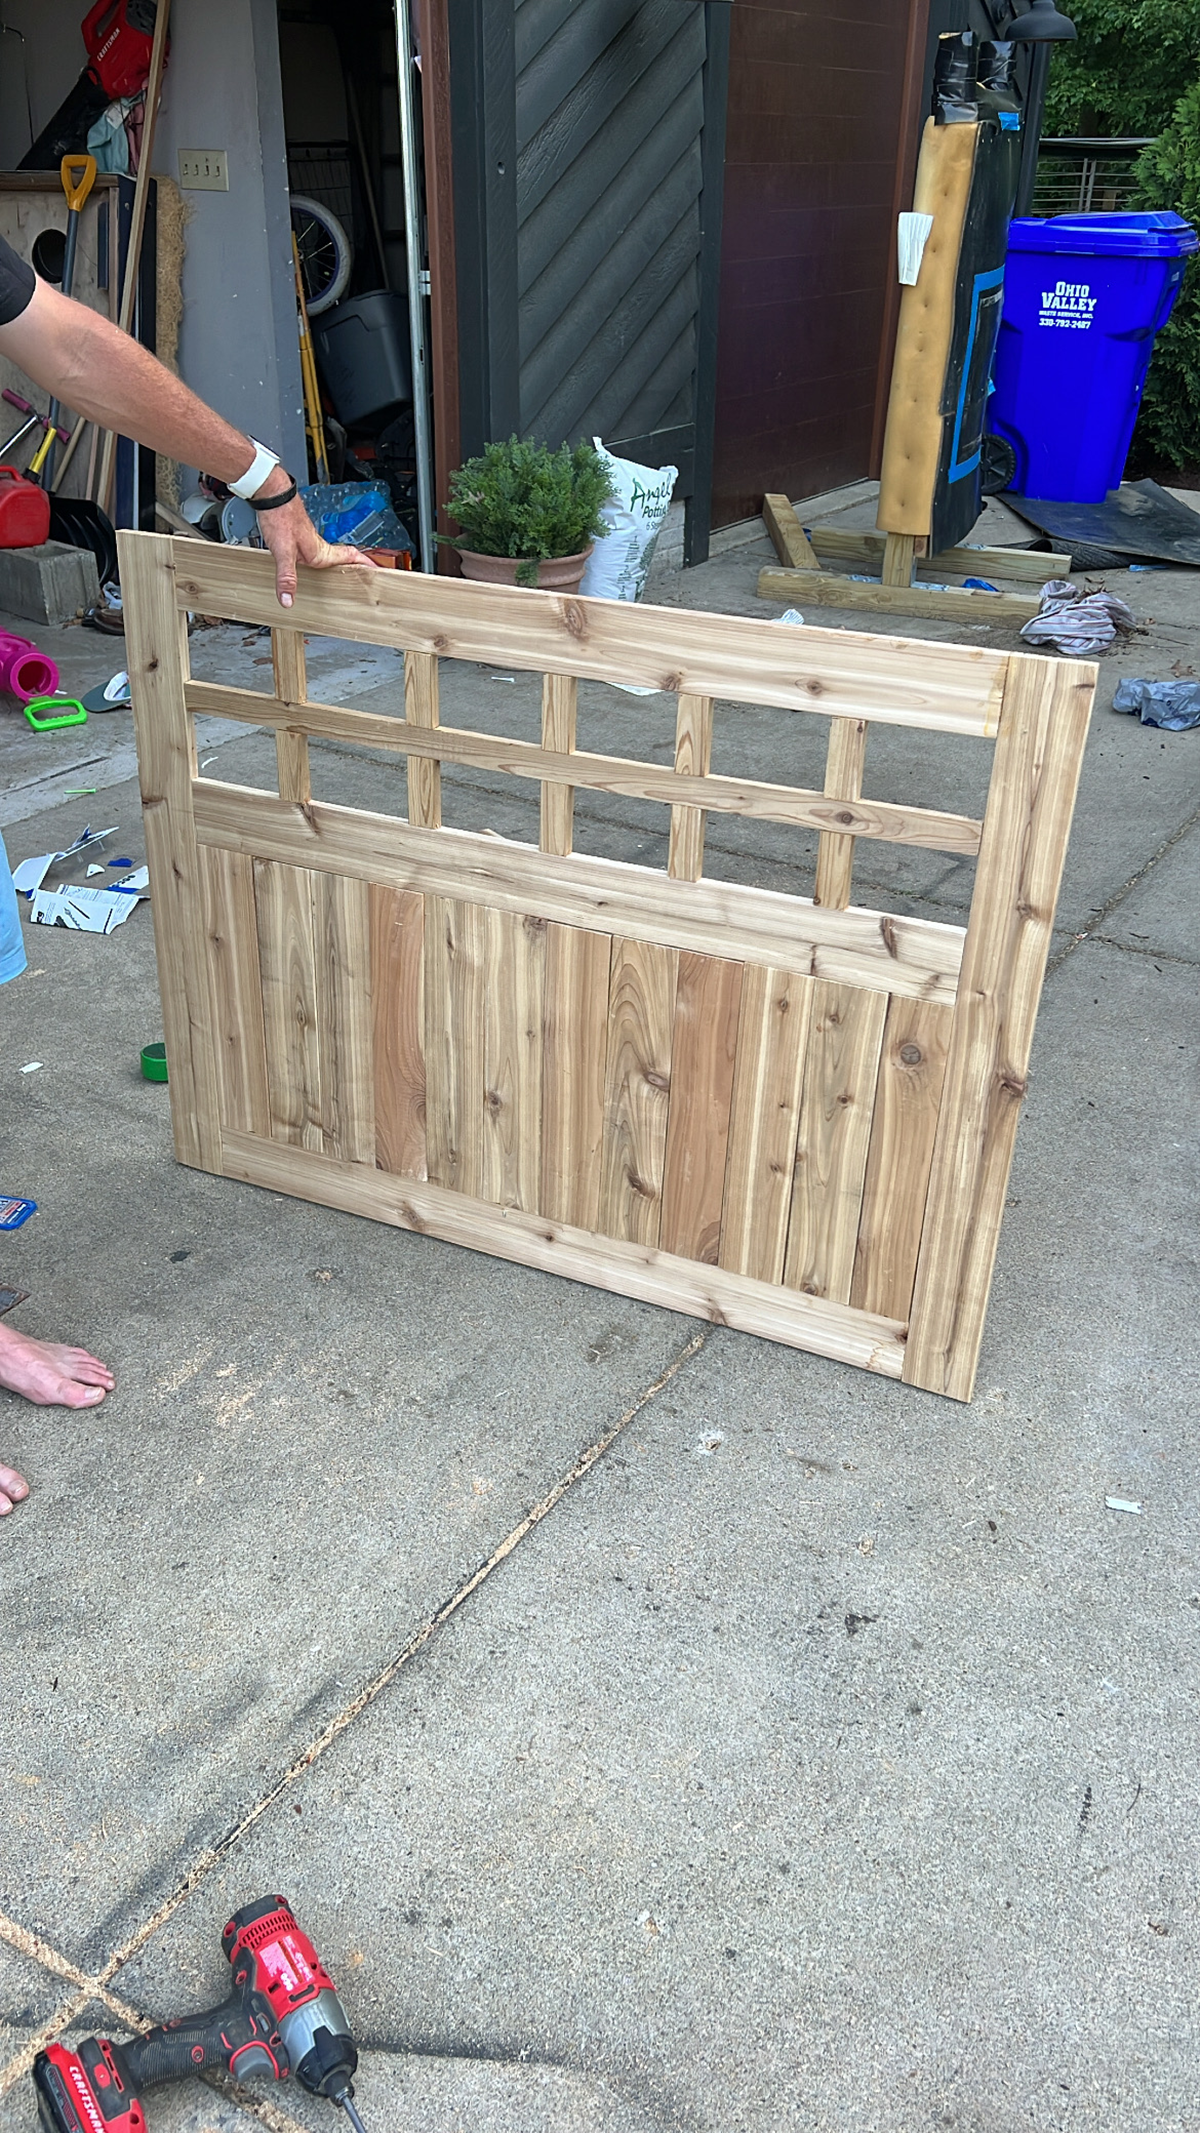
STEP 4: BUILD YOUR GATE
I had a lot enjoyable developing with the design for the gate on our raised backyard. This was such an essential a part of this construct as a result of it added a lot appeal! It’s additionally probably the most used a part of the backyard getting opened and closed quite a few instances a day and I wished the best way it felt after I walked via it to deliver a smile to my face.
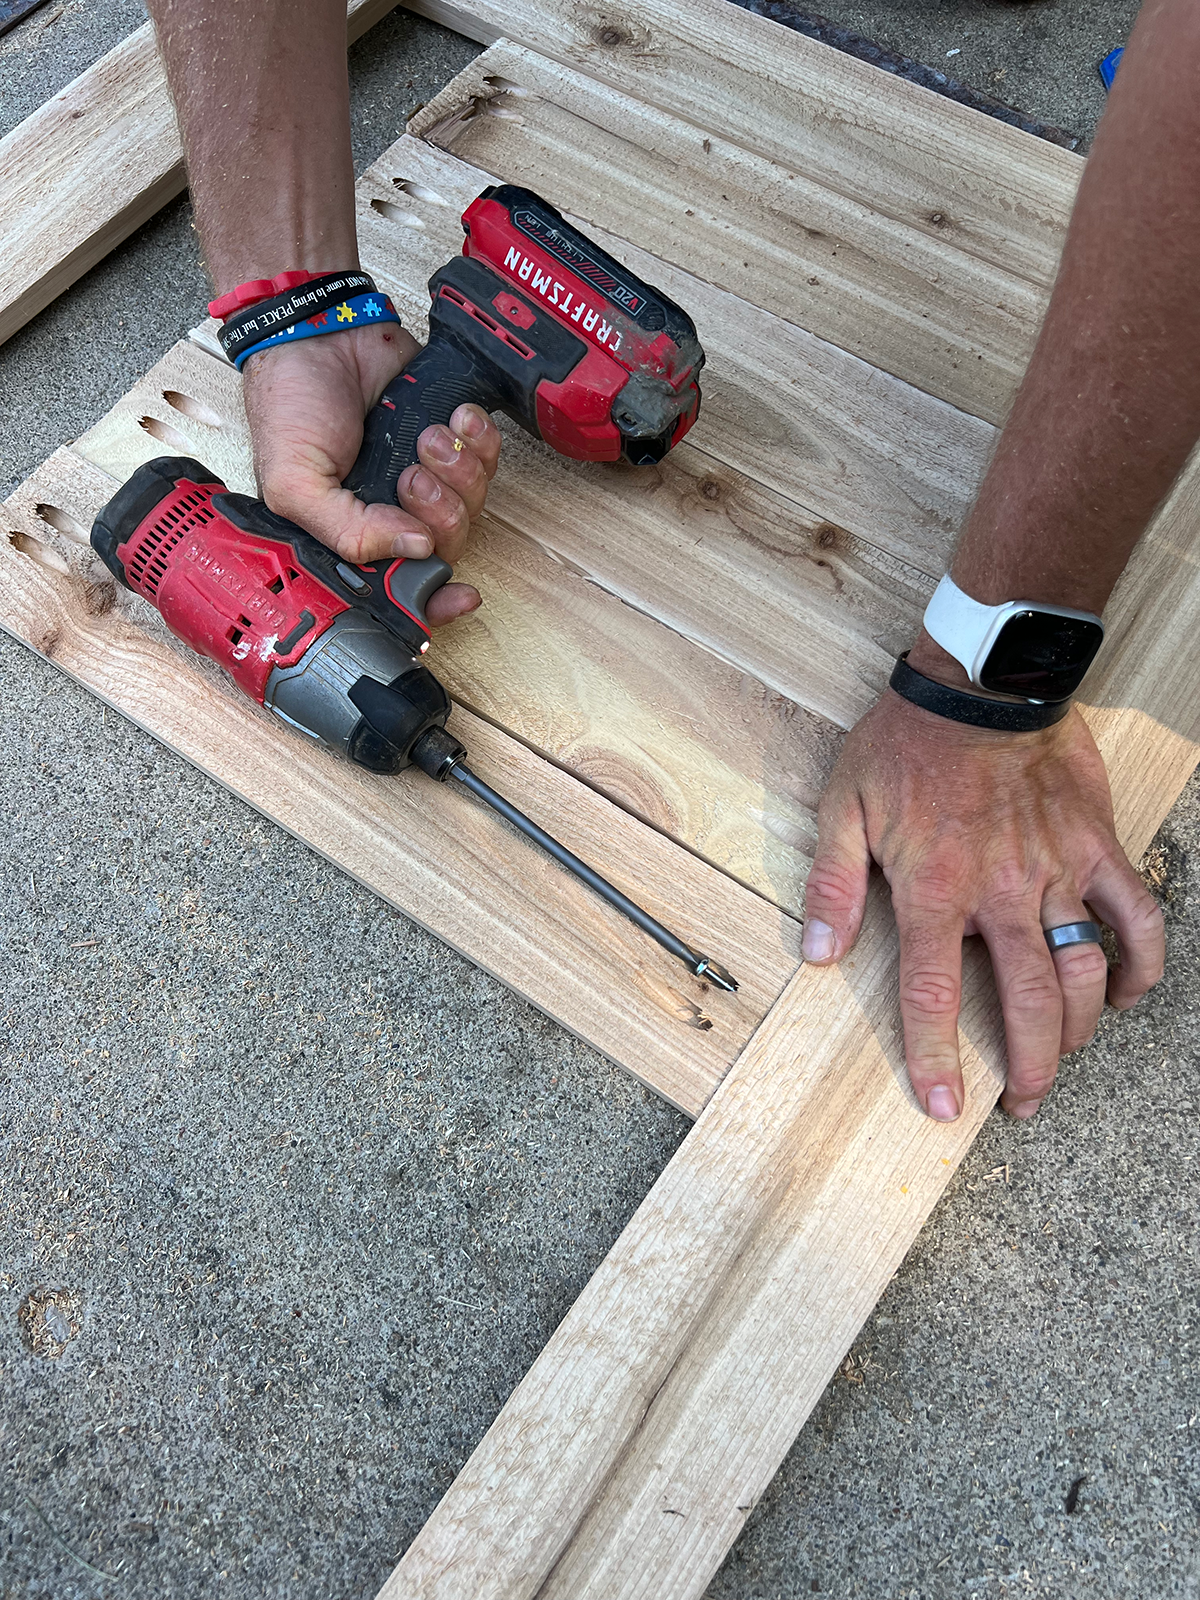
We hooked up all the things utilizing the Kreg Jig which was a complete time saver and made it tremendous straightforward. Then we used these hinges to connect it to the posts on the entrance of the backyard.
STEP 5: STAIN YOUR GARDEN
Earlier than you fill your backyard you’ll need to stain it, in the event you’re selecting to try this. When you’re utilizing an out of doors wooden like cedar, you possibly can completely simply depart it pure and let it climate on it’s personal. I made a decision I wished to regulate the colour barely so I used Sherwin Williams Woodscapes within the coloration Mountain Ash.
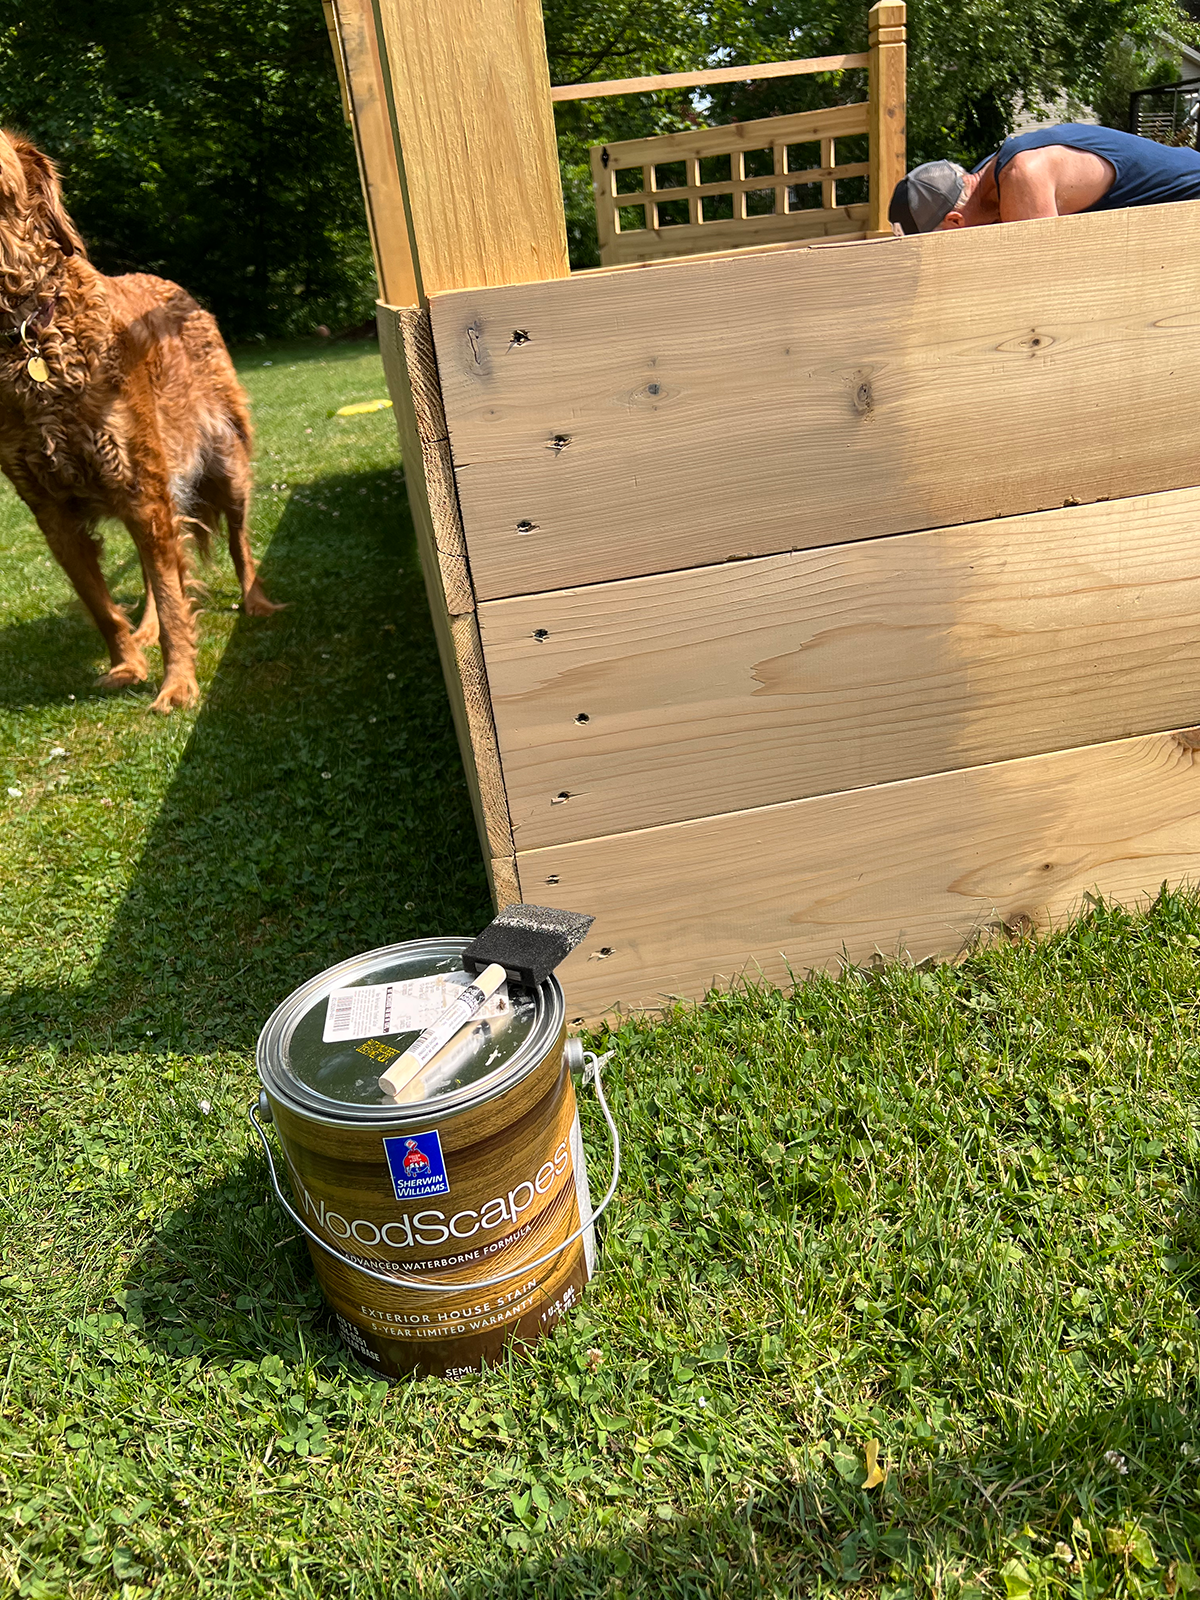
After making use of it, I used to be slightly unsure about it and thought of going over it with a darker stain. My plan was to select one thing that matched the colour of our decking and this was fairly shut, it simply had a barely greyer tone to it. I used to be getting antsy to begin planting so I made a decision to simply go along with it. It truly is an attractive coloration and I do know over time it’s going to all begin to naturally climate anyway.
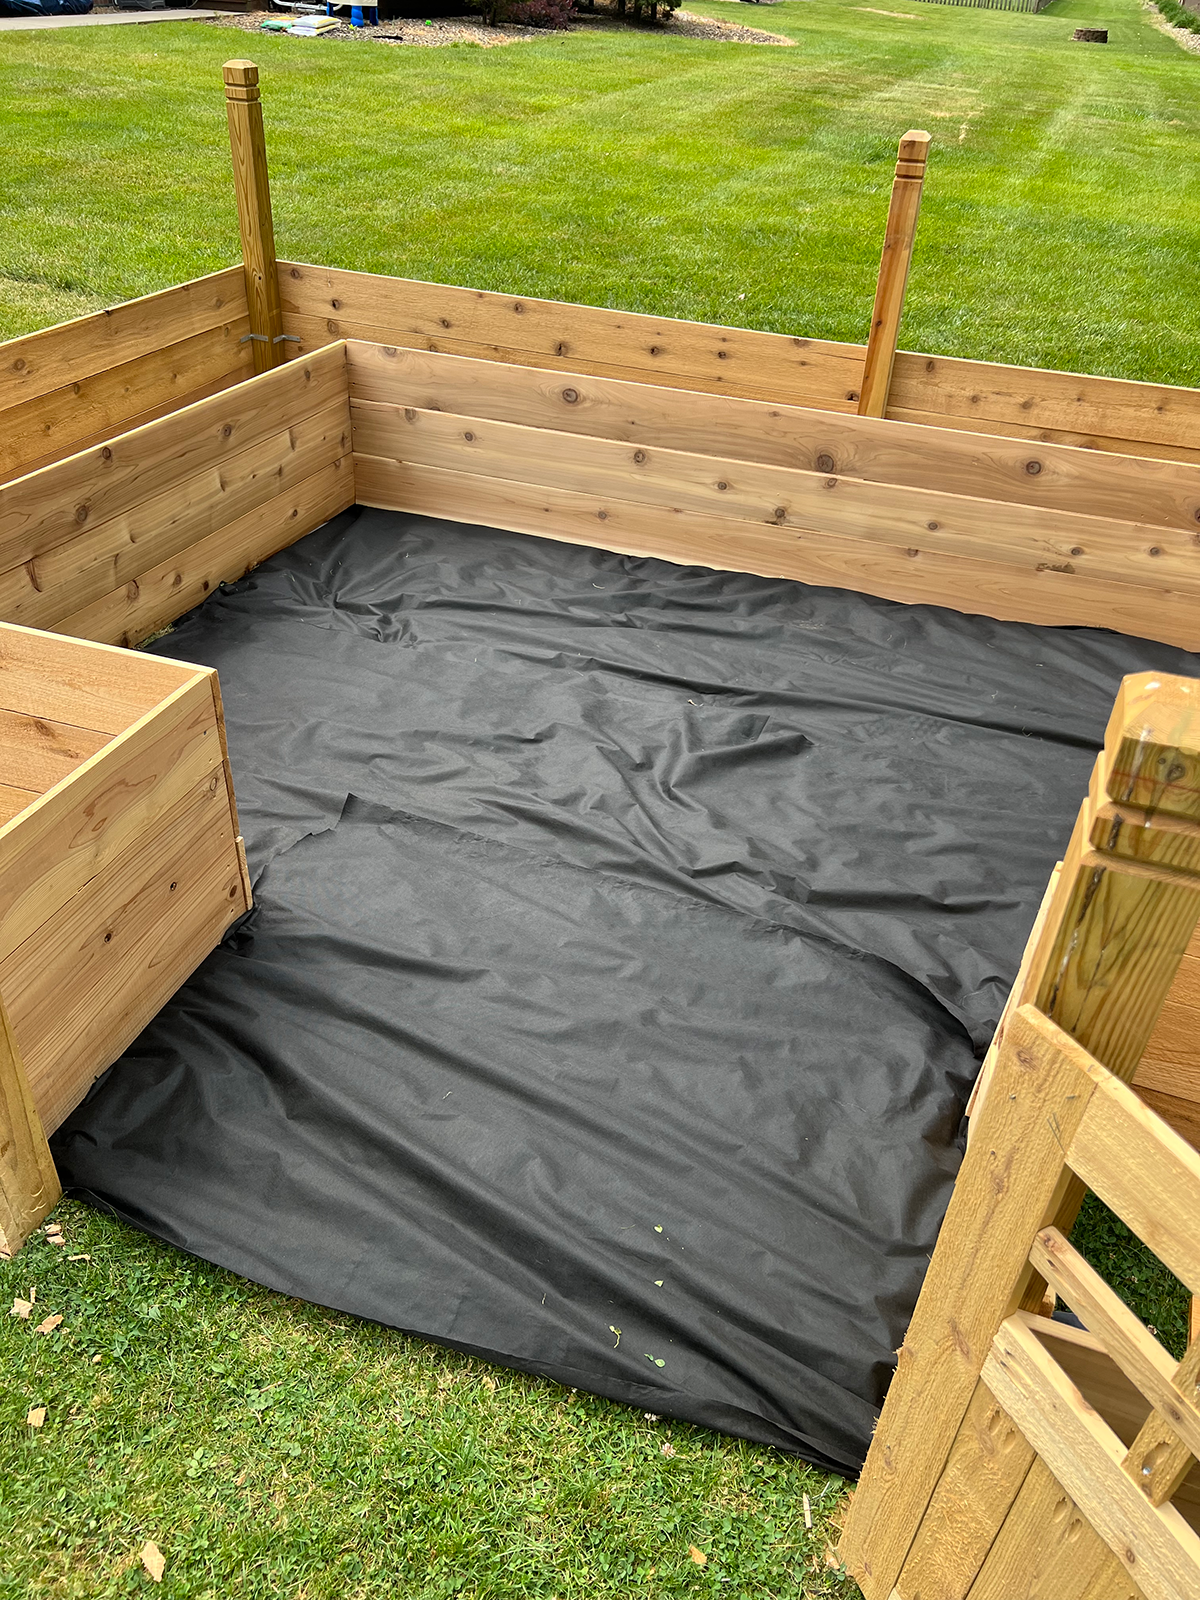
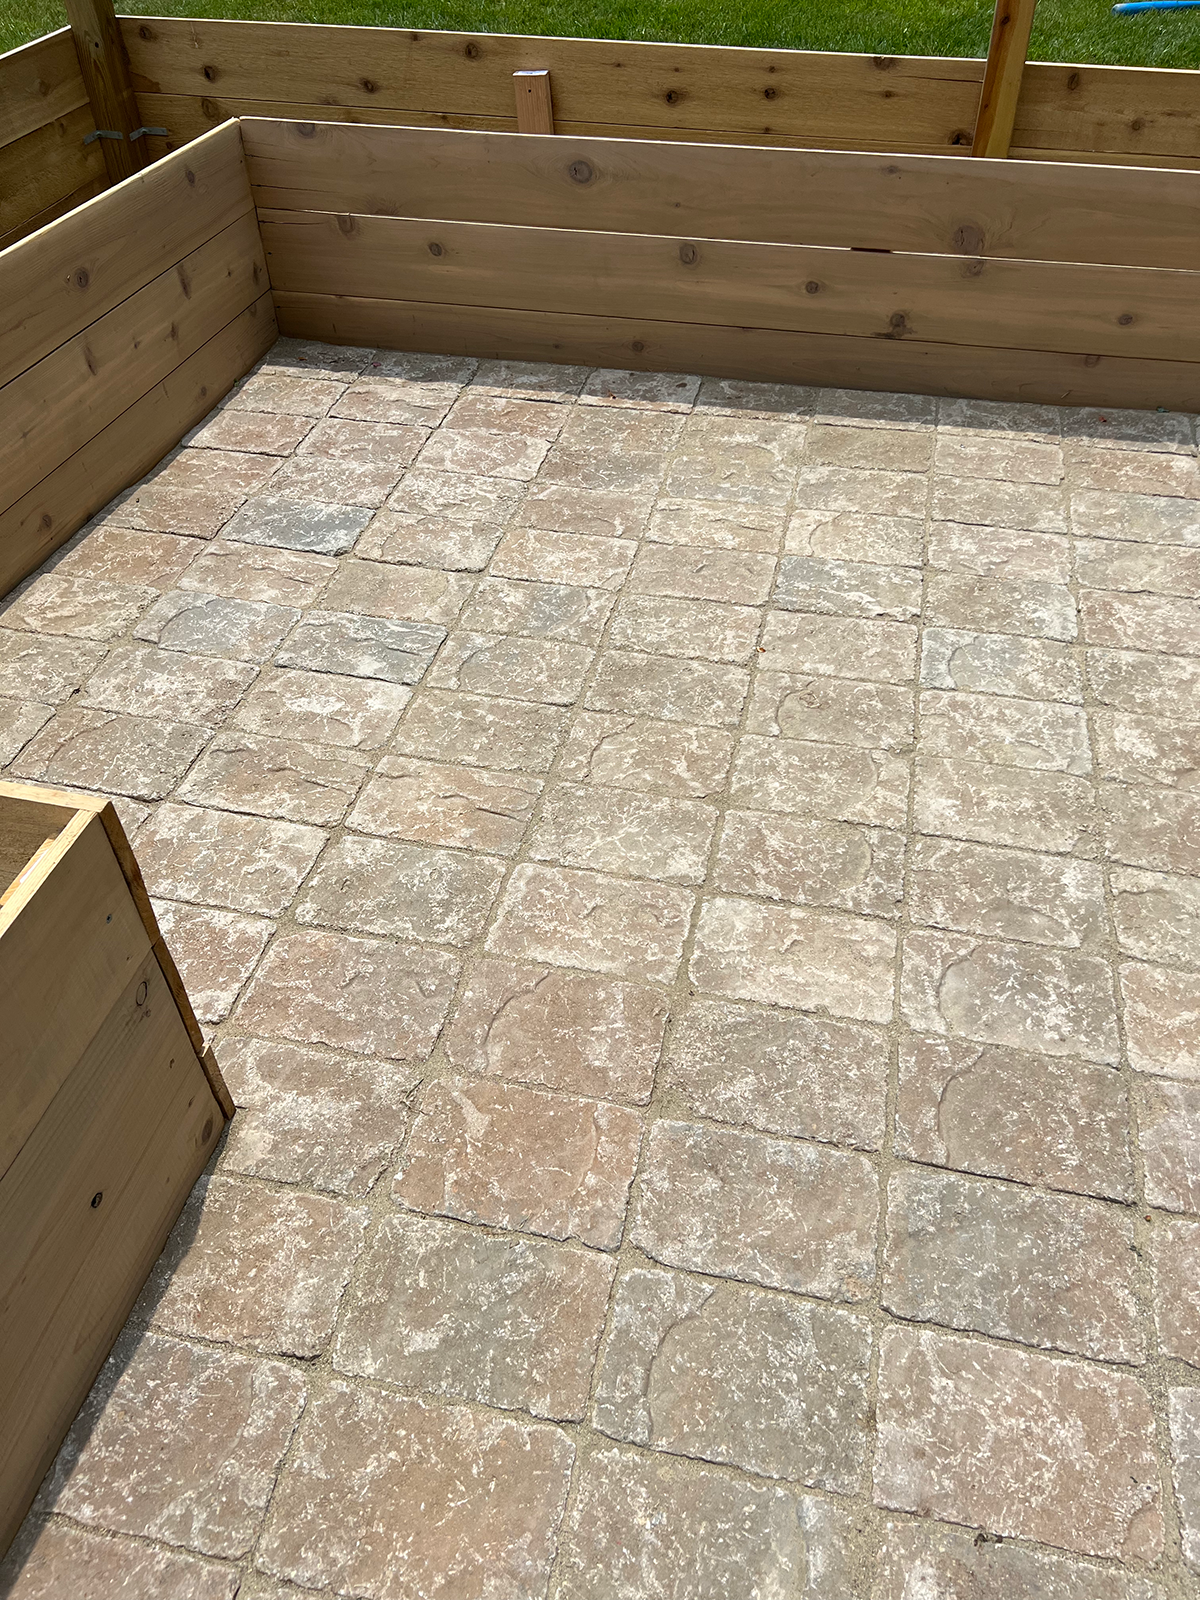
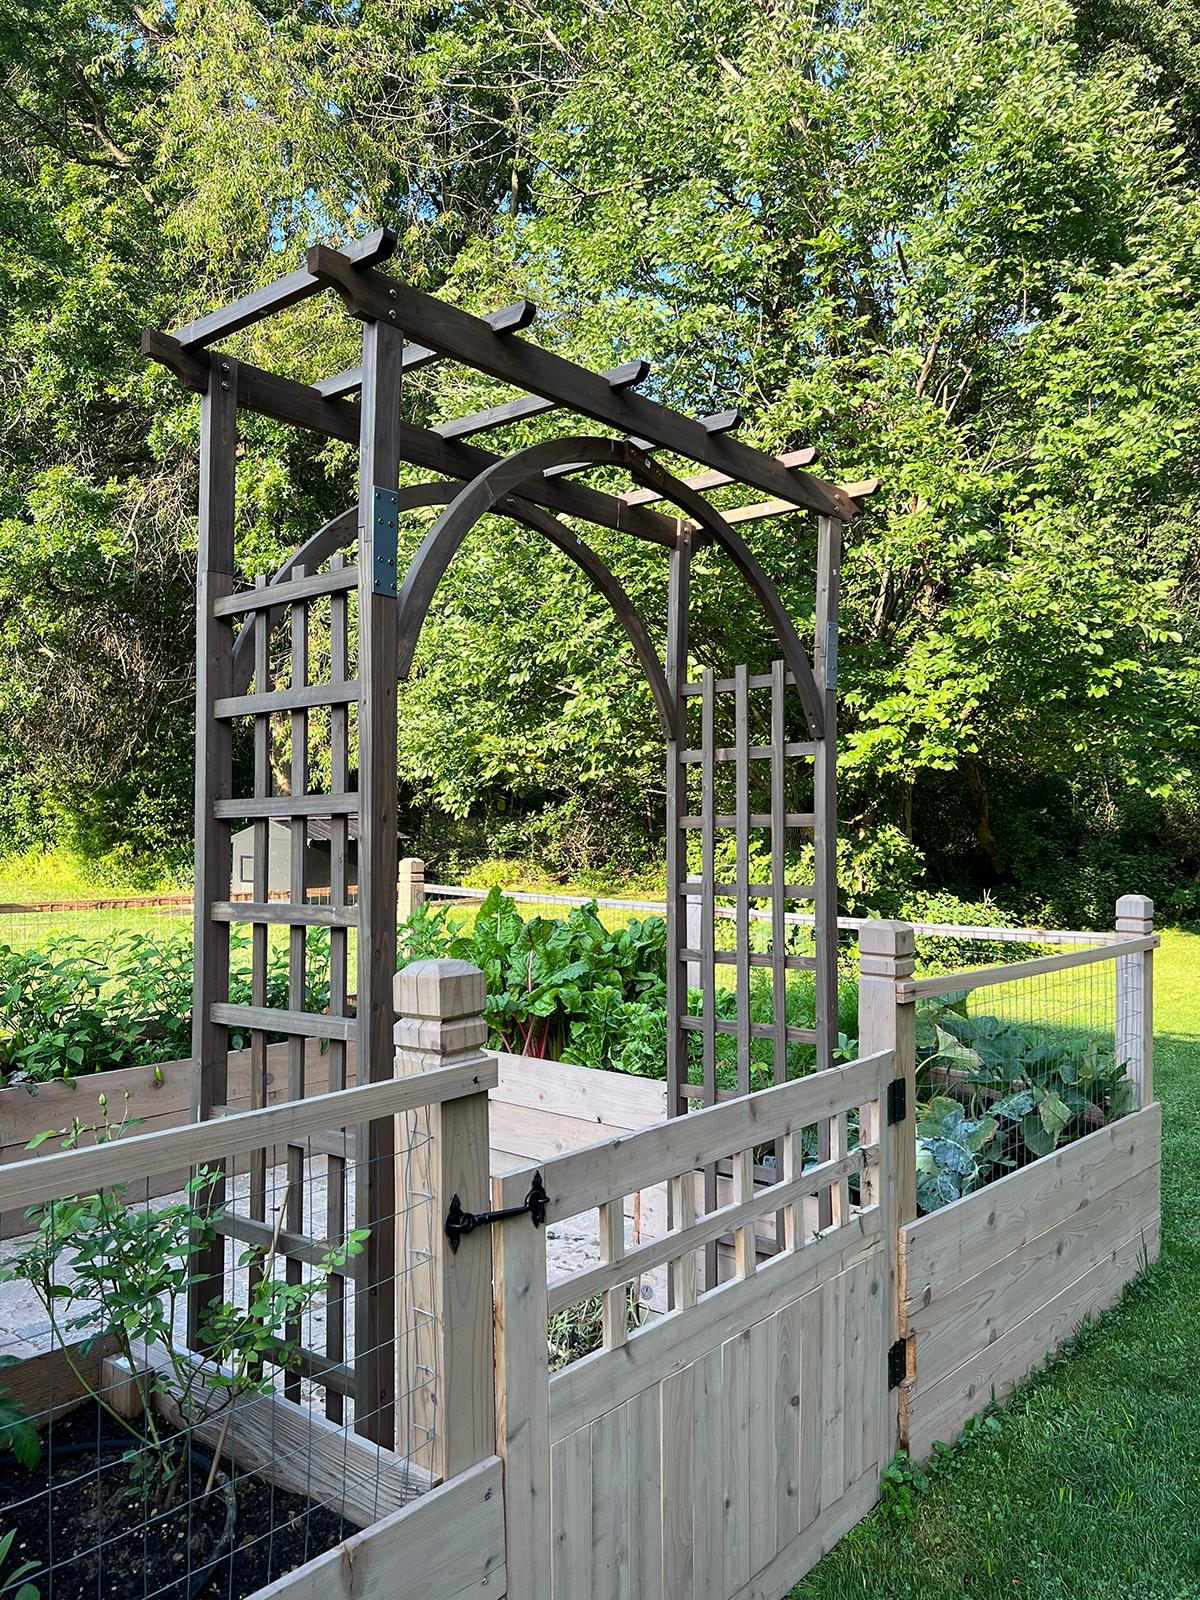
STEP 6: ADD PAVERS TO YOUR GARDEN
You might do various various things in the course of your backyard, however I made a decision to do pavers. You might depart it grass or add gravel or mulch too! For this course of we first laid out weed barrier to stop any weeds from rising.
Subsequent we used sand to create as flat as a floor as doable. Utilizing a protracted degree helped to easy all of it out! As soon as easy you too can tamp it right down to get it good and flat.
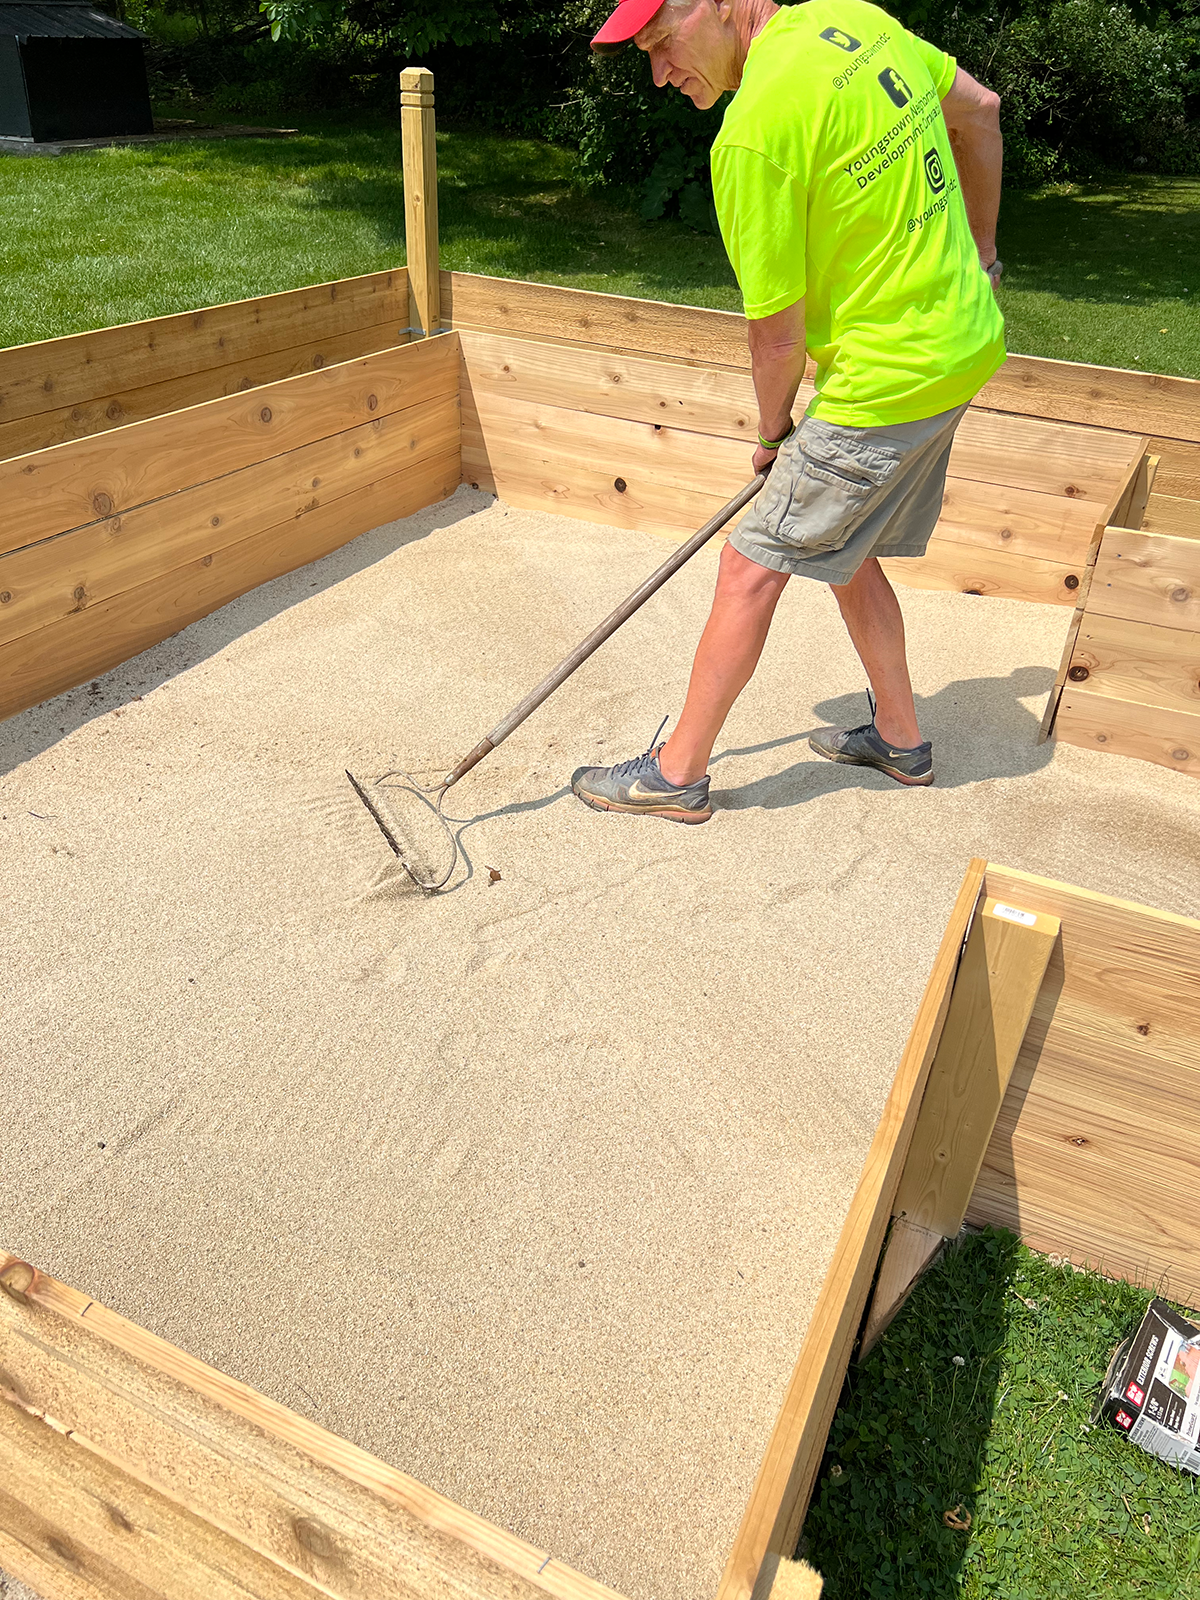
After the sand, you possibly can add your pavers. We used these pavers from Lowe’s and my FIL laid them ranging from the again of the backyard transferring ahead.

To assist preserve them in place we used polymeric sand which works tremendous properly. You’ll be able to comply with the instructions on the product however you mainly sweep it in to the cracks after which water it to make it harden in place.
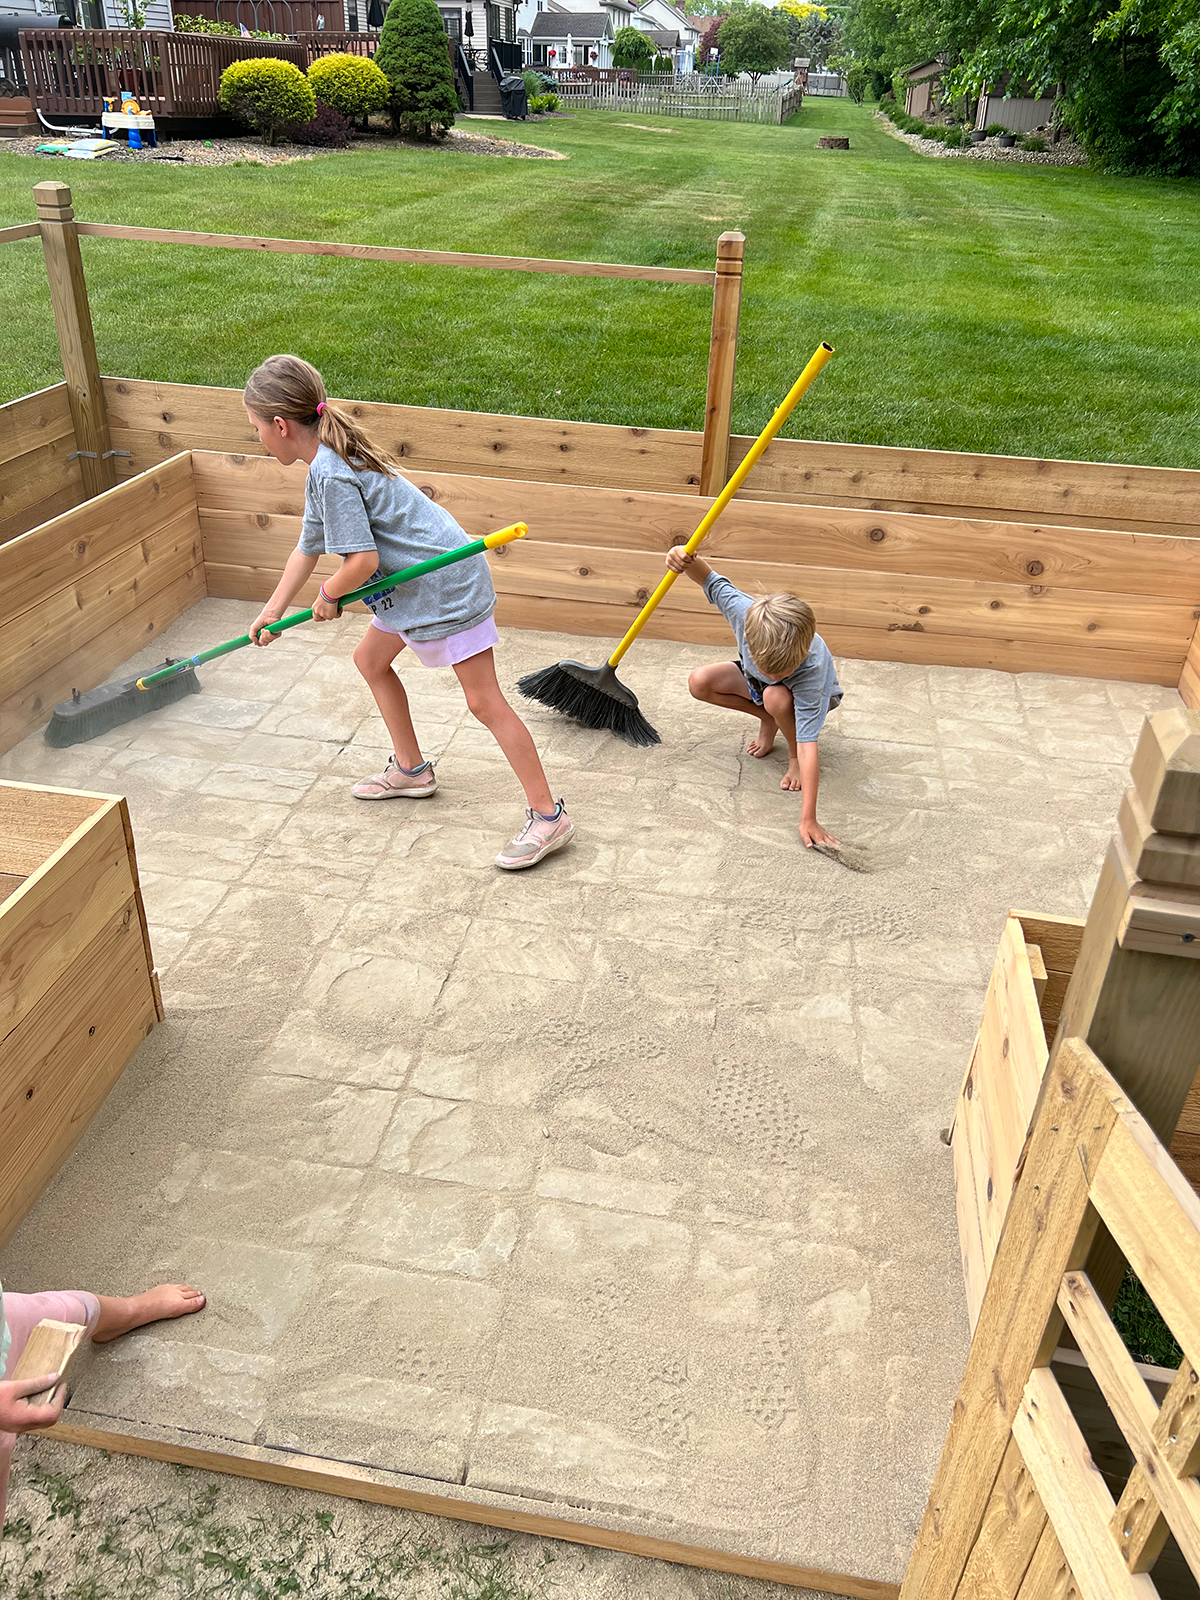
These pavers added a lot appeal and character to our backyard! It was precisely what I used to be envisioning and I feel was the most suitable choice for sturdiness over time.
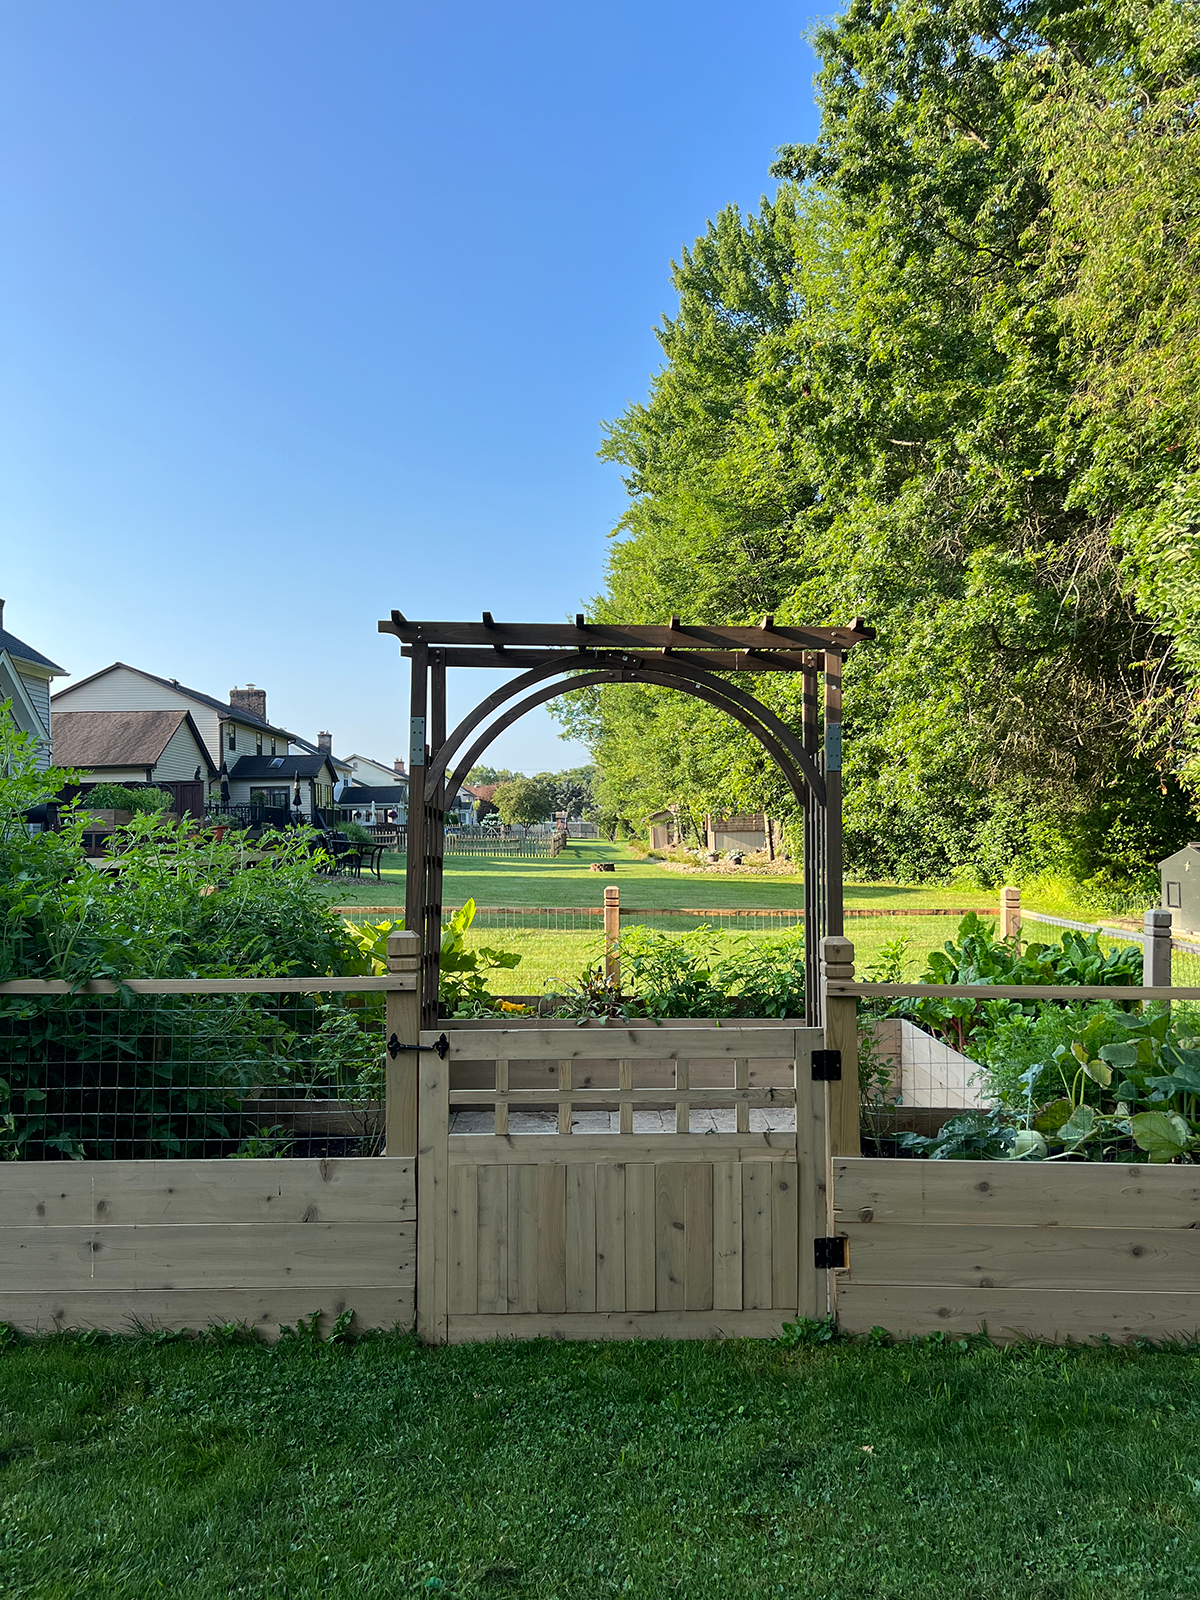
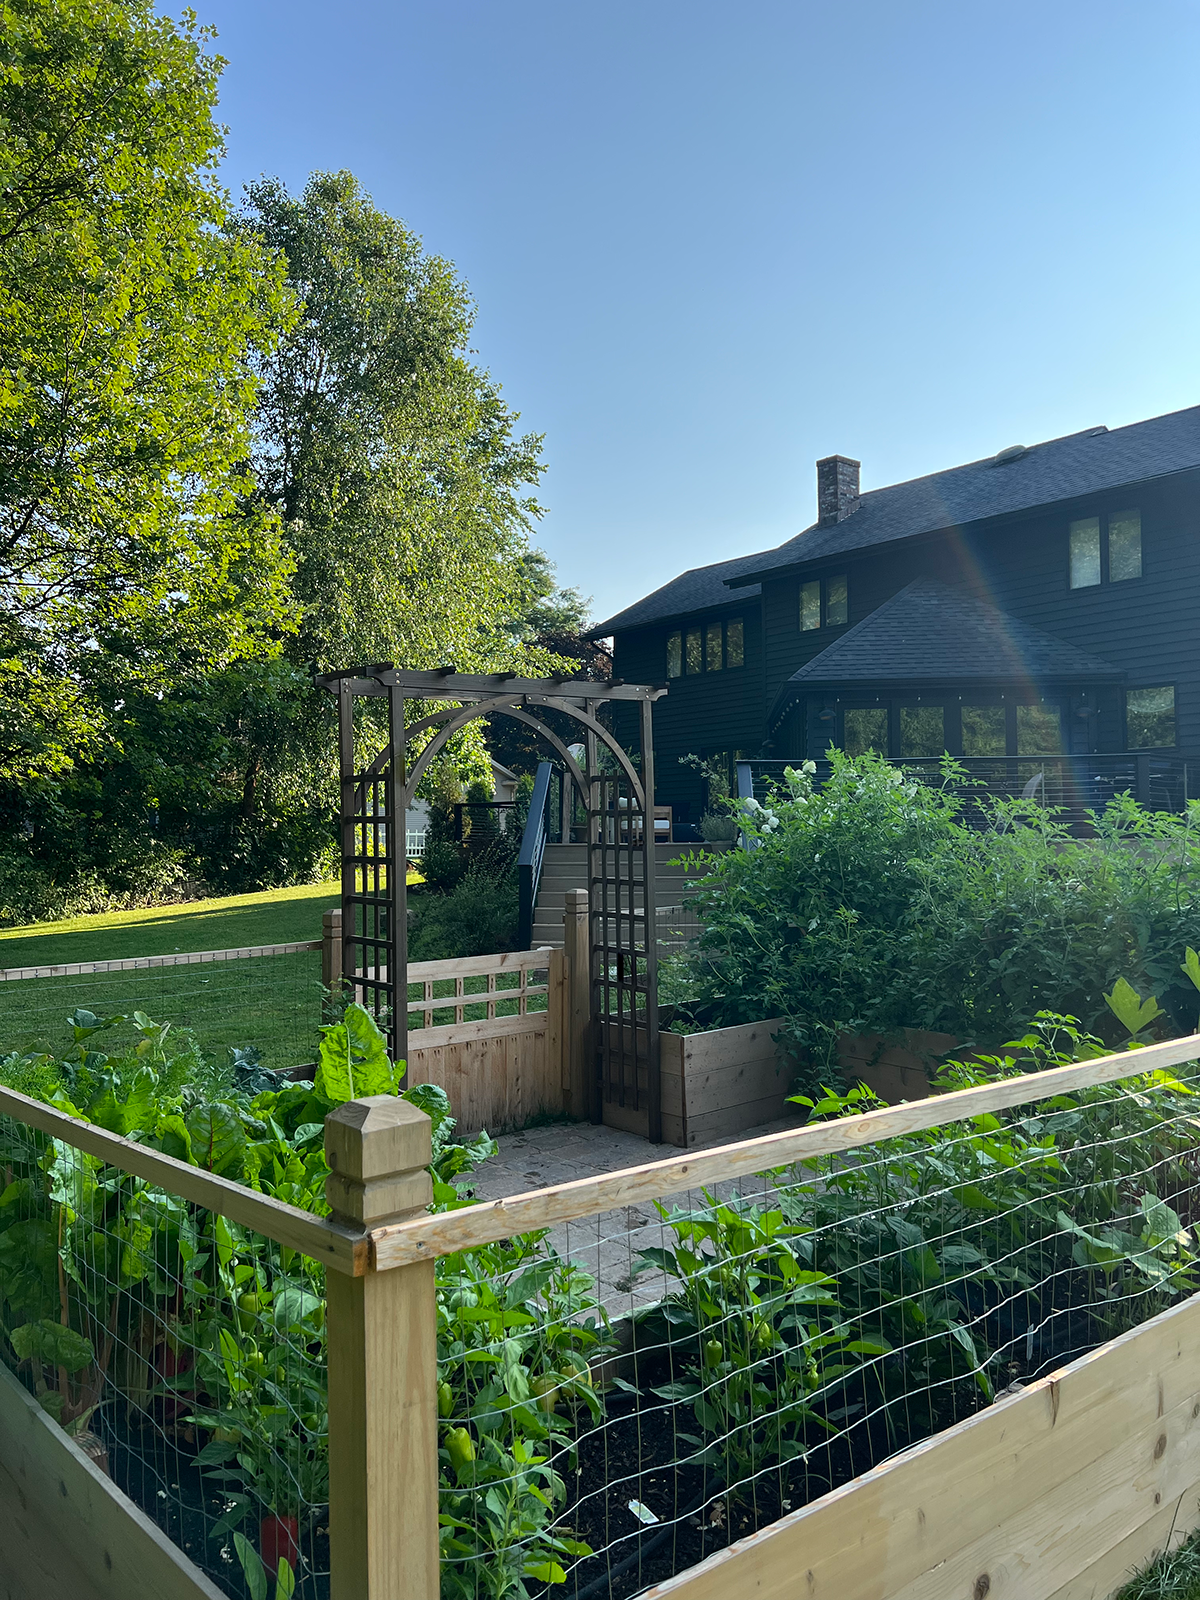
STEP 7: ATTACH AN ARBOR
For much more appeal, you possibly can add an arbor to your backyard! We debated constructing one, however cedar is costly and was beginning to add up so we determined to buy one as a substitute. I ordered some CL Iceberg roses from Heirloom Roses on-line and they’re already beginning to develop. I’m going to must be affected person on this however I can’t wait till the entire thing is roofed in stunning white roses!
STEP 8: FILL YOUR GARDEN
This was by far the toughest a part of this complete course of. Because the beds are slightly greater, you must fill them fairly a bit and grime is heavy! For this reason you need to fill them first with as a lot natural materials as doable. We loosely adopted the Lasagna Technique which helped however I’d be sure that to fill them much more than you assume it is advisable to earlier than including the grime, as a result of the grime pushes it wayyyy down.
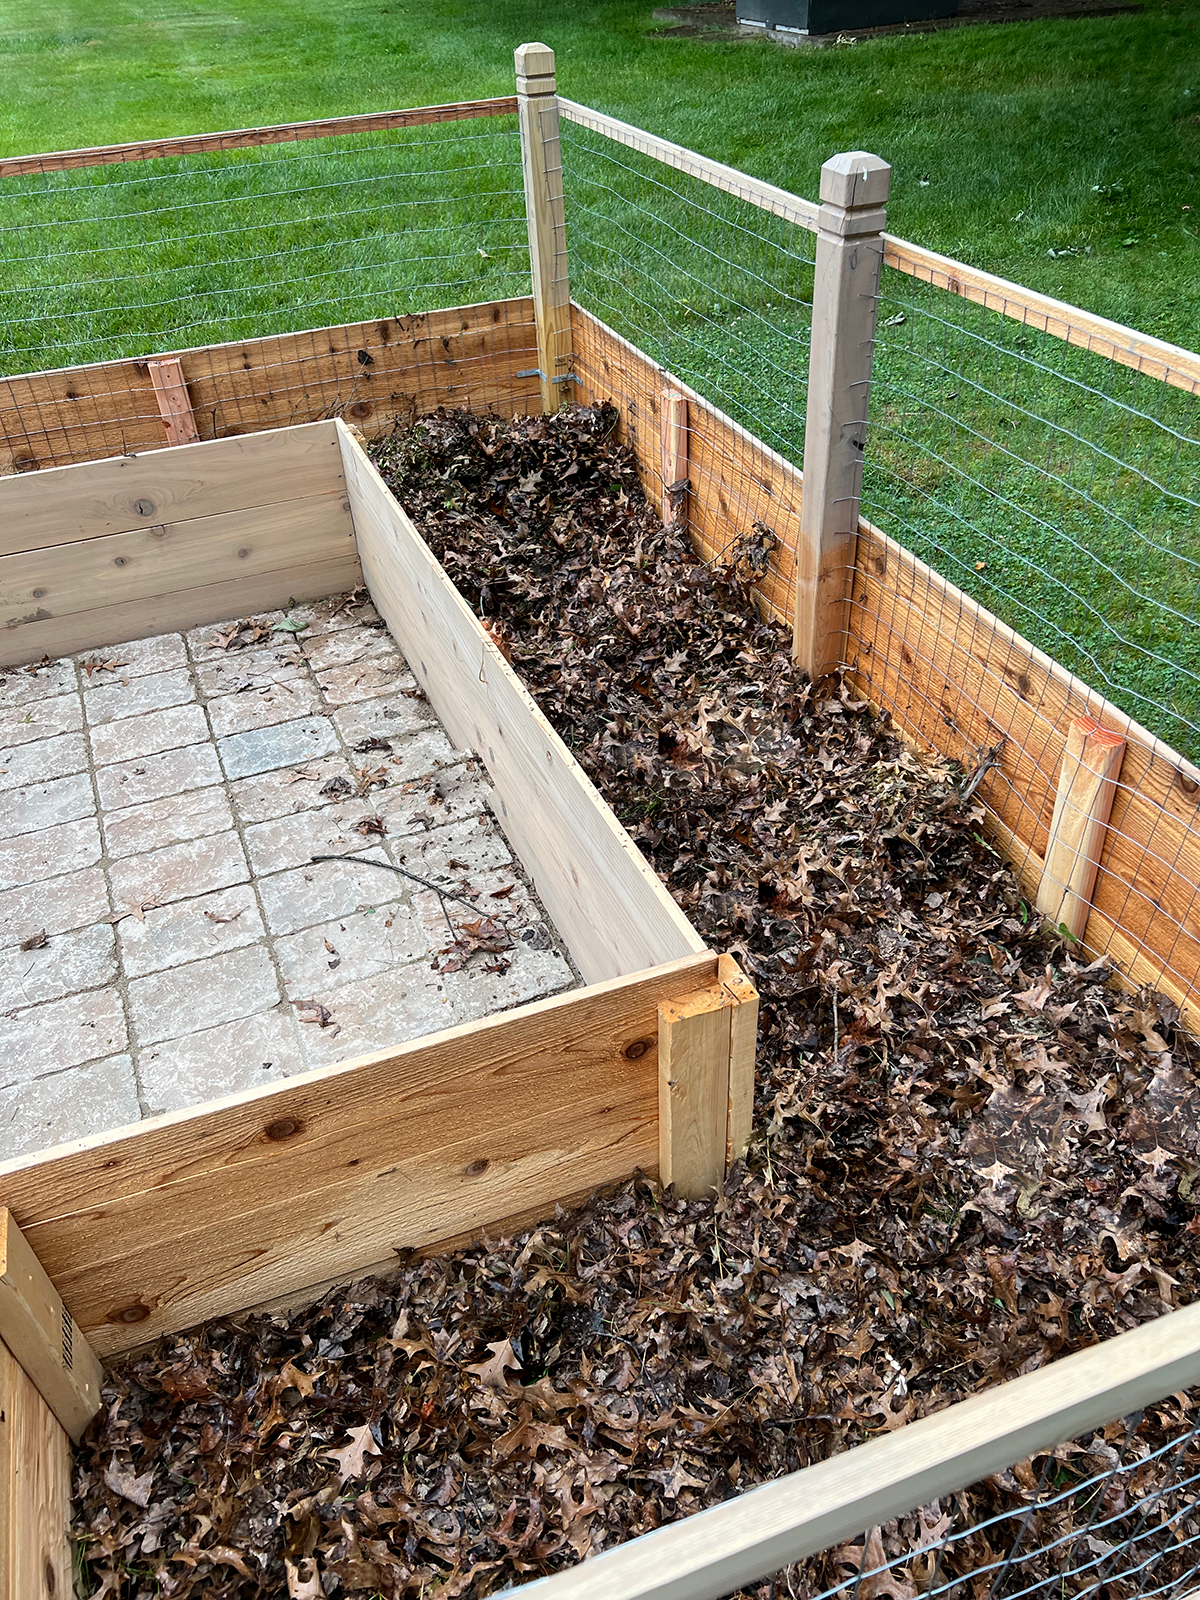
We began with some {hardware} fabric first to maintain any critters from crawling beneath. Then we positioned cardboard down to assist preserve the weeds out. Subsequent was lifeless branches and twigs from the woods. be sure that they don’t have any inexperienced leaves on them or they’ll sprout! After that was lifeless leaves!
Upon getting all of your layers of natural matter you can begin including in your grime. I went to Elliott’s Backyard Heart and so they beneficial their blended soil adopted by an inch of their mushroom compost.
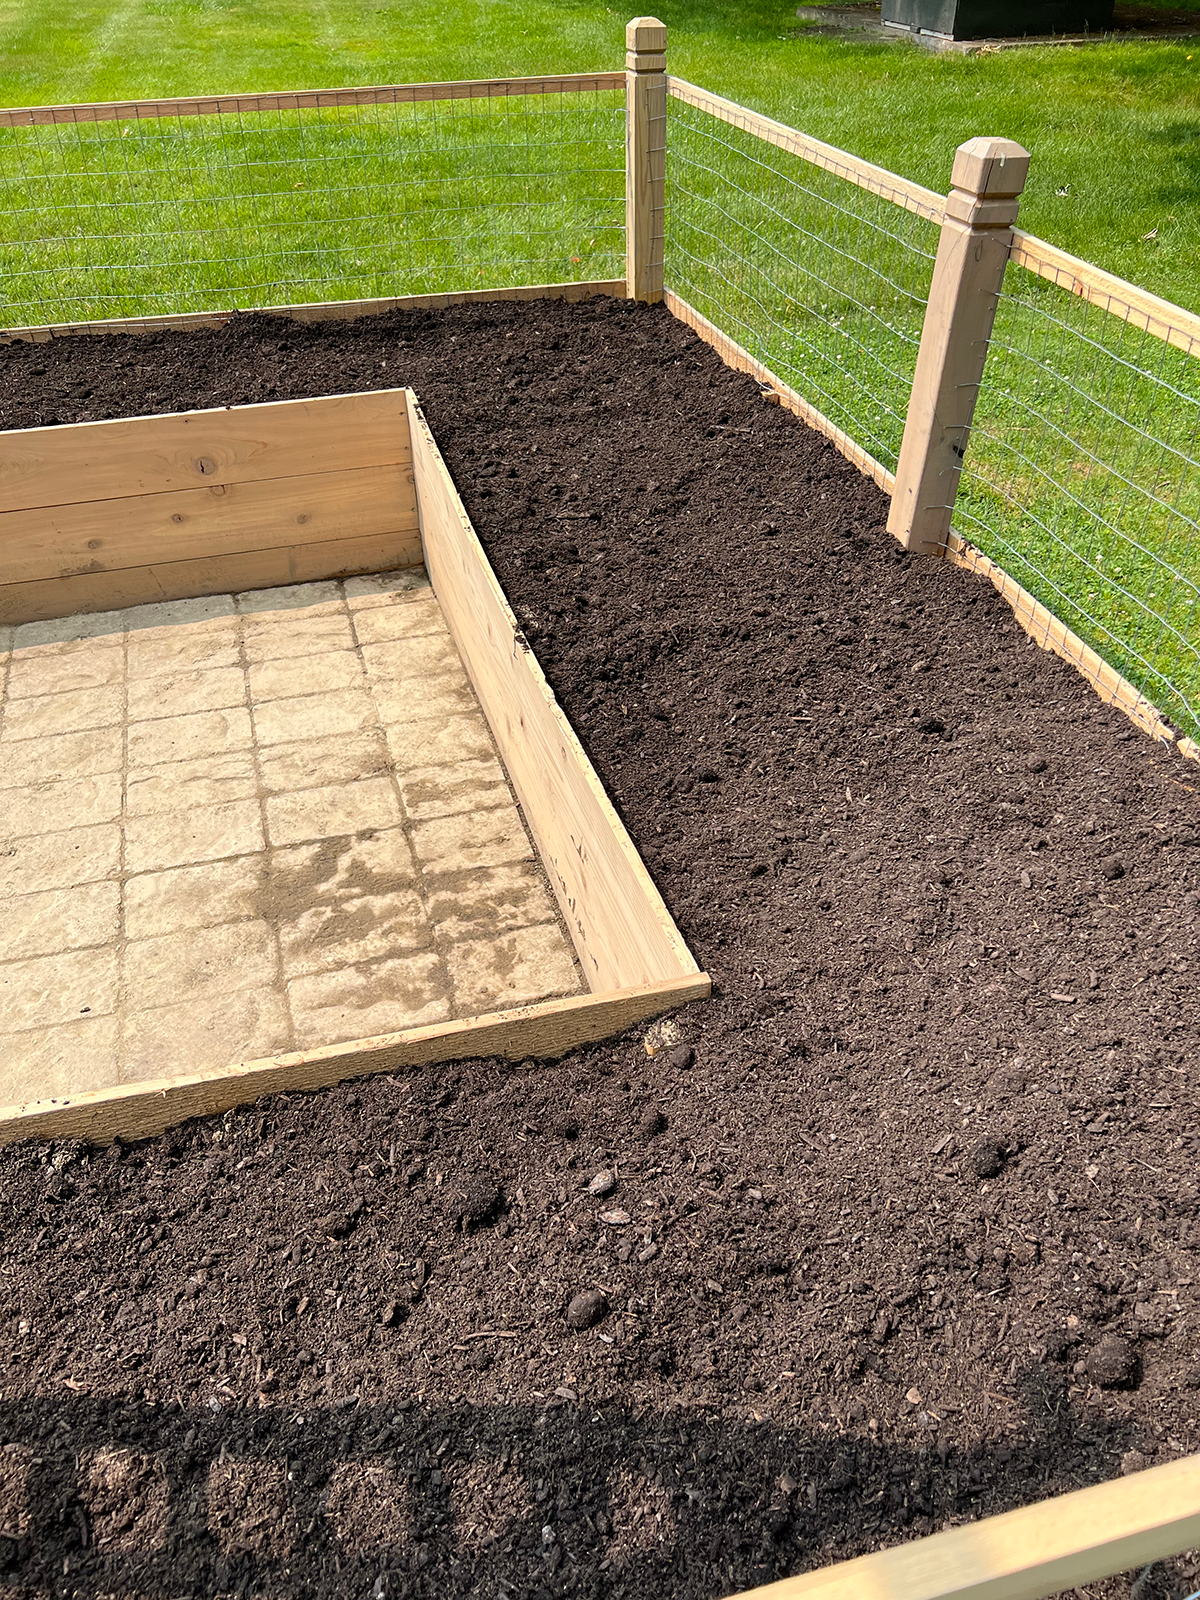
It took plenty of journeys forwards and backwards from our driveway with the wheel barrow however we bought it crammed and had been so excited to begin planting!
I made a video on instagram of the layers we used to fill the backyard you possibly can take a look at!
STEP 9: PLANT YOUR GARDEN!
I went to some completely different native nurseries and picked all types of starter vegetation. Since this was my first time planting in our backyard I had no concept what number of vegetation I would wish so I completely guessed. And naturally I bought too many ha. When it was time to plant, I simply adopted the spacing on every tag as greatest as I might and hoped for one of the best!
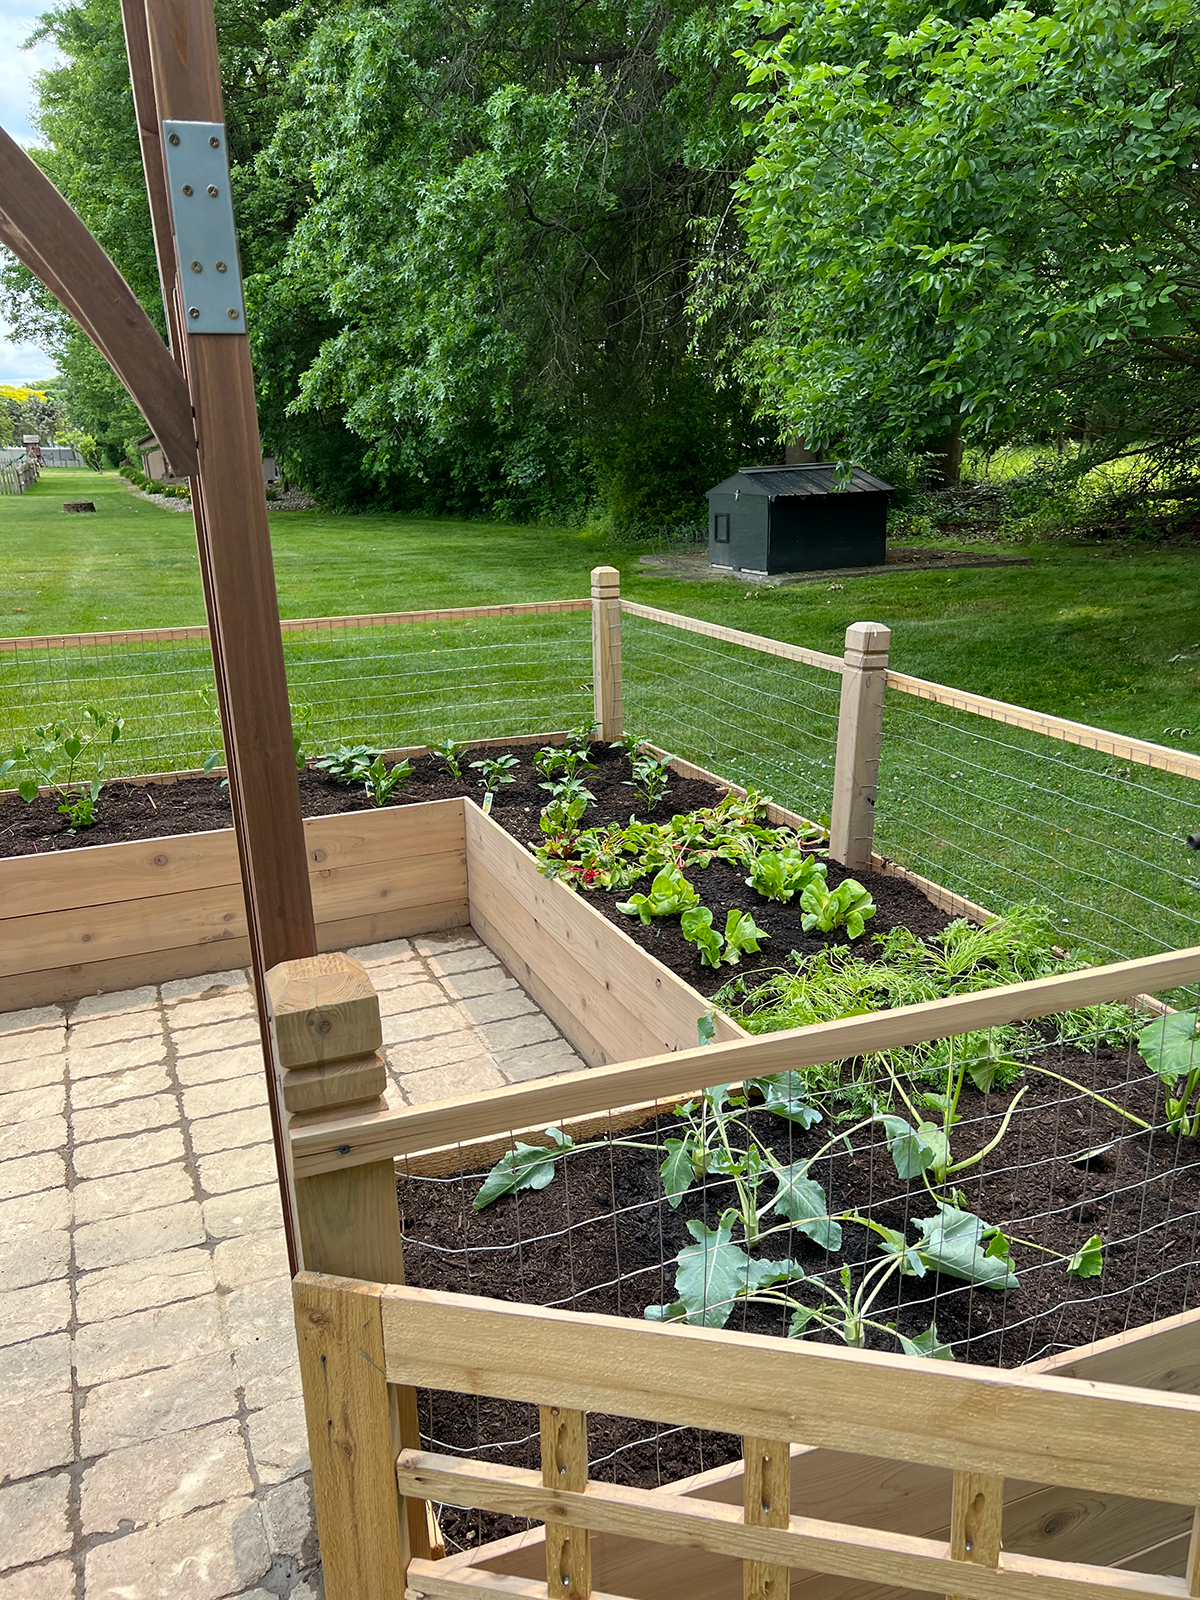
It’s been a couple of month and a half and our backyard is prospering! I can’t imagine how lush and delightful all of it seems to be and we’ve already been in a position to harvest some veggies! We planted tomatoes, acorn squash, cucumbers, beets, peppers, swiss chard, lettuce, zucchini and kohlrabi.
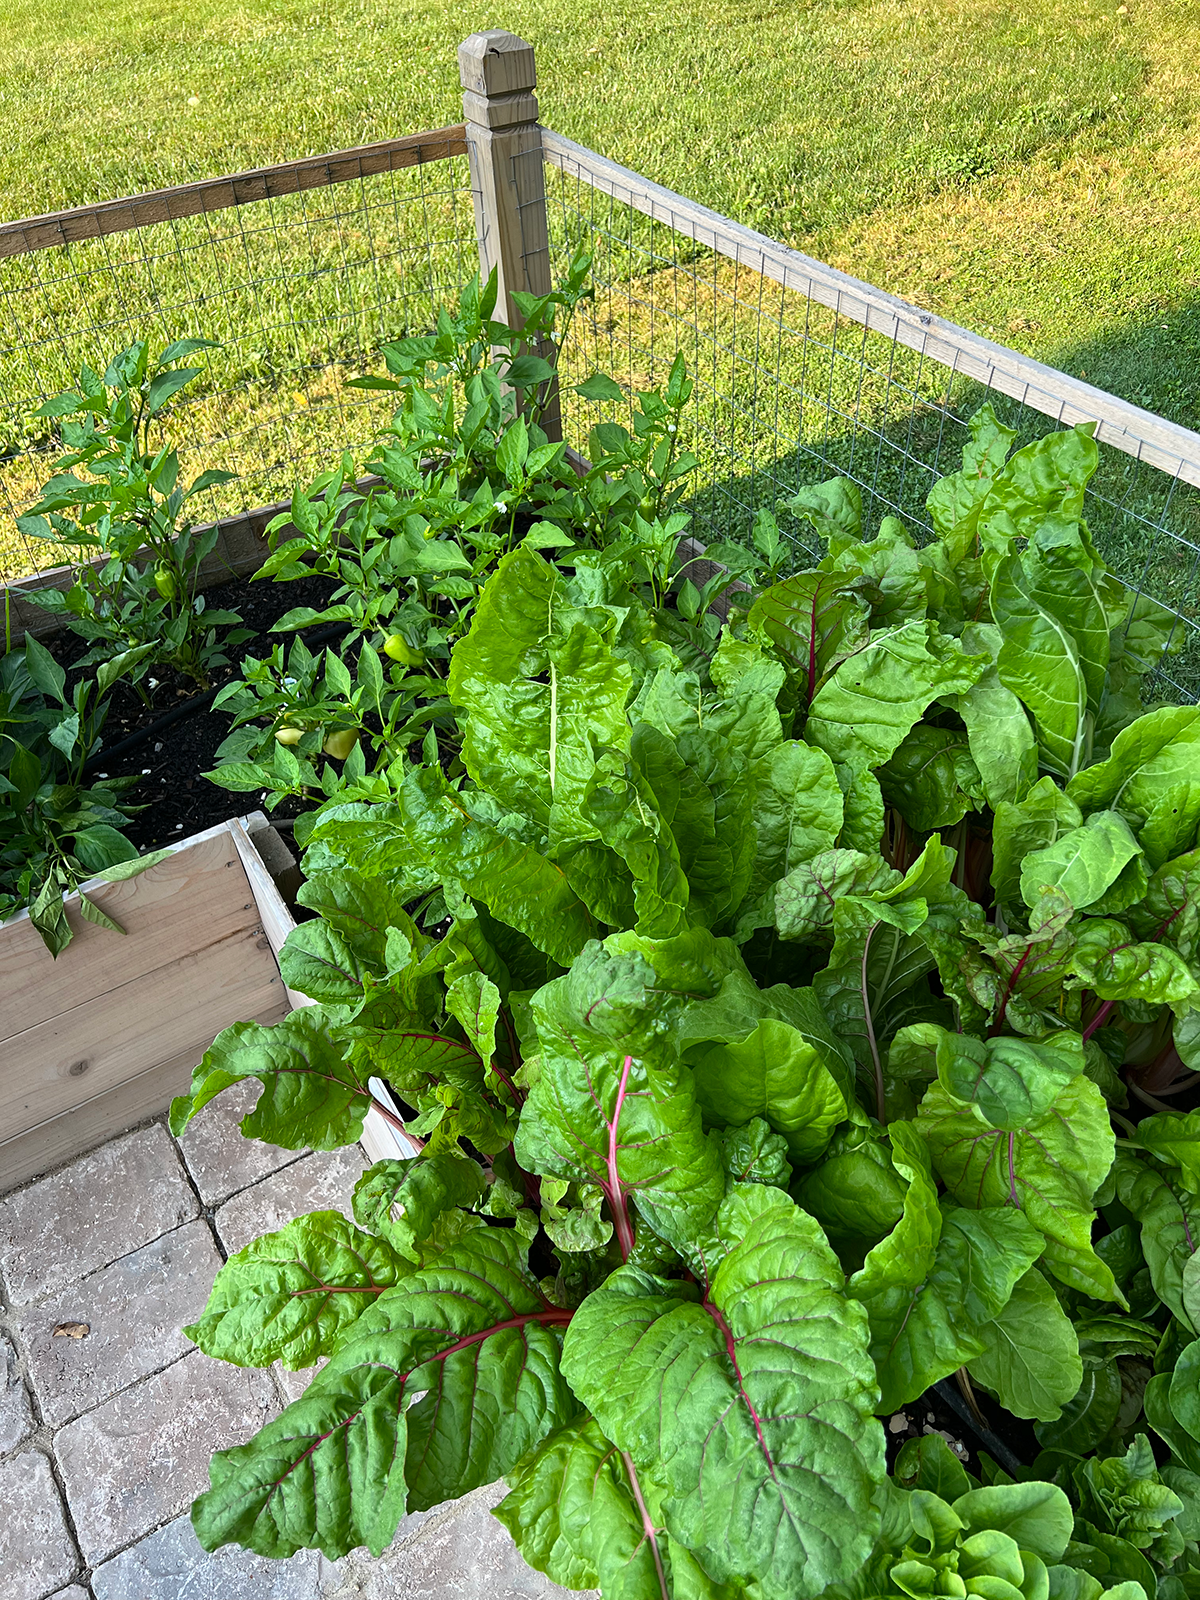
I need to plant some shrubs and flowers across the backyard so you possibly can’t see all the best way down via our neighbors yards. And to assist deliver round some pollinators!
Gardening has introduced me a lot pleasure and is so therapeutic for me. It’s so peaceable and extremely rewarding and it makes me even happier that our complete household likes to get entangled too.

Our enclosed raised backyard is off to an excellent begin and I can’t wait to look at it develop over time! We additionally connected a DIY Watering System so make sure to verify that out!
Associated
[ad_2]