
")
[ad_1]
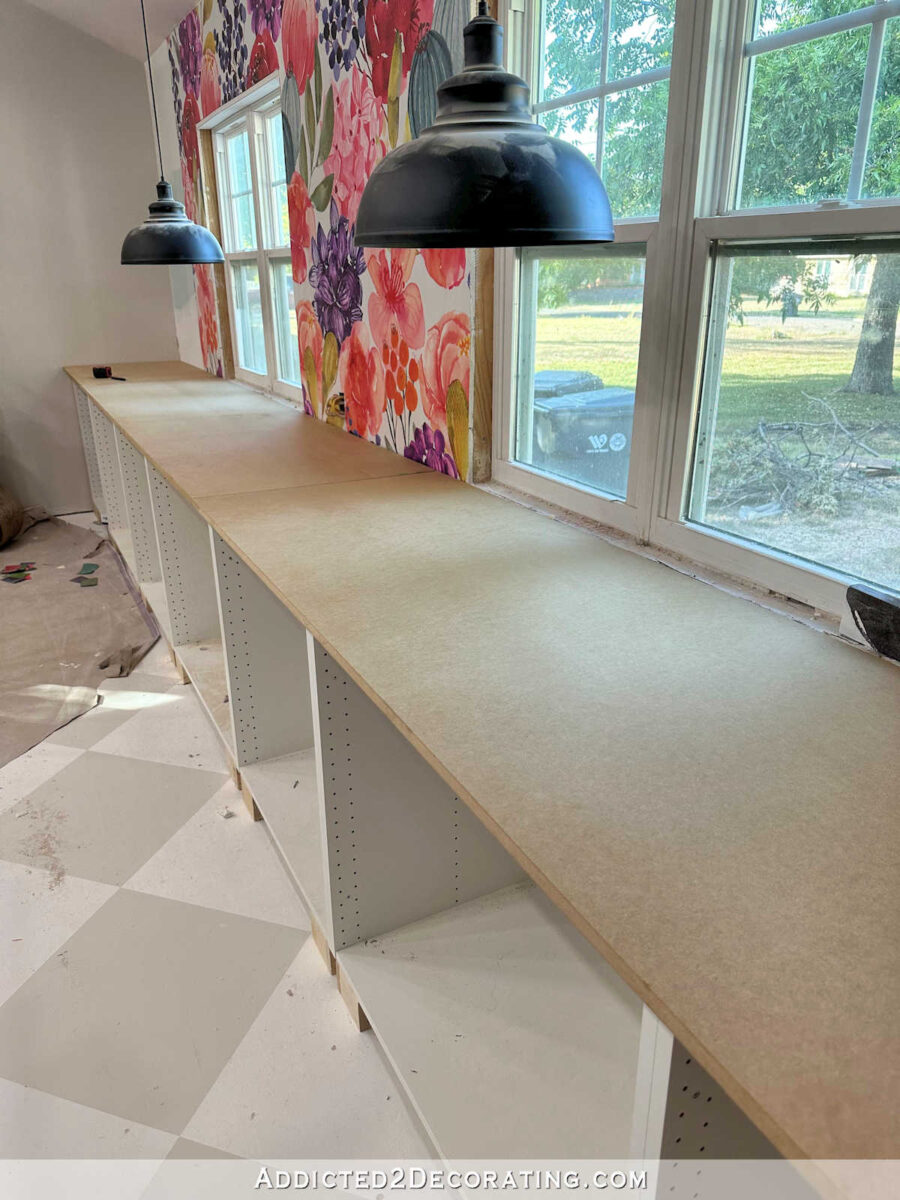
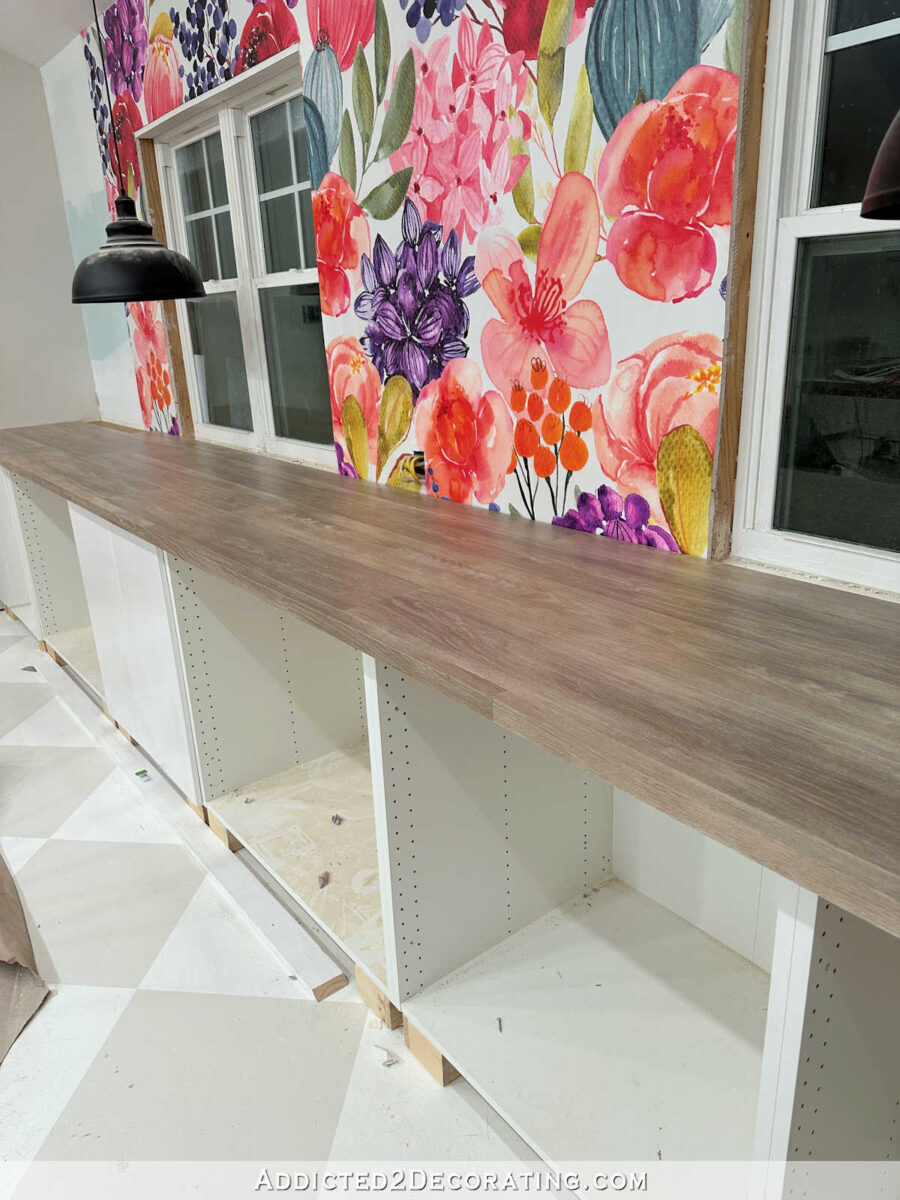
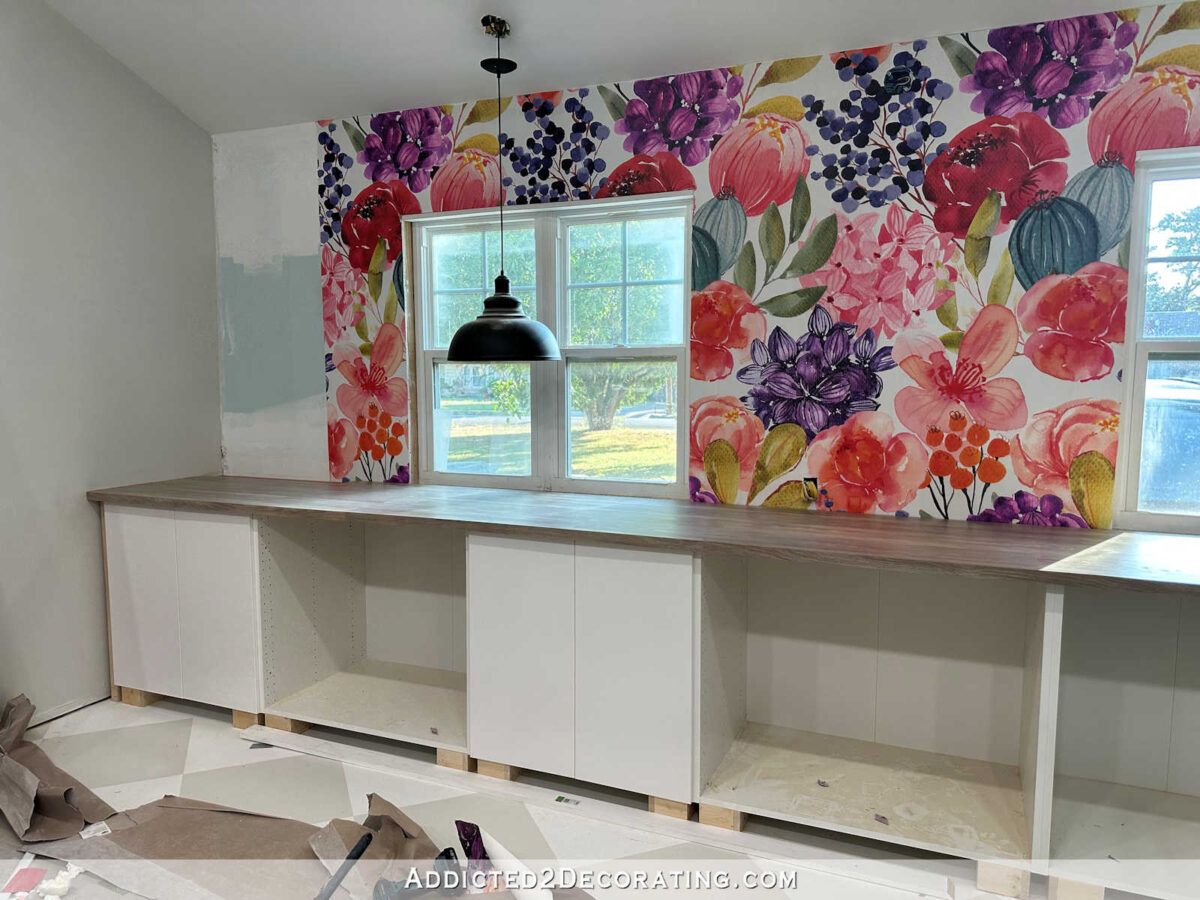
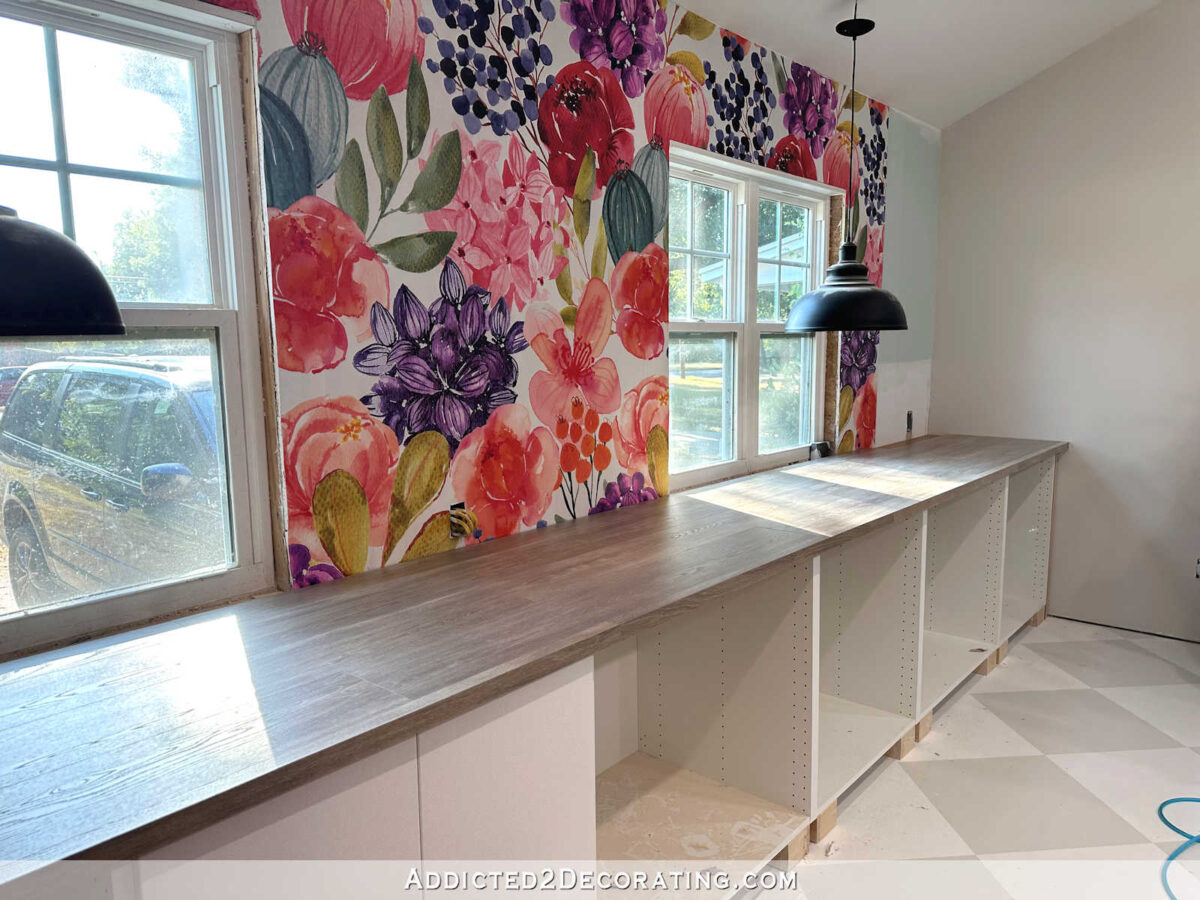
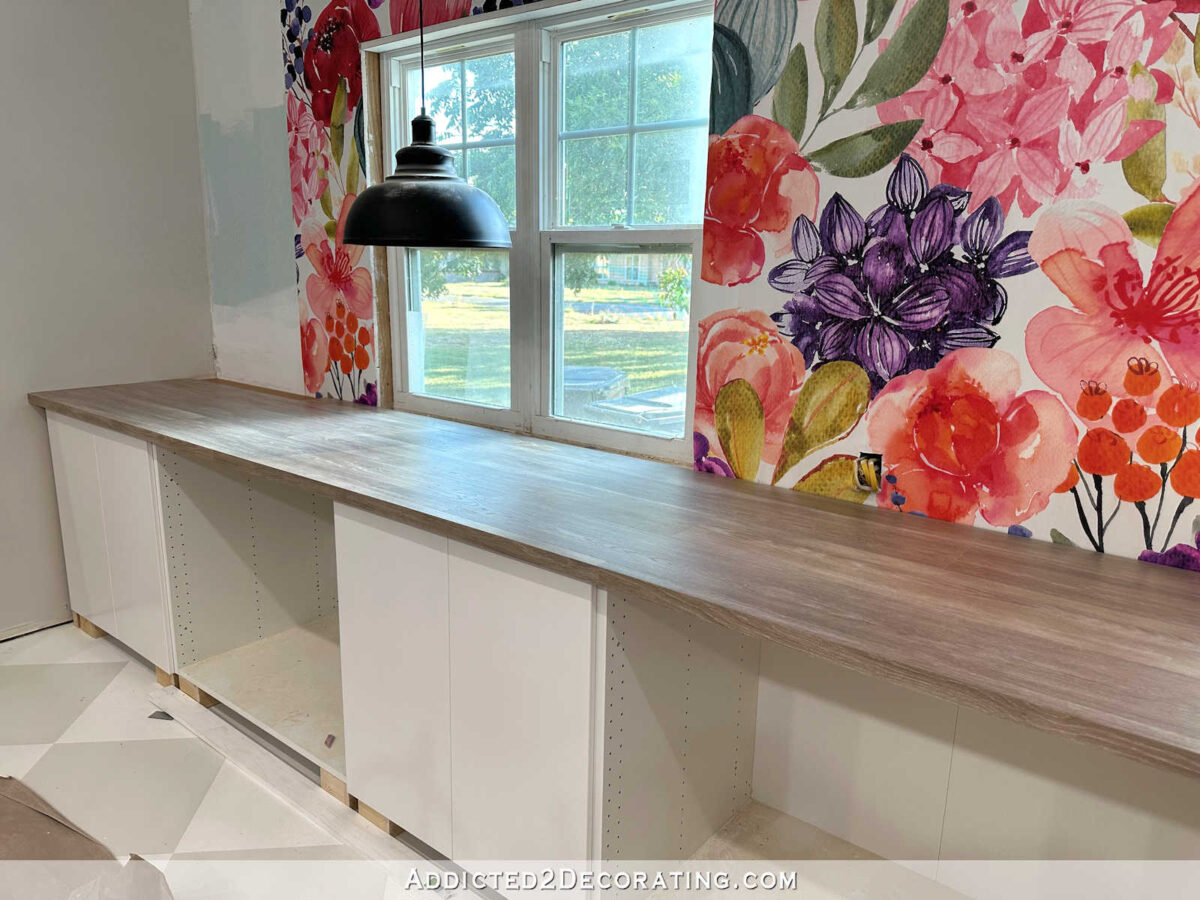
Yesterday, I bought a giant undertaking completed in my studio. The lengthy DIY countertop made with laminate flooring is finished! That was a frightening undertaking, and I’m so glad to have it checked off of my record.
What made it daunting was the size. That countertop is nearly 20 ft lengthy, and it took me perpetually to give you a plan to cowl that 20-foot span whereas not spending a fortune. The entire 20-foot countertop value about $300, and I’m so happy with the way it turned out!
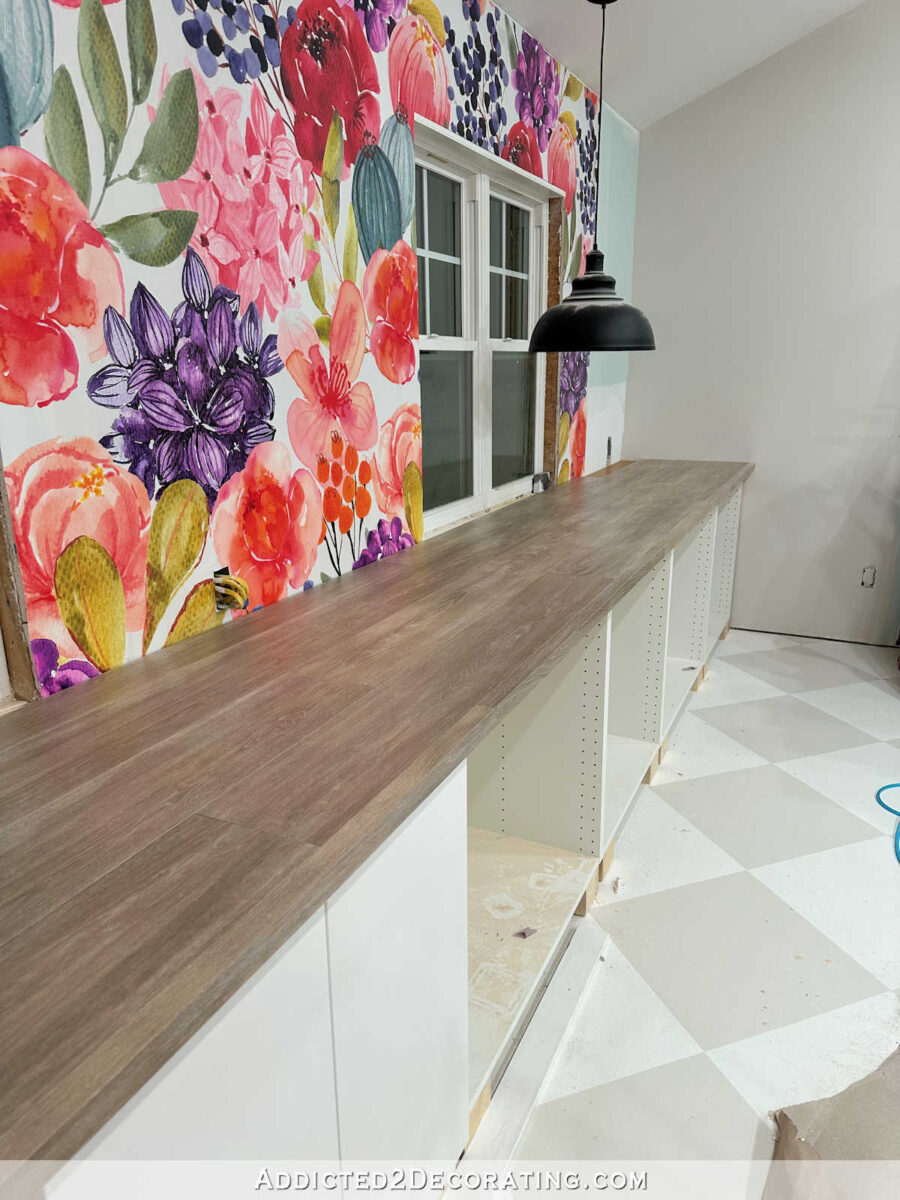
I can’t get the entire countertop in a single image (no less than not proper now with the work tables in the best way), however right here’s a take a look at how the countertop turned out.

I’ll must take photos later within the day when gentle isn’t streaming by way of these entrance home windows, however that should do for now. Doesn’t that look so good?! Particularly for a $300 countertop! And the method as actually fairly easy. So let me begin originally and present you the way I made this countertop.
I began out by reducing a single layer of three/4-inch plywood to suit on high of the cupboards. Since I used to be utilizing MDF, I had the items minimize at House Depot. MDF is de facto heavy, and I don’t like having to raise and minimize these massive items myself, so I allow them to do the heavy lifting for me. 🙂 I had them minimize the MDF to my completed countertop depth minus 1/2 inch, which is the thickness of the laminate flooring I’d be utilizing.
I’ll have to indicate you these subsequent steps on the opposite countertop within the studio, however the course of was the identical on each.
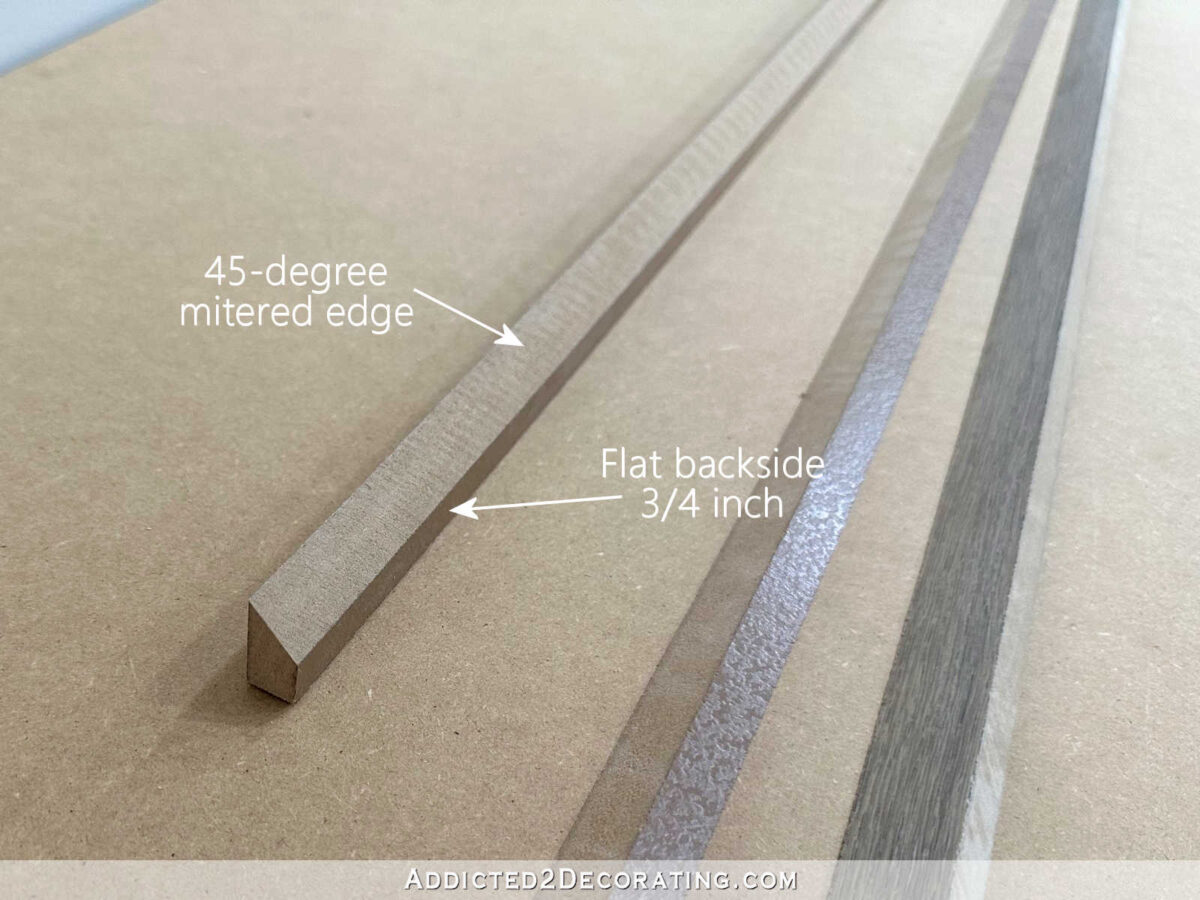
I began on the entrance and labored my approach to the again. So beginning on the entrance, I used my desk noticed to chop strips of the laminate flooring (I used this Capistrano Seashore Oak laminate flooring from LL Flooring) in order that it match the thickness of the MDF (3/4 inch on the lengthy countertop) with a 45-degree mitered edge on high. After which I hooked up these strips utilizing wooden glue and 18-guage end nails. Right here’s a view of that piece from the entrance…
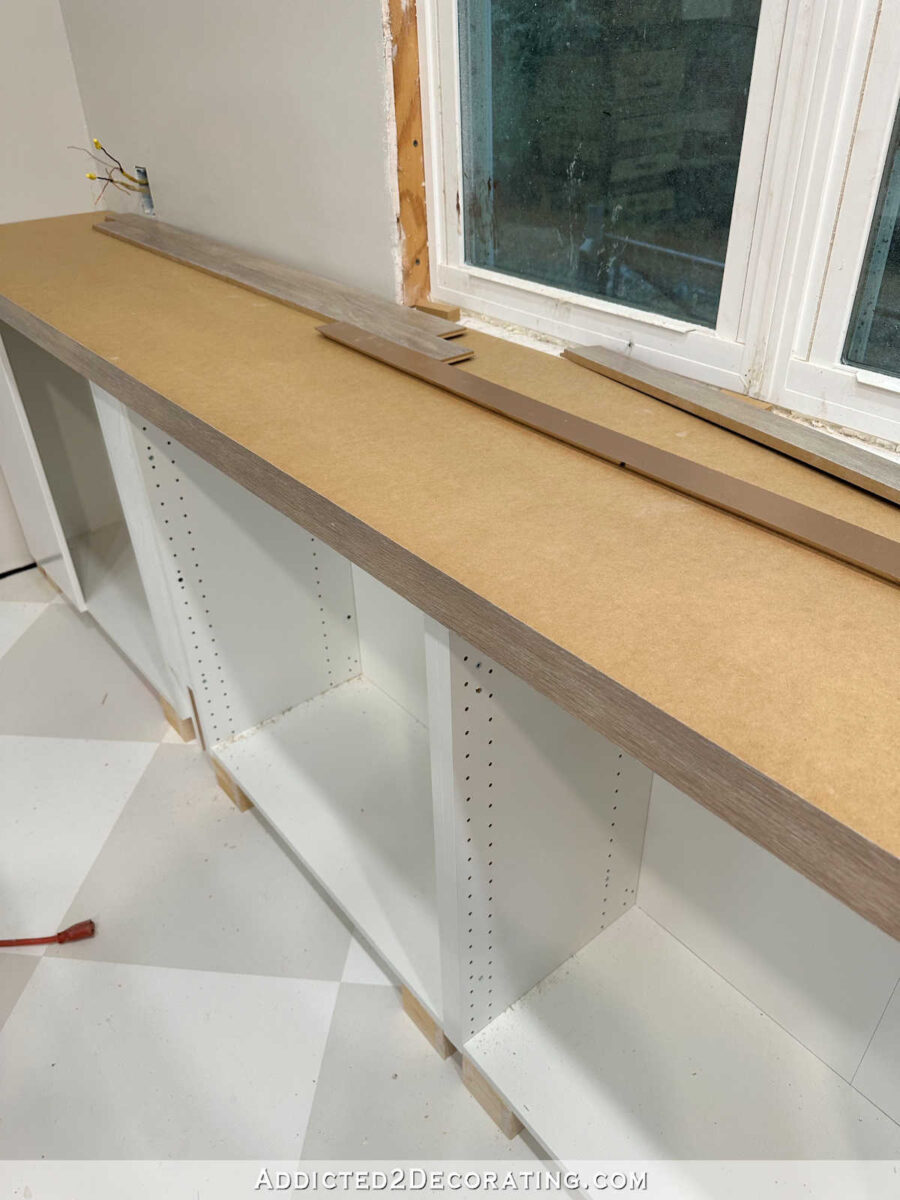
That high mitered edge doesn’t present from the entrance, however right here’s a view of the again facet of that piece. Hopefully you may see how the highest edge is mitered at 45 levels.
And when you couldn’t see it within the image above, hopefully you may see the highest mitered edges on the nook of this countertop or the place that entrance piece meets the wall.
As soon as the entrance items had been hooked up, I minimize the items that may be hooked up to the highest to complete off that entrance piece. Once more utilizing my desk noticed, I minimize them in order that the flat bottom of those items was 3/4 inch vast, and these additionally had a 45-degree mitered edge.
After which I hooked up these in order that the 2 mitered edges met and gave the looks of a stable entrance piece of wooden. I glued and nailed these items on in the identical approach I did the entrance items.
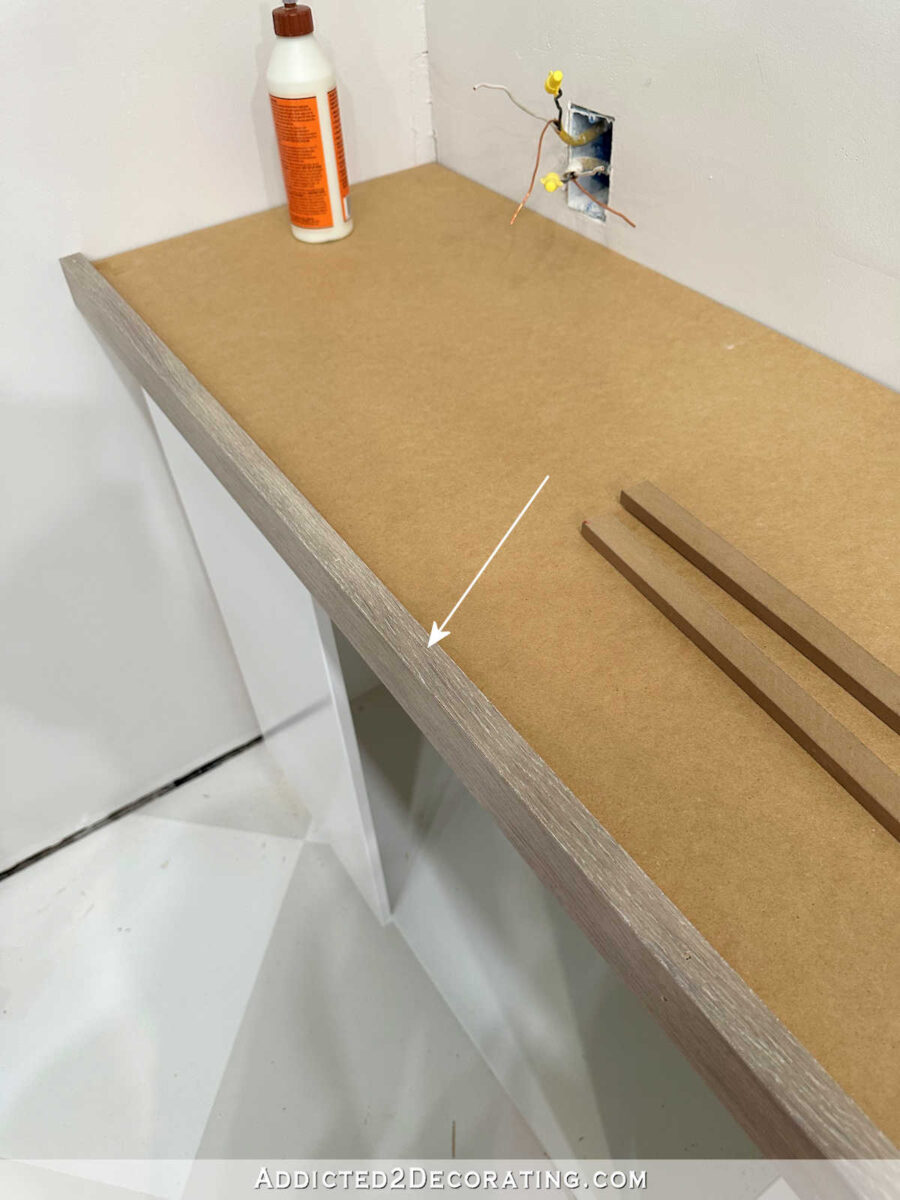
As soon as these two items had been hooked up, that is what it appeared like…

Once more, take into account that the photographs I confirmed above of the steps I took on the entrance edge had been all photos of the opposite countertop within the room, and on that countertop, I used a double thickness of three/4 MDF as the bottom for the countertop. That might have made the completed countertop two inches thick, which is just too thick for my style, so I solely used one thickness of three/4 MDF as the bottom for the lengthy countertop, making the completed countertop 1 1/4 inches. That appeared a lot better.
So the remainder of the steps I’ll present you on the precise 20-foot countertop that I completed. Though, the remainder of the steps are extremely easy.
I began by utilizing my desk noticed to chop off the tongue and groove edges of each piece of flooring. Why? As a result of most laminate flooring or prefinished flooring has apparent grooves between the boards while you put them collectively the right approach (i.e., utilizing the tongue and groove on the boards). Even when they don’t look apparent while you’re looking for flooring, they’ll be apparent while you attempt to use them for a countertop. So I simply ran every board by way of my desk noticed twice and minimize off the tongue and groove on all sides.
After which I crammed within the countertop space, beginning on the entrance and dealing my approach to the again, with the trimmed items. It was like placing collectively a quite simple puzzle made for a 3-year-old. 😀 A number of the items needed to be minimize to size utilizing my miter noticed, and the very again row needed to be ripped on the desk noticed to suit the remaining house. However aside from that, it was extremely simple.
As soon as I had the items match collectively and the countertop utterly lined, I eliminated the items row by row and numbered the backs in order that I’d know which row to put each bit, and which order to put in them. After which, utilizing a 6-inch curler, I utilized two coats of Contact Cement to the again of every piece, letting the primary coat dry totally earlier than making use of the second.
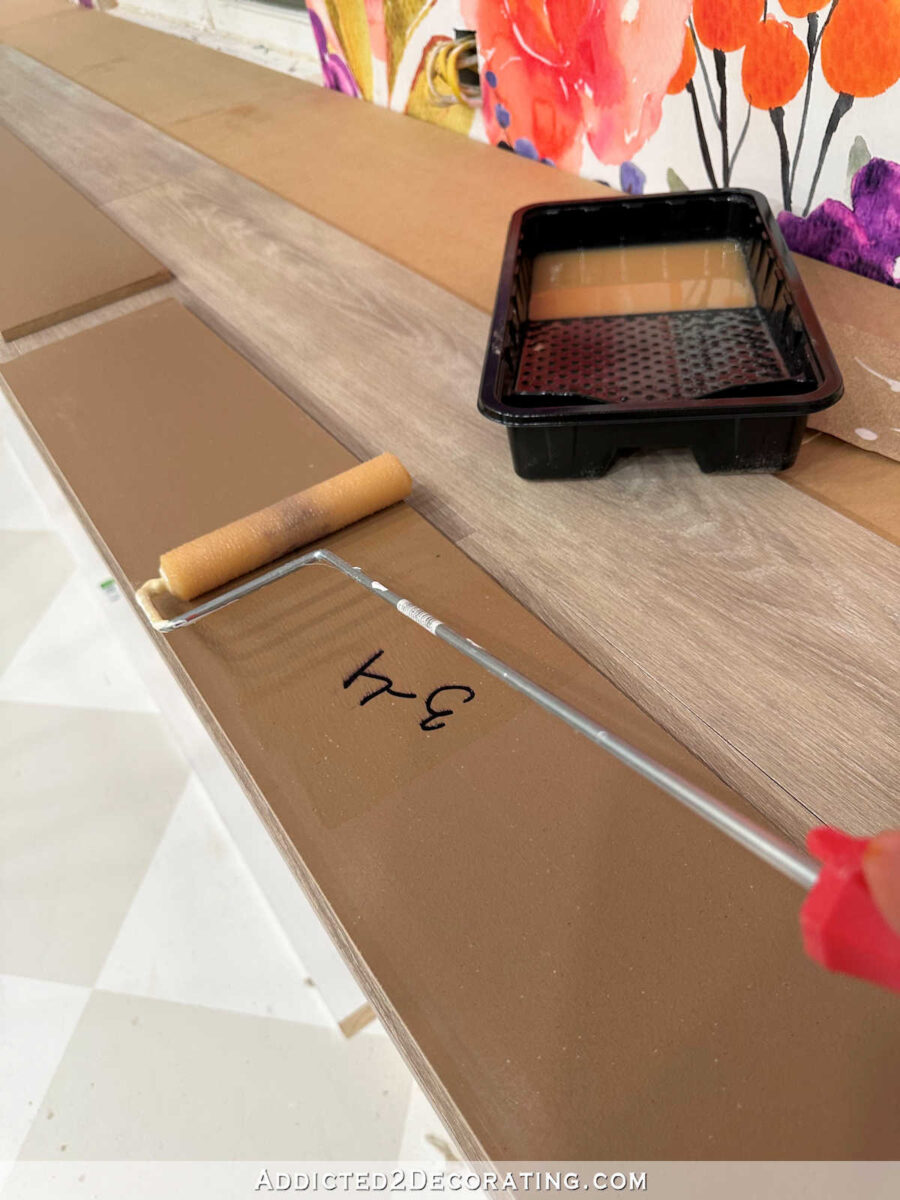
With these flooring boards positioned apart to dry, I utilized two coats of Contact Cement to the MDF, letting the primary coat dry totally earlier than making use of the second.
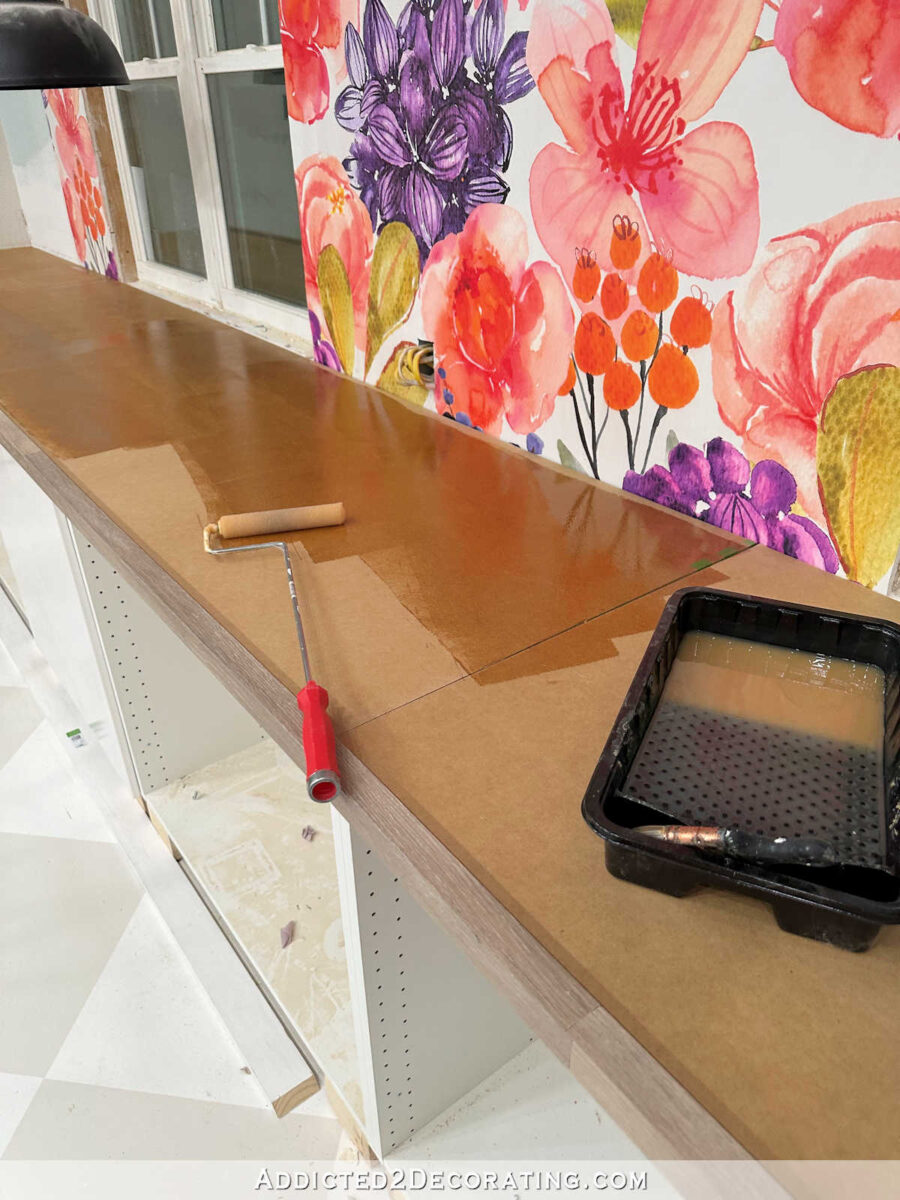
As soon as the Contact Cement was dry on the MDF, I started placing my massive puzzle again collectively, beginning on the entrance and dealing my approach to the wall. Placing every part again collectively took about fifteen minutes, if even that lengthy. It was so fast and simple.
As I put each bit in place, I pressed it down (particularly specializing in the corners) as exhausting as I may to ensure it was making good contact with the MDF and sticking correctly. After which as soon as the entire boards had been in place, I went again and pressed every part down yet another time. If I had a flooring curler, this may have been an excellent use for it.

At that time, it appeared fairly good, however it nonetheless wasn’t completed.
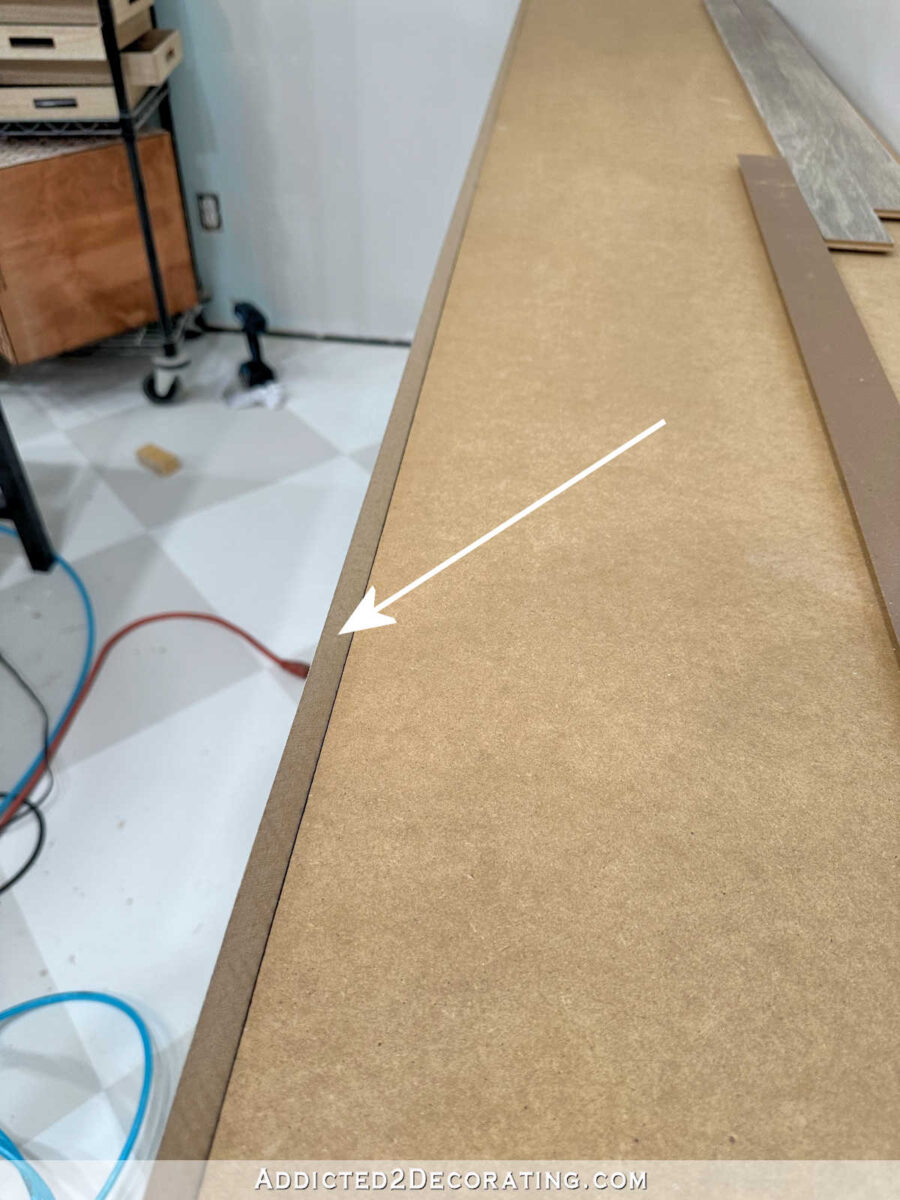
Since the entire items had been minimize on the desk noticed and miter noticed, they didn’t match collectively completely. I imply, they had been a great match, however not an ideal match. A number of the boards had tiny cracks between them like this…

So I took a scrap piece of the flooring to House Depot and had them colour match the darkest colour within the flooring as carefully as doable, after which I introduced that dwelling and blended a few of that paint into latex caulk.
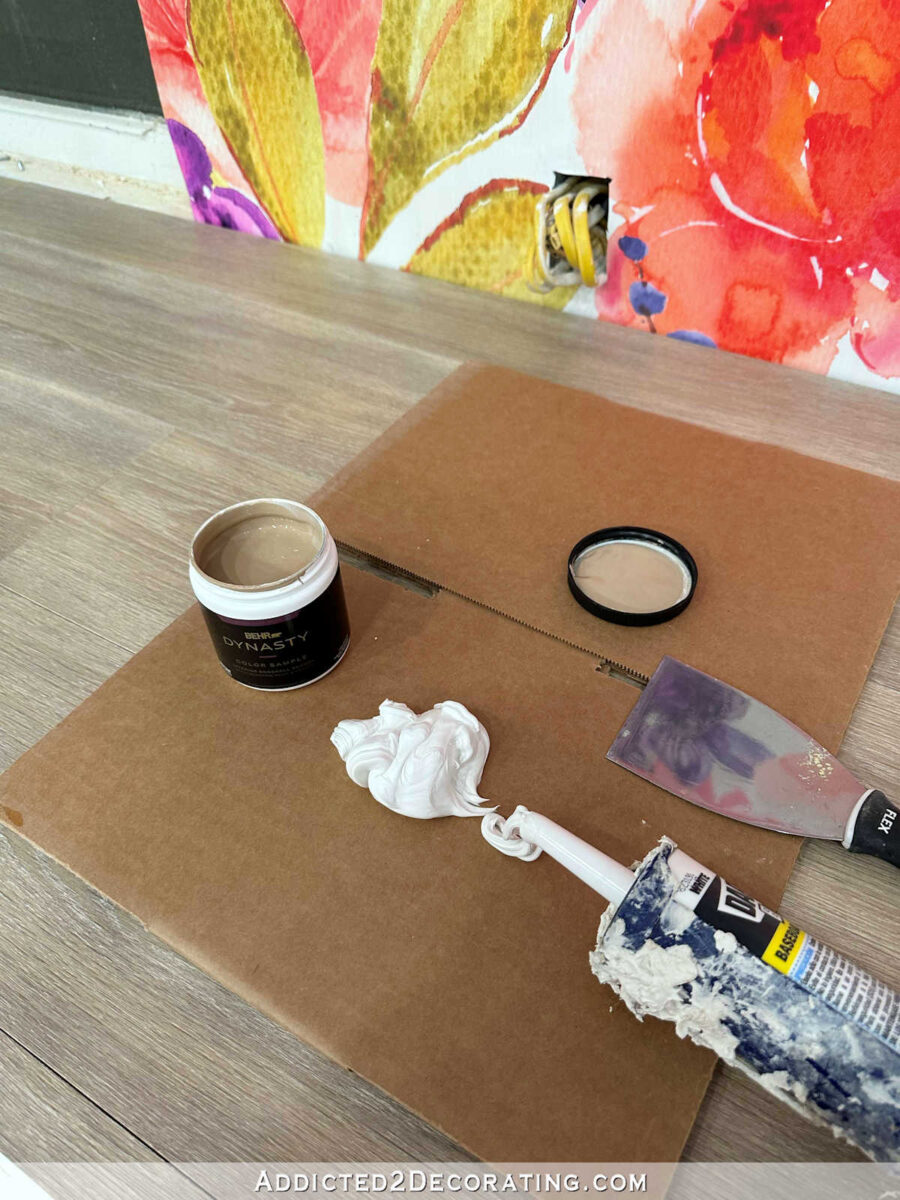
I had them match the darkest colour within the flooring as a result of the white of the caulk would lighten the colour as soon as it was blended.
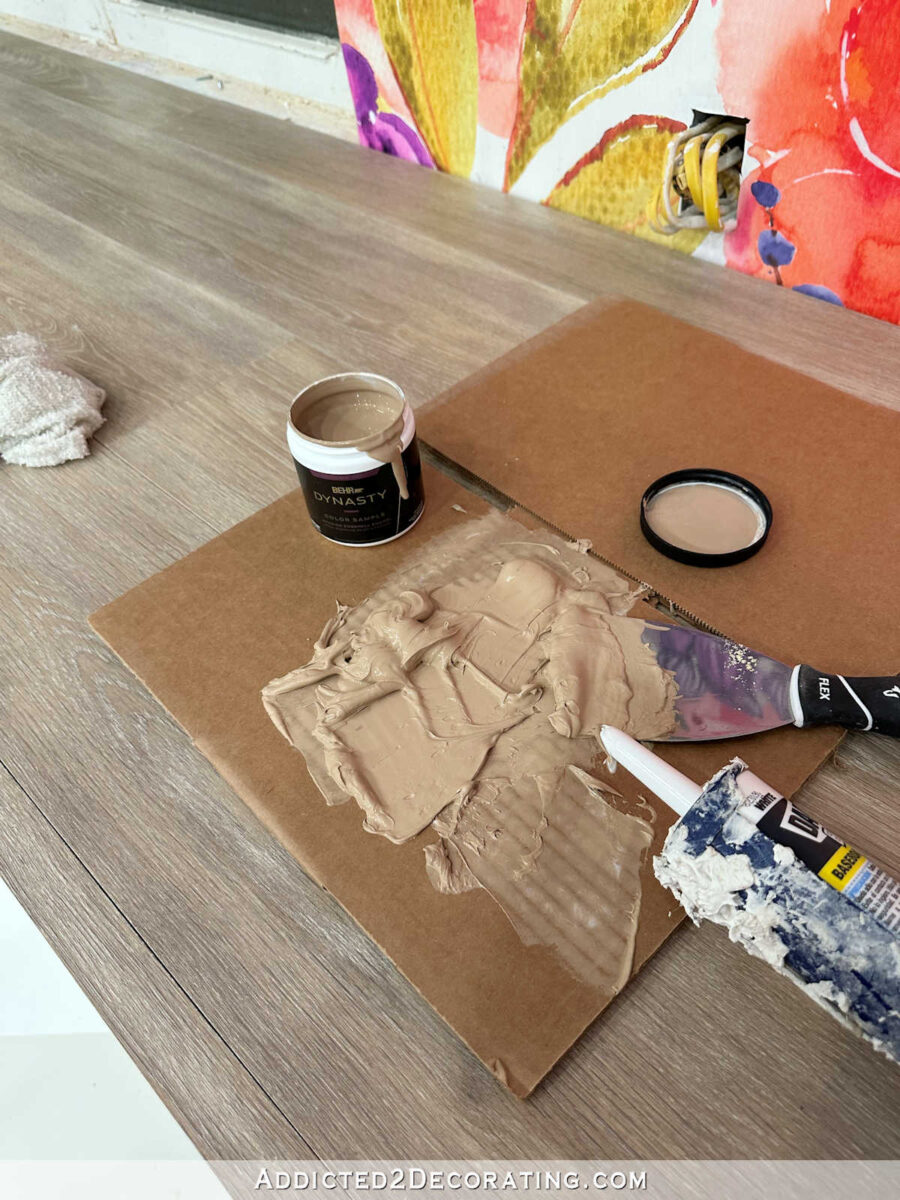
After which I used my most trusted and most used device ever (my finger) and crammed within the cracks with the coloured caulk. You’ll be able to see one of many little cracks alongside the entrance fringe of the countertop within the picture beneath. This was earlier than caulking.
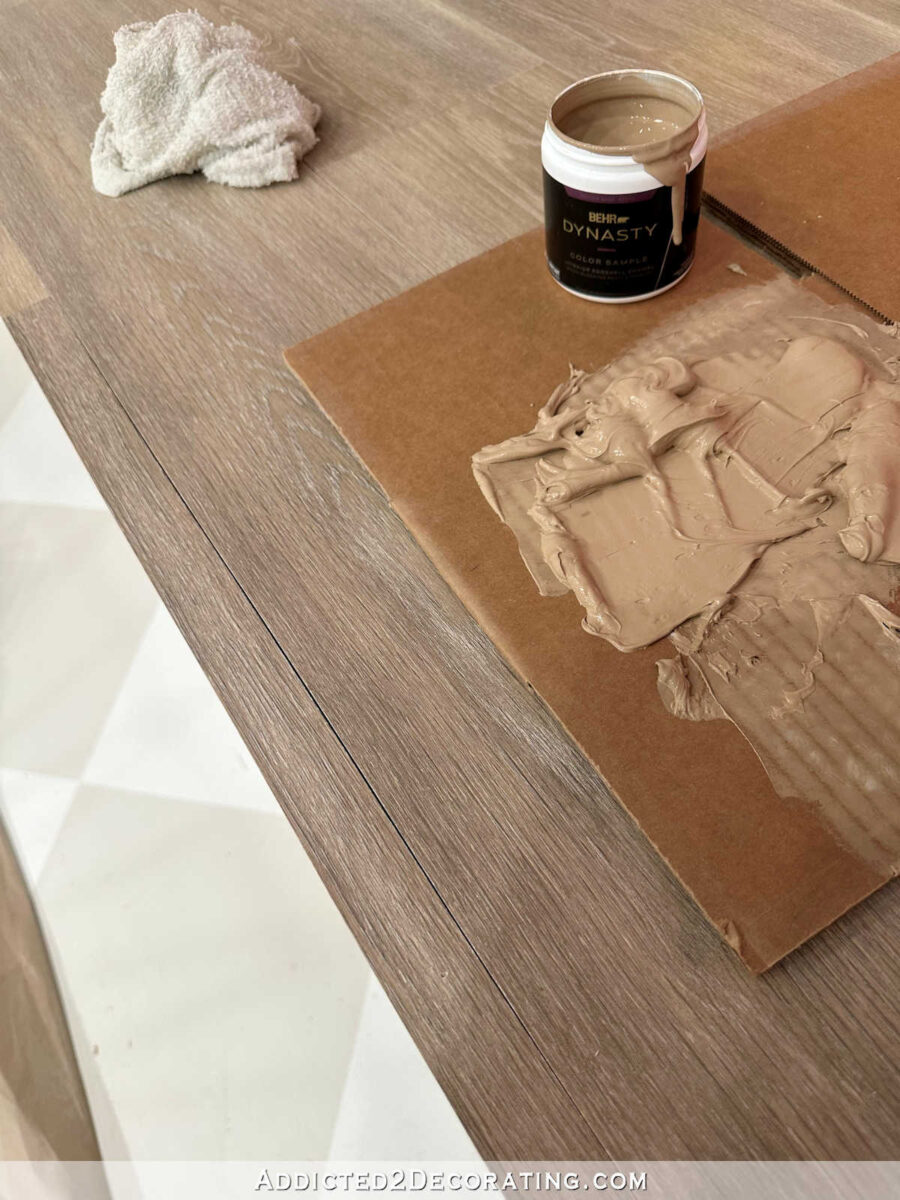
I simply smeared it on with my finger, ensuring that I pressed it down into the crack…
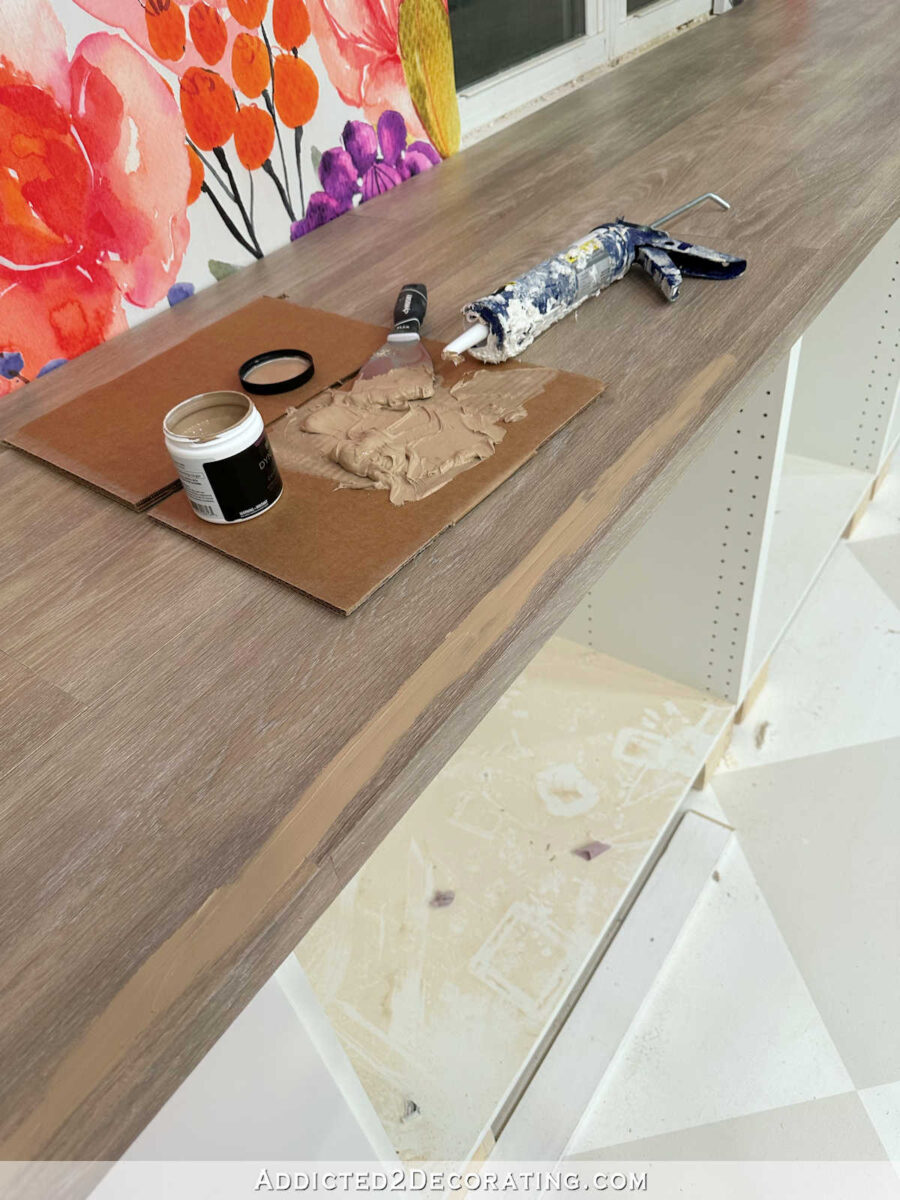
After which after I wiped off the surplus with a moist rag, it appeared a lot better! No extra darkish crack.

I’ll in all probability return and do a second coat as a result of I believe including the latex paint to the caulk made the caulk shrink greater than ordinary because it dried. However that will likely be a fast and simple course of.
I’m so happy with how this countertop turned out! And I can’t consider I made a 20-foot-long countertop for round $300. I don’t assume you may beat that! 😀

Once more, I’ll must take higher photos later within the day when the solar isn’t coming by way of these home windows so immediately, however I believe you may see it effectively sufficient even with the solar.
This really exceeded my expectations, and was a lot simpler to make than the pantry countertop that I made utilizing actual hardwood flooring that had the be utterly sanded and completed as soon as the boards had been put in. With this, all that was wanted after the boards had been put in was slightly little bit of caulking. You’ll be able to’t beat that!
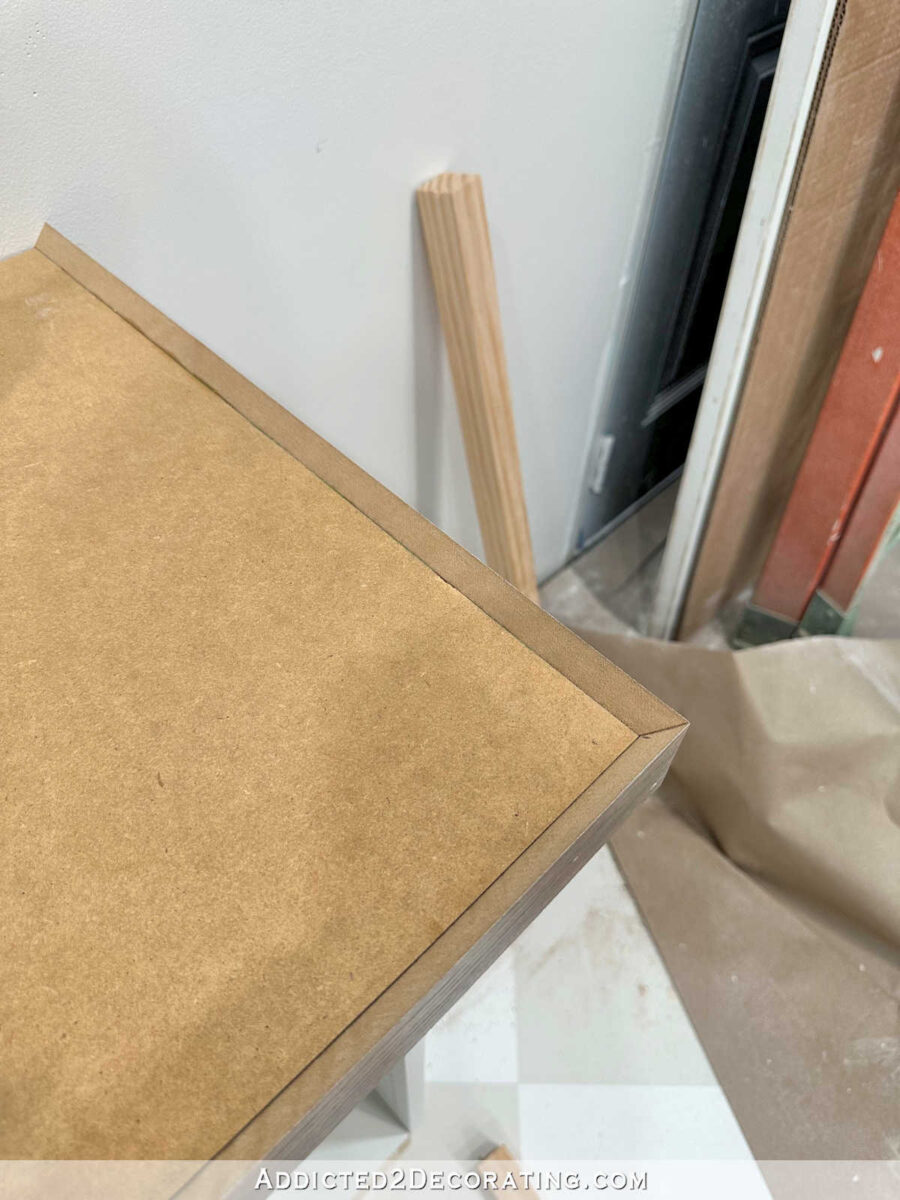
And now…lastly…I get to place the higher cupboards in place on both finish of this countertop and canopy up the areas that haven’t any wallpaper. Chances are you’ll discover that the very again nook on every finish doesn’t have a bit of flooring hooked up.
That’s as a result of I used to be actually one flooring board in need of protecting each counter tops, and there was completely no approach I used to be going to buy one other full package deal of this flooring only for one further board, so I simply made positive the uncovered areas can be immediately beneath the higher cupboards. 😀 I’ll discover another 1/2-inch materials to fill in these areas earlier than setting the higher cupboards in place.
Now that the countertop is completed, the following steps will likely be placing collectively the higher cupboards and trimming these out, trimming out the underside cupboards, and ending {the electrical} shops within the backs of the cupboards. I’ve already bought one outlet in place, however I’ve three to go. After which the scary half. I’ve to chop 3-inch holes within the countertop for the countertop grommet shops. Yikes! That’s scary to me, however it needs to be carried out if I would like easy accessibility to electrical shops on this wall.

Addicted 2 Adorning is the place I share my DIY and adorning journey as I transform and enhance the 1948 fixer higher that my husband, Matt, and I purchased in 2013. Matt has M.S. and is unable to do bodily work, so I do the vast majority of the work on the home on my own. You’ll be able to be taught extra about me right here.
[ad_2]