
 Use (Set up With out Sektion Legs Or Suspension Rail)")
[ad_1]
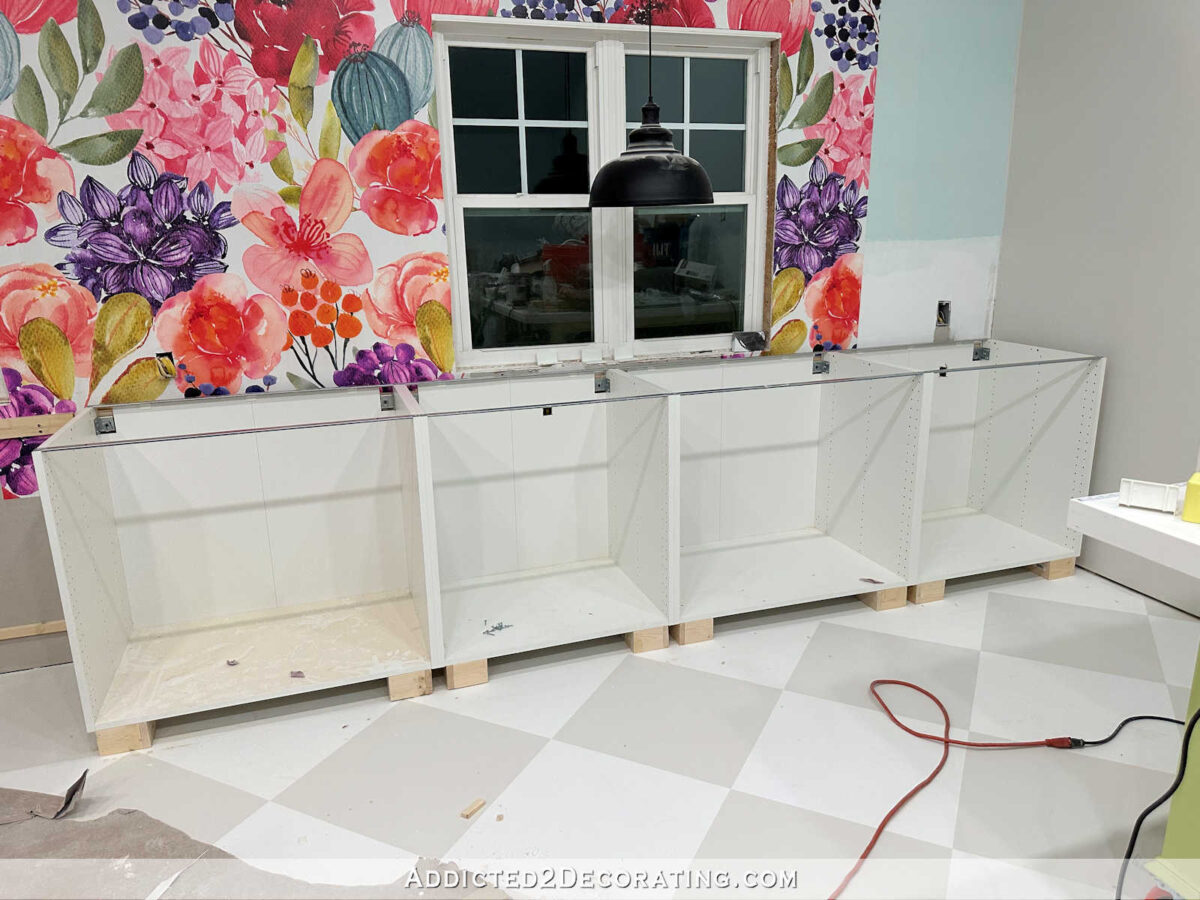
I had a alternative between putting in the brand new studio rest room wallpaper or putting in the studio cupboards this weekend, and I made a decision to put in so the studio cupboards. So when you confirmed up right here at this time hoping to see the wallpaper put in, I’m so sorry! You’ll have to attend a bit longer. However seeing the IKEA Sektion cupboards lastly put in on the lengthy wall of the studio is fairly thrilling!
This wasn’t precisely an easy set up of IKEA Sektion cupboards. These cupboards are made for use in a kitchen, and commonplace kitchen cupboard top is 36 inches. So these cupboard containers are 30 inches excessive, and when you add the legs that IKEA sells for them, after which add a typical thickness countertop, the completed counteretop will probably be proper at 36 inches excessive.
Effectively, I didn’t have 36 inches of top to work with since I’m utilizing these in my studio on a wall with two home windows which have been put in on the excellent top to permit for the standard desk-height countertop, which is 30 inches excessive.
Since I’m probably not utilizing this as a desktop, I don’t thoughts the completed countertop being a little bit larger than 30 inches, so it simply wanted to be someplace between 30 inches excessive and round 34 inches excessive.
That implies that the IKEA legs wouldn’t work for my functions. The minimal top for the IKEA legs is 3.5 inches, and the best I may use is 3 inches. So I ended up making my very own very tough toes out of 1×4 lumber that I ripped down to three inches, after which minimize into 4-inch-long items. I made every foot out of 4 items, glued and nailed collectively utilizing 16-gauge 1.5-inch nails in my nail gun.
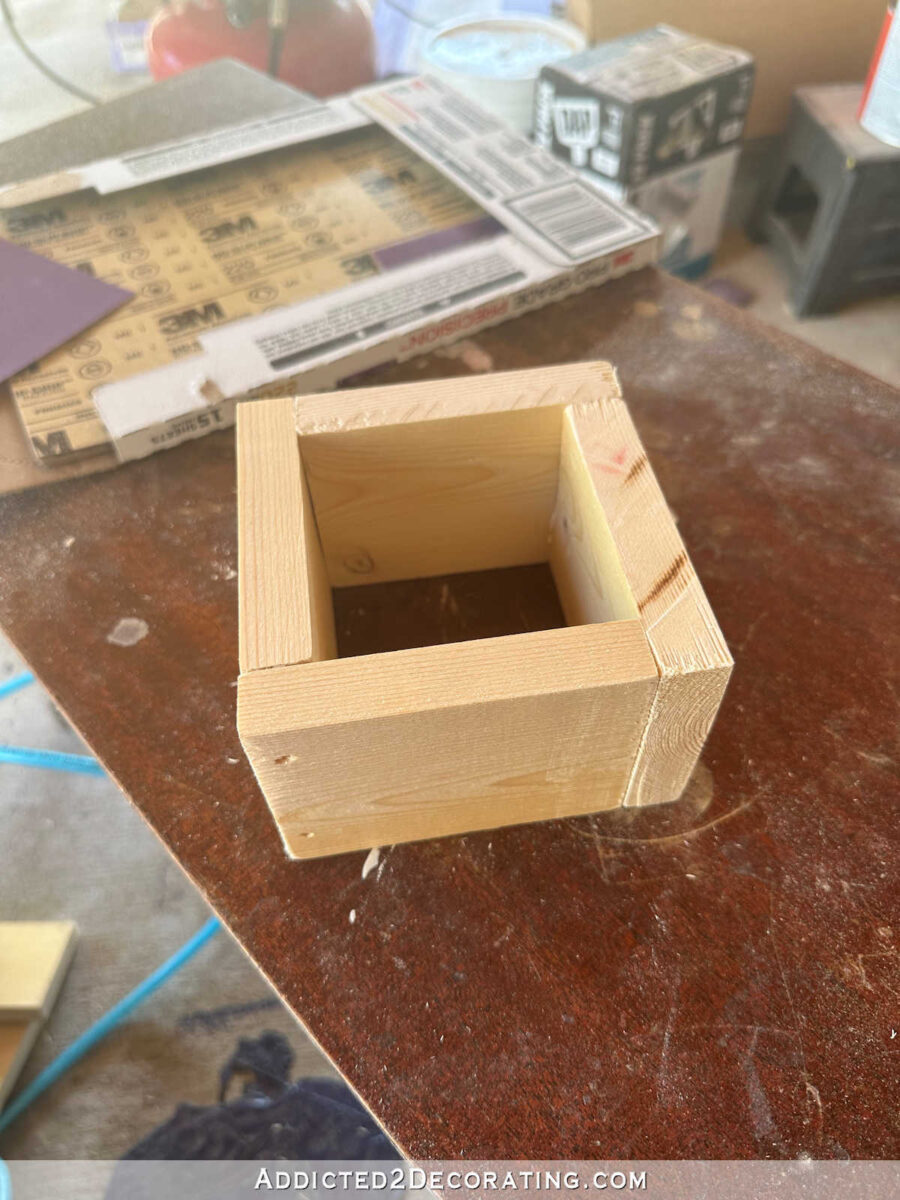
I wasn’t involved with them being fairly since they gained’t present on the completed cupboards as soon as the entire trim is put in. I simply wanted the entire toes to be a constant 3 inches excessive.
As soon as I had the entire toes made, I positioned my cupboard containers on the ground entrance down, after which connected the toes utilizing scorching glue. I do know lots of people don’t belief scorching glue as a result of they’ve solely ever used these dinky little scorching glue weapons that you just purchase on the craft retailer. However once I discuss scorching glue, I’m speaking about an precise scorching glue gun that you just man within the software division of House Depot or Lowe’s that places out a really thick bead of glue.
When attaching the entrance toes, I made positive the entrance of every foot was flush with the entrance of the cupboard since I don’t plan on having a toe kick on these cupboards. If I had wished a toe kick, I might have moved these entrance toes again 4 inches.
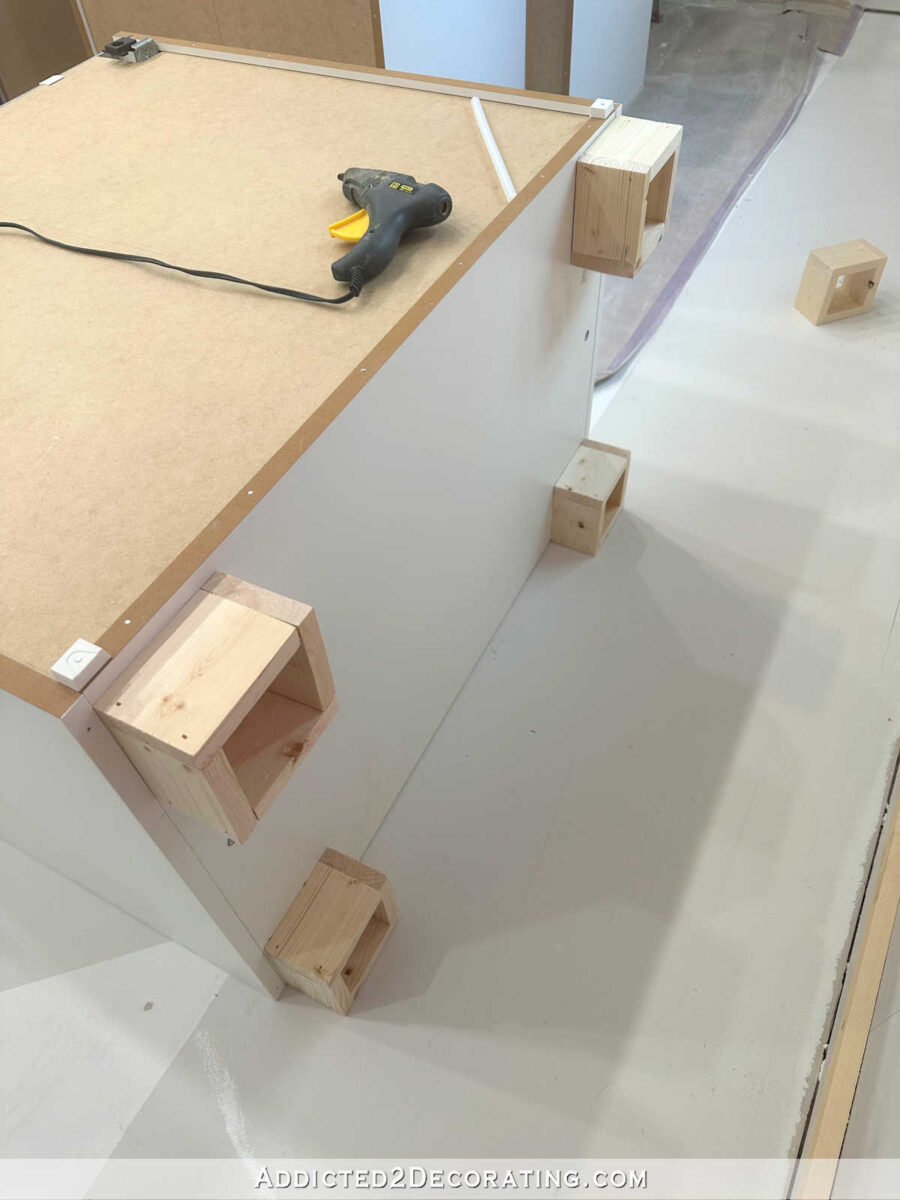
As soon as I had these connected, I positioned the cupboard proper facet up, and it regarded like this…
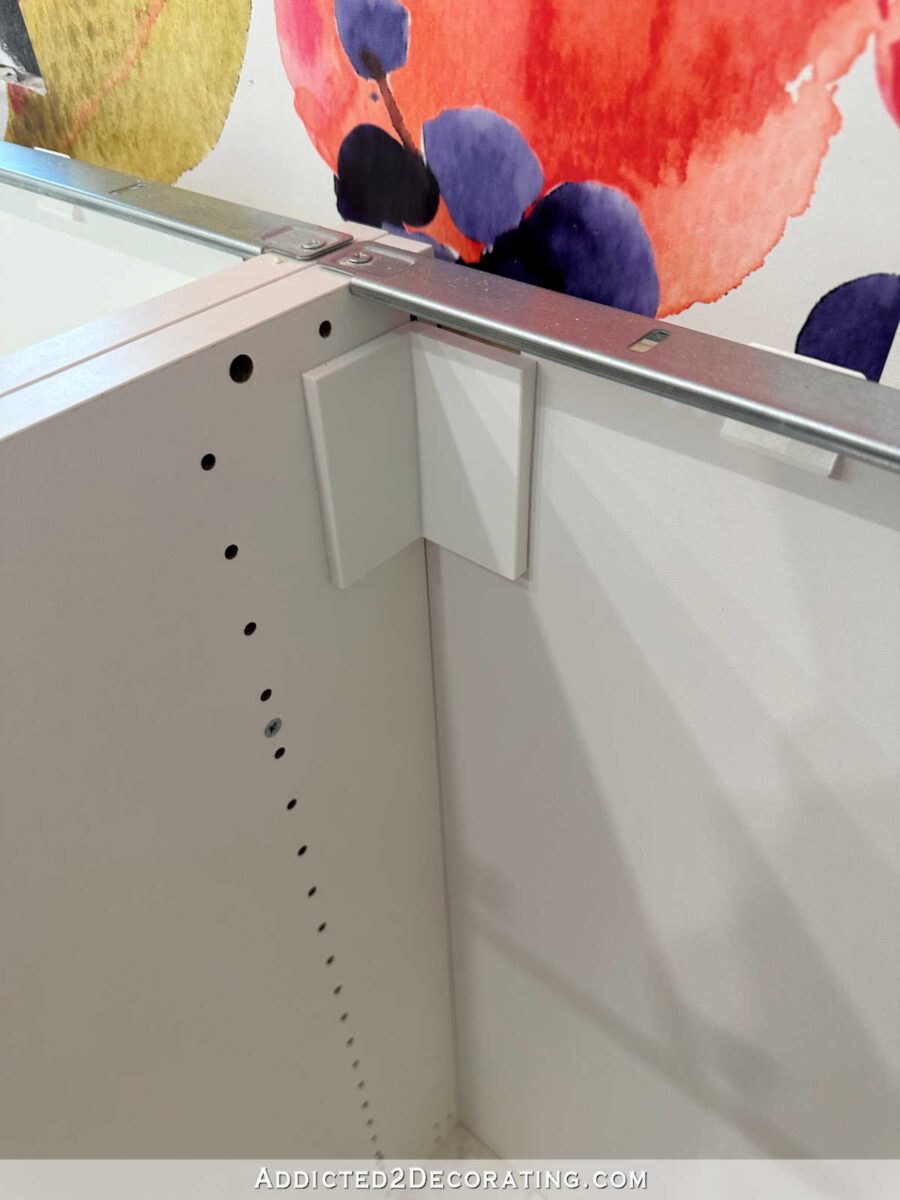
After I ordered my cupboards, I wasn’t actually positive precisely how I used to be going to put in them (I used to be nonetheless deciding on how I wished my completed cupboards to look), so I didn’t order the suspension rails which can be typically used to put in the Sektion cupboards. Ordering them individually at a later date would have price $120 only for transport. So I made a decision to skip the suspension rail and simply connect the cupboards to the wall with out the suspension rails.
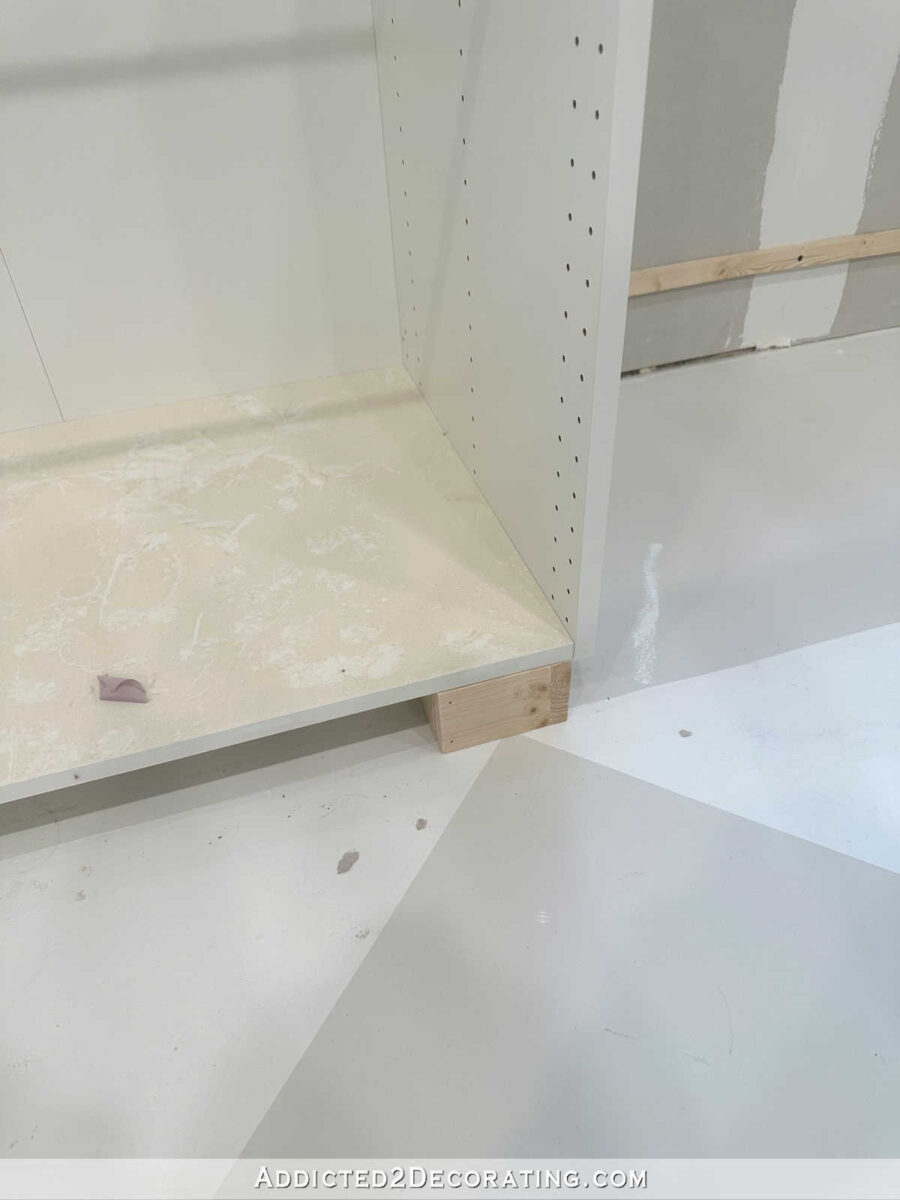
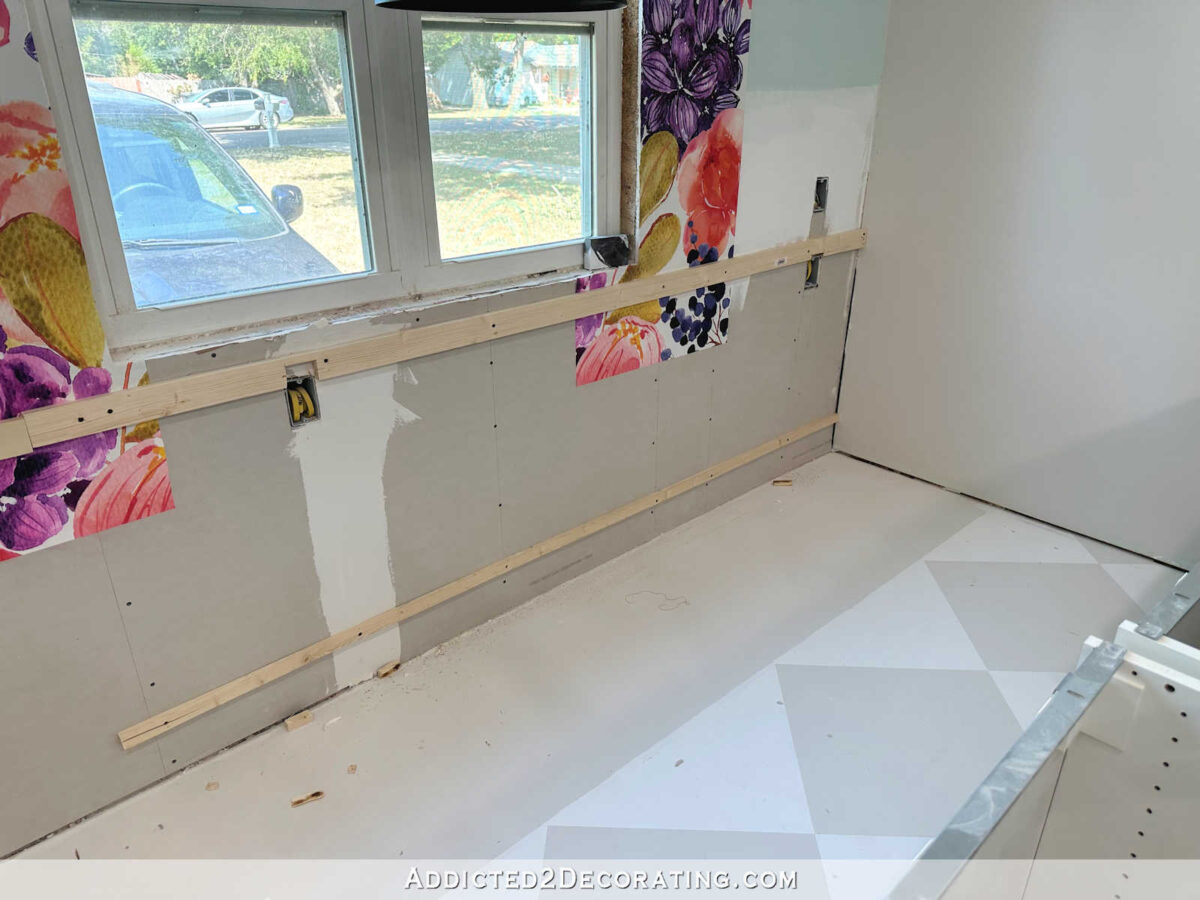
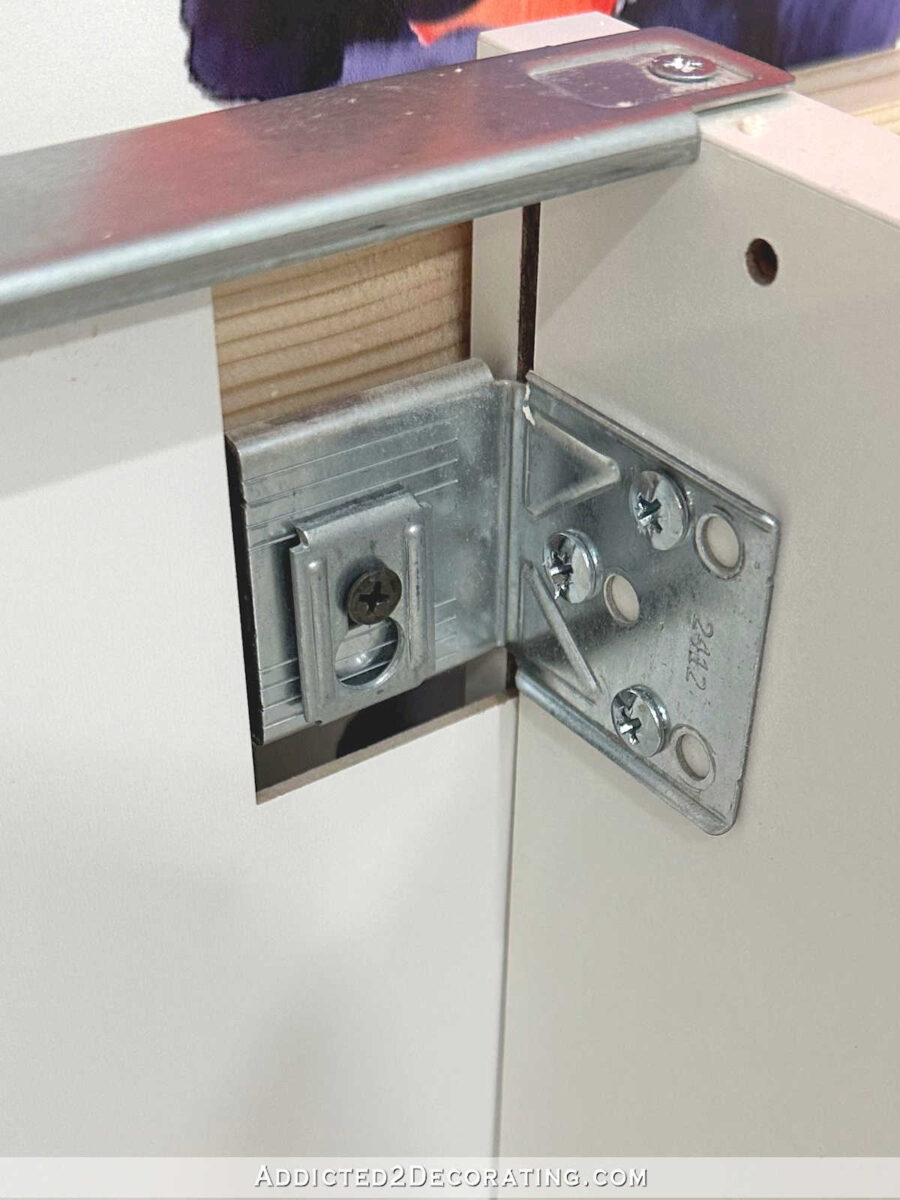
The issue is that the studs within the wall weren’t immediately lined up with the brackets which can be used to screw the cupboards to the wall. So earlier than making an attempt to connect the cupboards to the wall, I screwed some boards horizontally to the wall, screwed into the studs. That manner I may set up the cupboards anyplace alongside the wall and have them screwed securely into these boards.
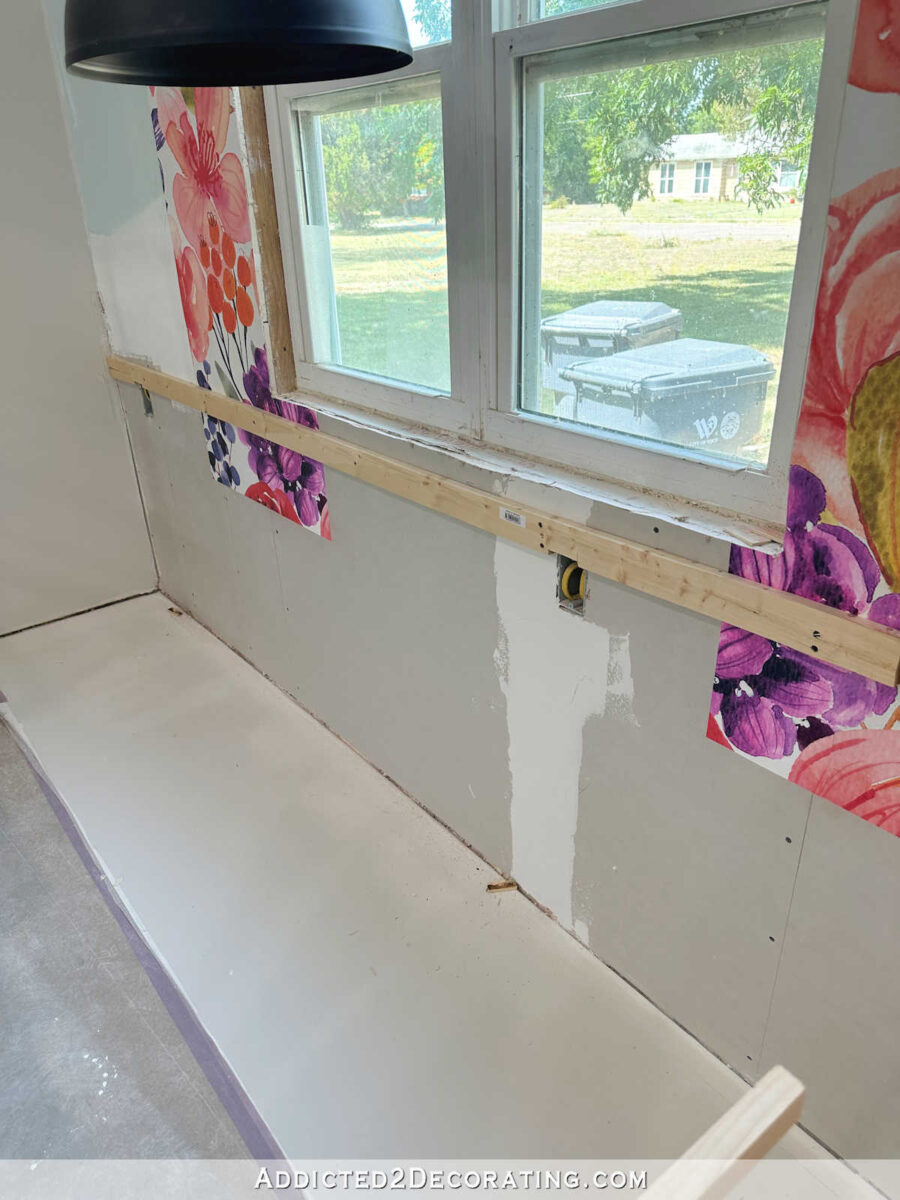
I additionally ripped a small strip of lumber to position near the underside of the wall in order that the underside of the cupboard could be plumb with the highest.
Earlier than screwing the cupboards to the wall, I needed to make one small modification. These brackets that include the Sektion cupboards are adjustable. Should you’re going to make use of them with the IKEA suspension rails, you put in them utilizing the screw holes nearer to the entrance of the cupboard in order that they protrude out the again of the cupboard barely. These actually connect over the suspension rail and work equally to a French cleat.
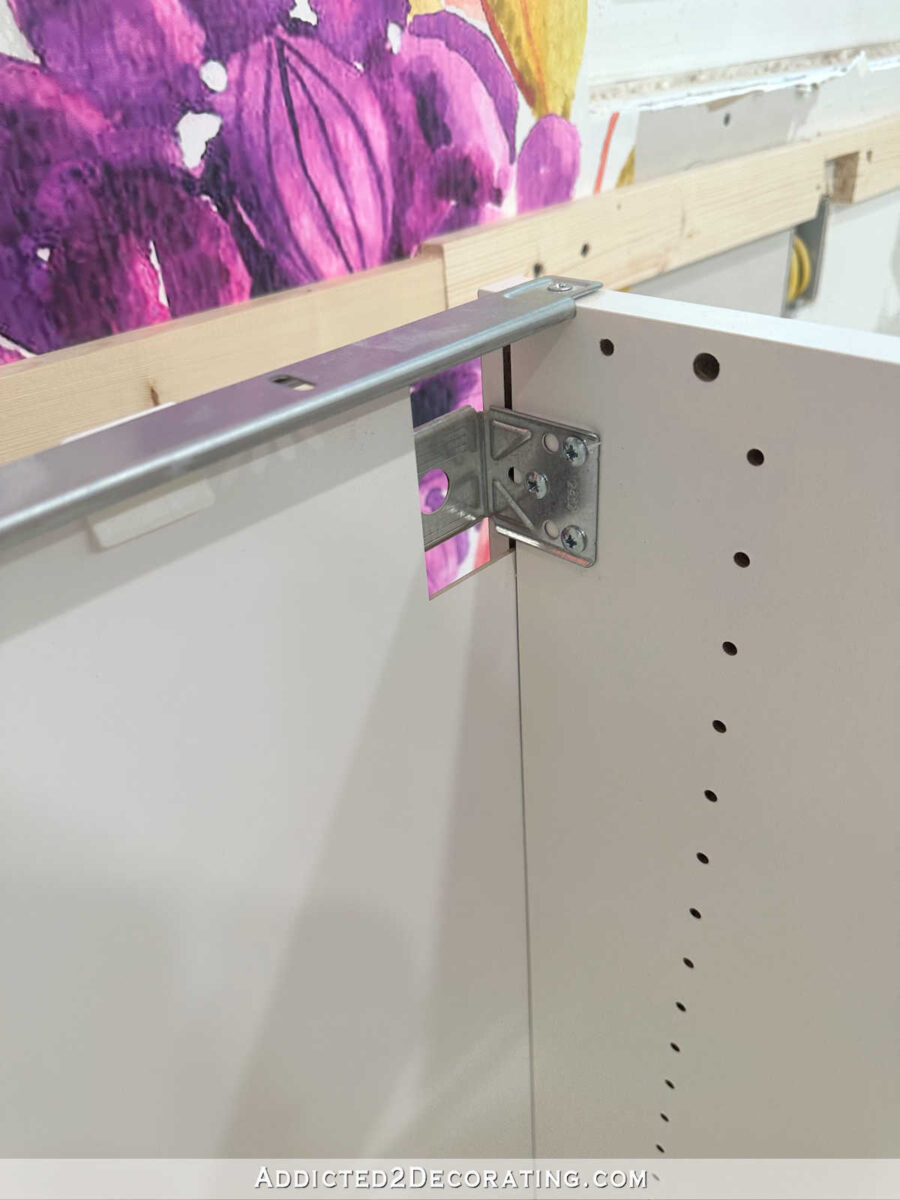
However when you’re not utilizing the suspension rails, and also you’re simply screwing the cupboard on to the wall, you utilize the again holes, which brings the bracket ahead and makes the again of the bracket flush with the again of the cupboard.
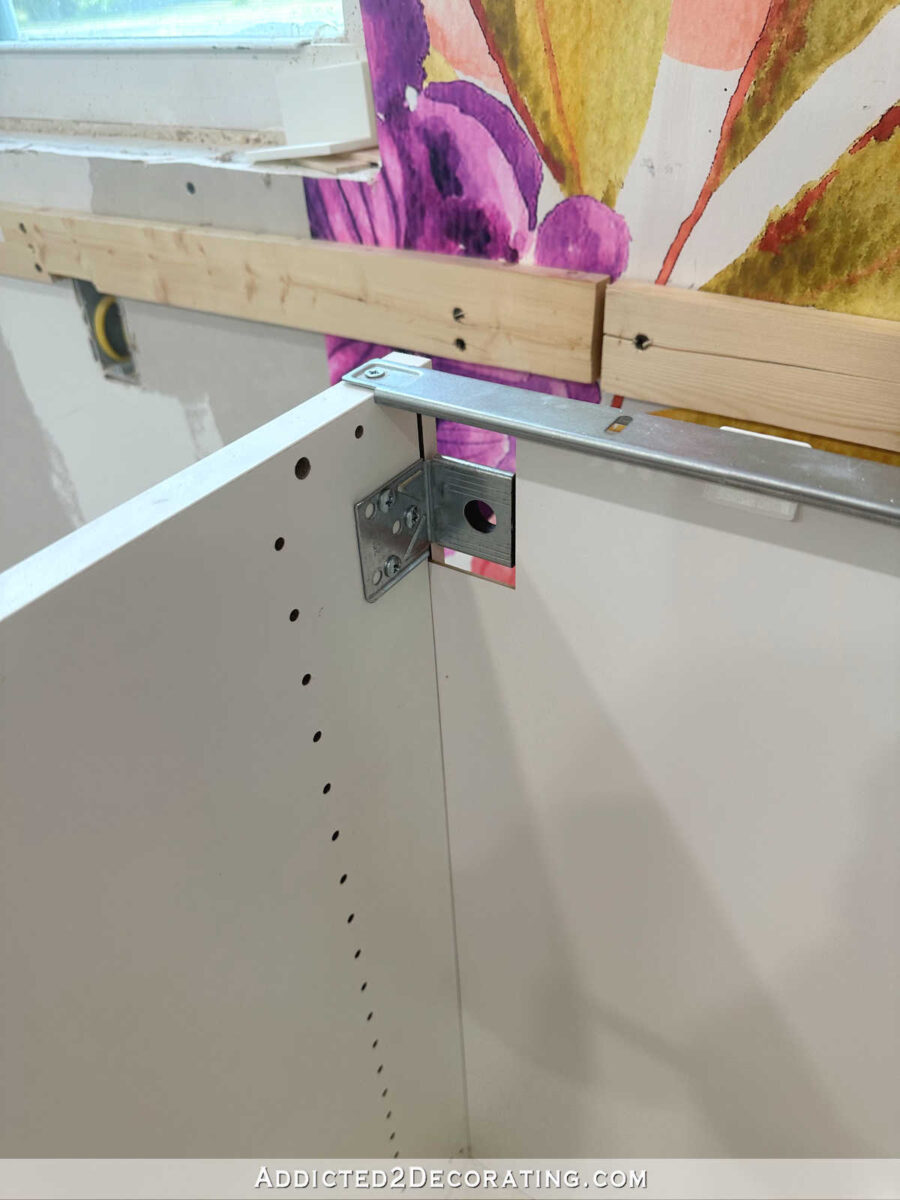
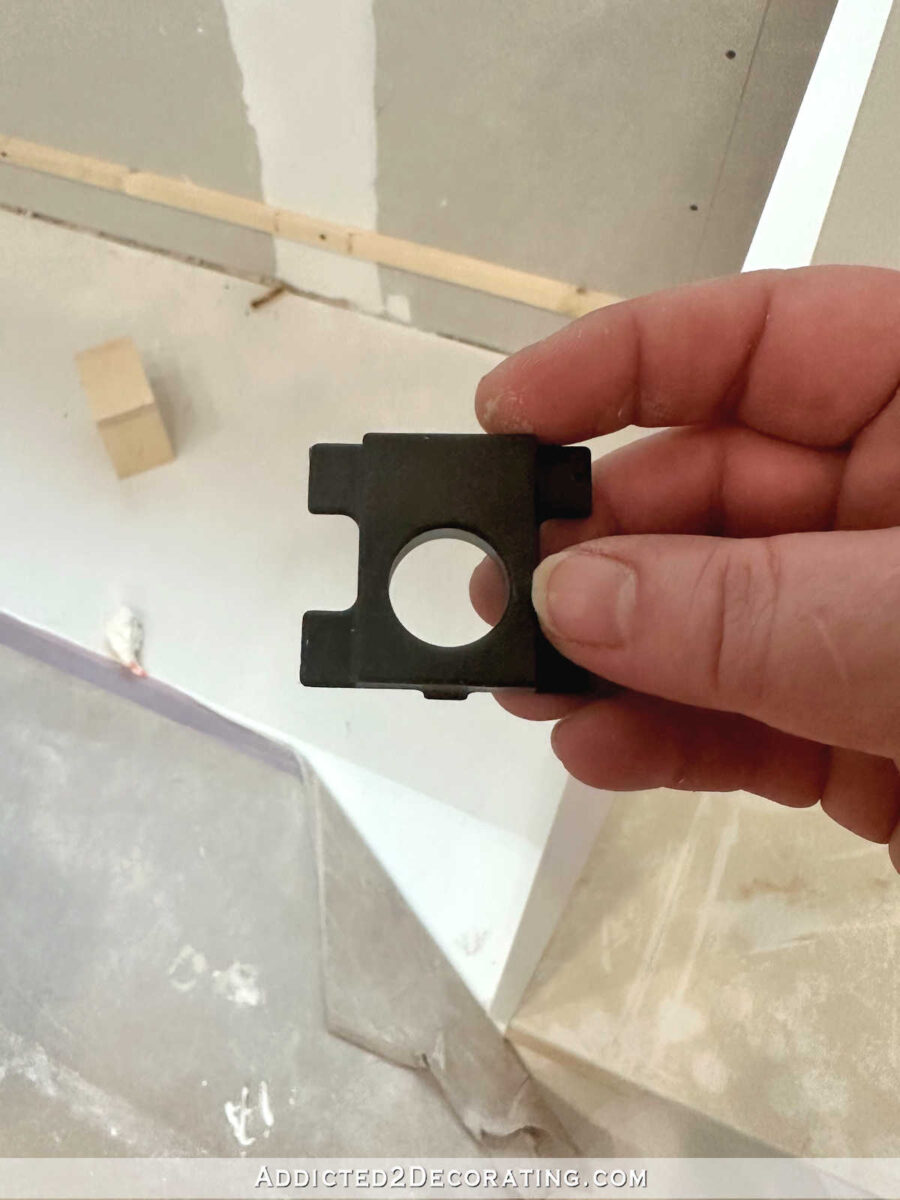
After which these little black filler items insert into the bracket on the bottom.
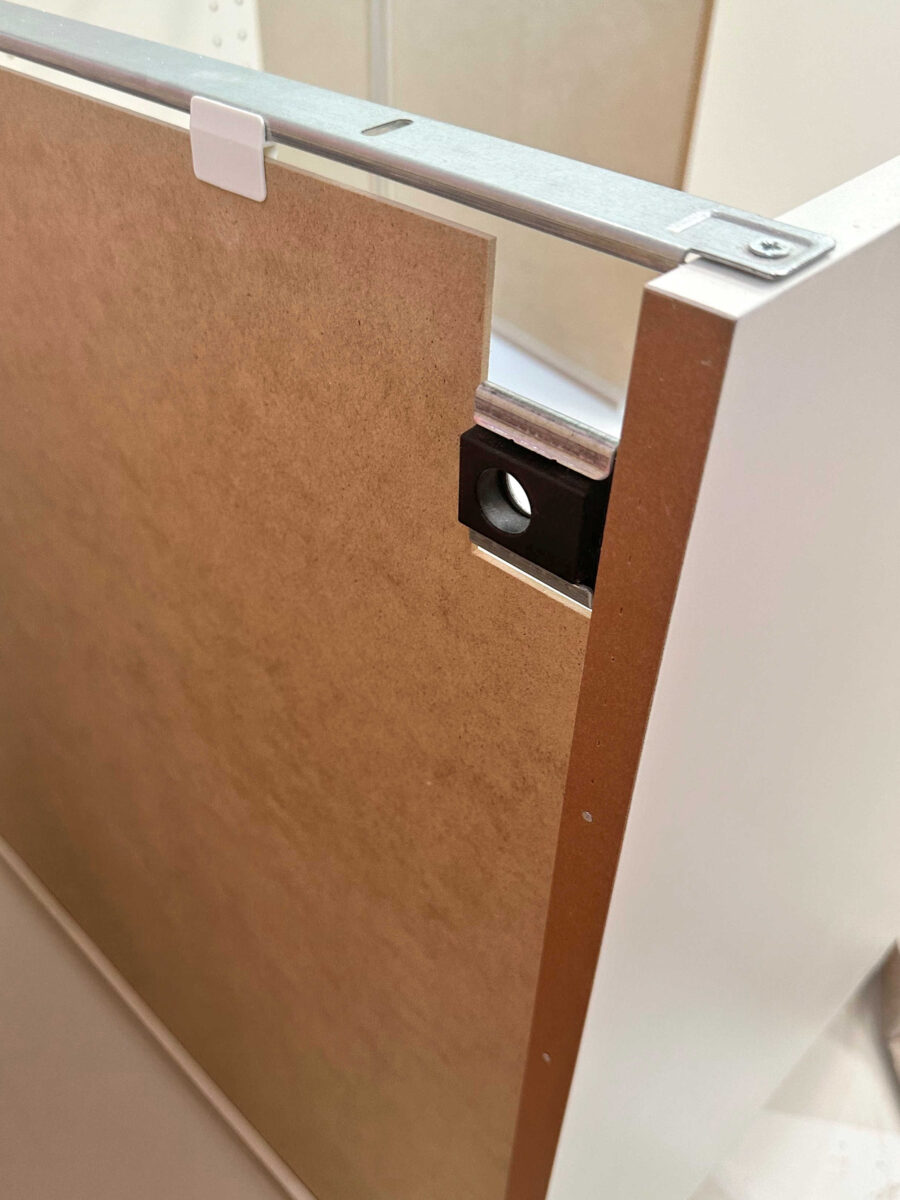
Right here’s a facet view exhibiting what the bracket seems to be like when it’s put in for use with the suspension rail. The steel bracket simply hooks excessive of the suspension rail, which is why it must be set again additional and never be flush with the again of the cupboard.
However right here’s the facet view when the bracket is put in for the cupboard to be screwed on to the wall. As soon as the black plastic piece is inserted, it’s flush with the again of the cupboard in order that the cupboard will sit proper towards the wall (or in my case, proper towards the wooden strips that I connected to the wall).
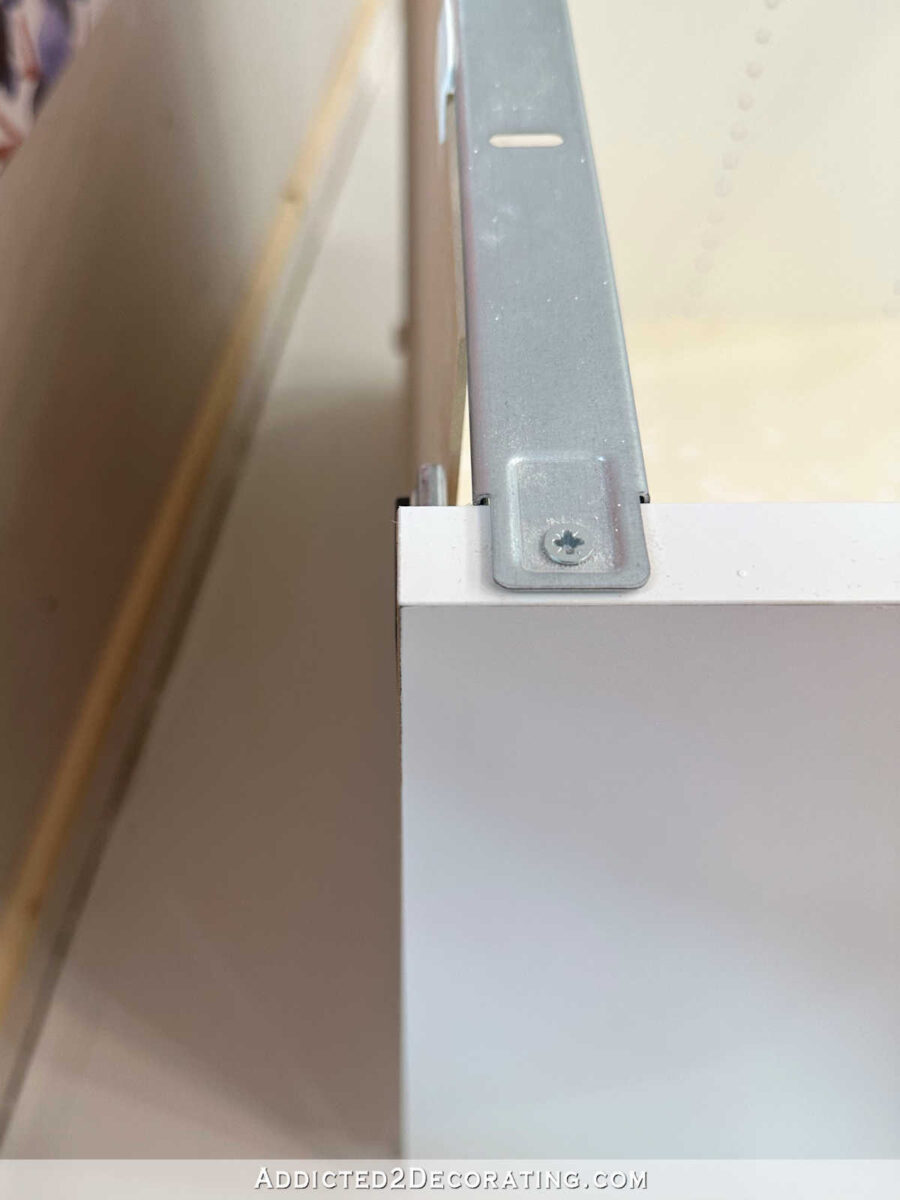
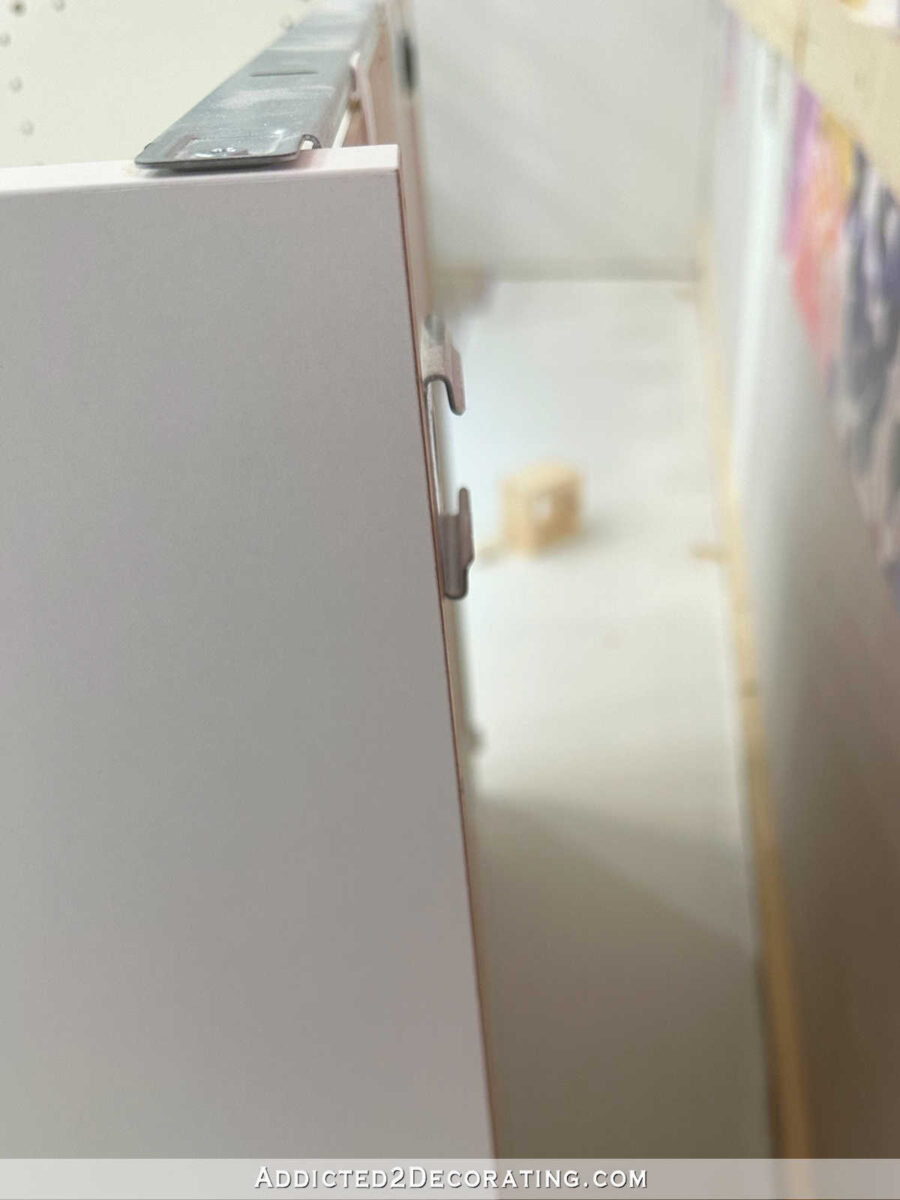
As soon as I had the entire brackets adjusted, I positioned the primary cupboard as a substitute, after which put screws by the center of those large holes within the brackets and into the wooden.

After which I positioned these little steel items (which include the cupboards) over the screws. I didn’t tighten the screws simply but. I wished till I had the entire cupboards in place earlier than going again and tightening these screws.
And right here’s a facet view of the primary cupboard put in…

With that first heart cupboard put in, then I labored out from there. I moved the subsequent cupboard into place, clamped it to the primary cupboard, predrilled 4 holes, and screwed it to the primary cupboard utilizing the screws supplied with the Sektion cupboards. After which I screwed it to the furring strip (however didn’t tighten the screws utterly), and moved on to the subsequent cupboard.

The method wasn’t tough in any respect. With an additional set of arms, it will have been a really fast course of. Working on my own undoubtedly slowed issues down, nevertheless it was very manageable.
As soon as I received the entire cupboards screwed to one another and screwed to the wall, I began within the center and tightened the entire wall screws.

As soon as these screws have been safe, I coated the brackets with the plastic covers that include the Sektion cupboards.
The very last thing I wanted to do to arrange for trim set up was to fill within the areas at every finish. I used 2″ x 2″ items to the correct top, and utilizing my trusty scorching glue gun as soon as once more, I connected these to the edges of the tip cupboards, ensuring that the entrance of the board was flush with the entrance of the cupboard body. The best way, once I connect the 5/8-inch-thick trim board to the entrance of this spacer board, the trim board will probably be flush with the fronts of the cupboard doorways.

So that is so far as I received this weekend. Subsequent up, I’ll be trimming out these decrease cupboards, after which putting in the countertop.

My aim is to have the countertop completed and the 2 higher cupboards put collectively by Wednesday evening in order that some sturdy males in our Wednesday evening group can left these higher cupboards and put them into place for me. 😀

I’m so excited in regards to the progress! I’ve been dreaming about this room, and particularly this wall, for thus lengthy, and I’m so anxious to see it completed!

Addicted 2 Adorning is the place I share my DIY and adorning journey as I rework and beautify the 1948 fixer higher that my husband, Matt, and I purchased in 2013. Matt has M.S. and is unable to do bodily work, so I do the vast majority of the work on the home on my own. You possibly can study extra about me right here.
[ad_2]